This is a story about an American classic that was acquired, rebuilt, and restored over the course of two years. Republished with permission from Neal Hartman. Captions, photos, and information are primarily by his father, Mark Hartman and his craftsman Rick.
You’ll find in this series, in addition to the refurbishing and rebuilding of an iconic American car, pictures of various restoration projects, excellent storytelling, and some great history.
Read the whole thing. I promise you’ll enjoy it.
The original thread/discussion at NICOClub.com is viewable here:
http://forums.nicoclub.com/s-s-go-for-broke-build-thread-1963-impala-wagon-renamed-again-for-g-o-b-t407288.html
——————————————————-
Backstory, beginning February 2009:
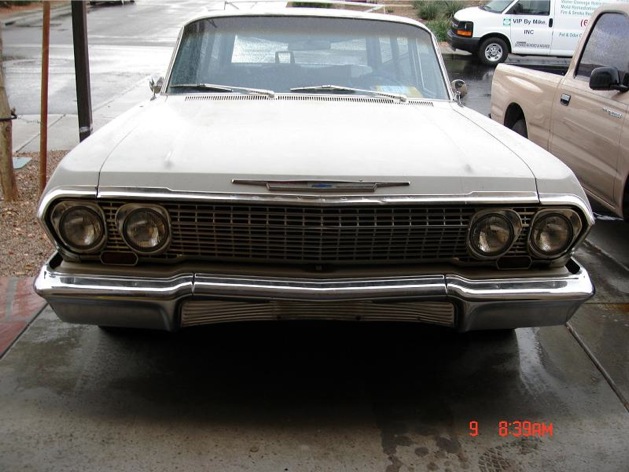
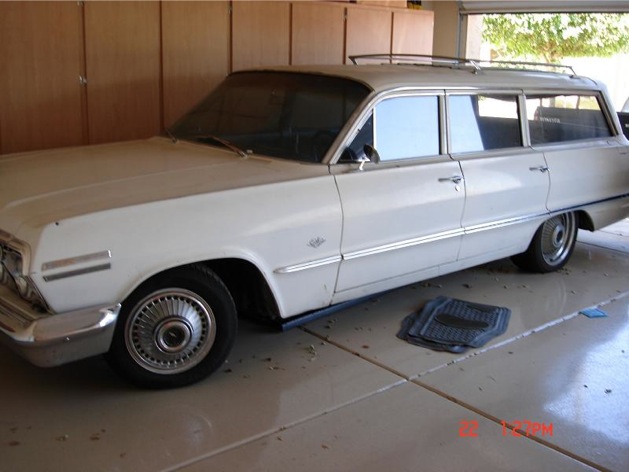
Neal’s dad, Mark, called Greg, the owner of NICOClub, and told him about a 1963 Impala wagon for sale in Arizona. Greg, an Arizona local, checked it out and gave it a clean bill of health. Otherwise original, this white wagon came with an LT1 drivetrain from a 1995 Impala SS.
In late February, the car was loaded on to a truck and shipped to Neal’s hometown in Galesburg, IL.
——————————————————-
Here’s a few pictures of it back in Arizona, still quite clean, especially for its age:

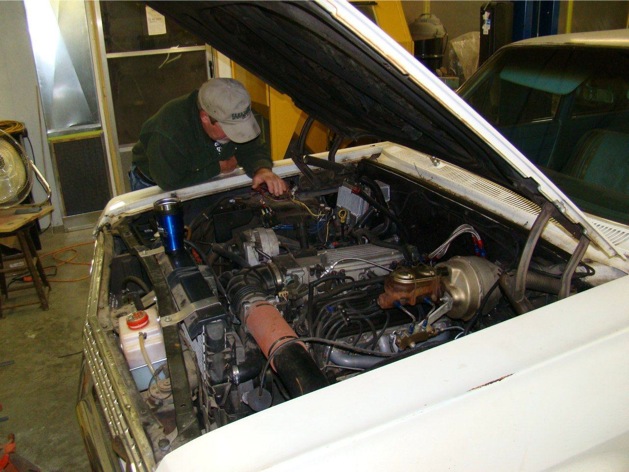
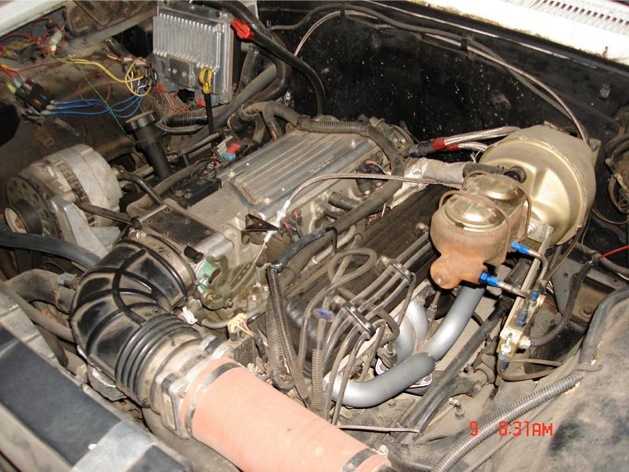
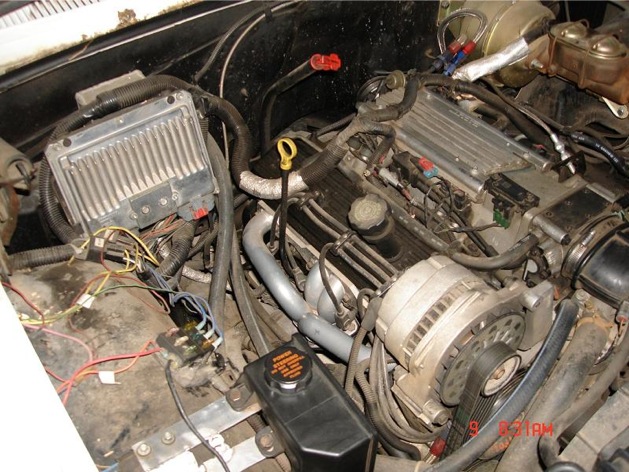
Here’s the engine bay:
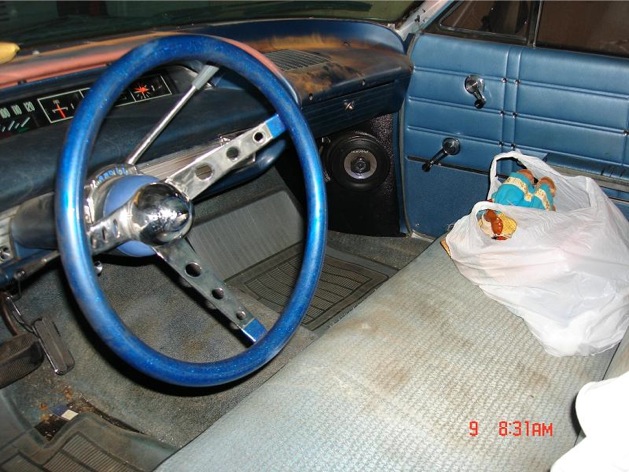
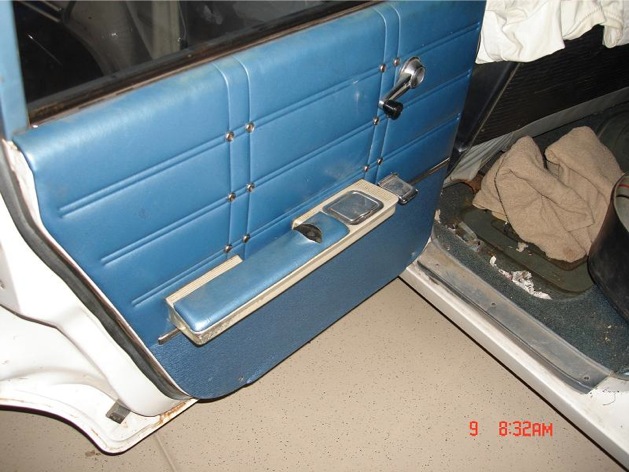
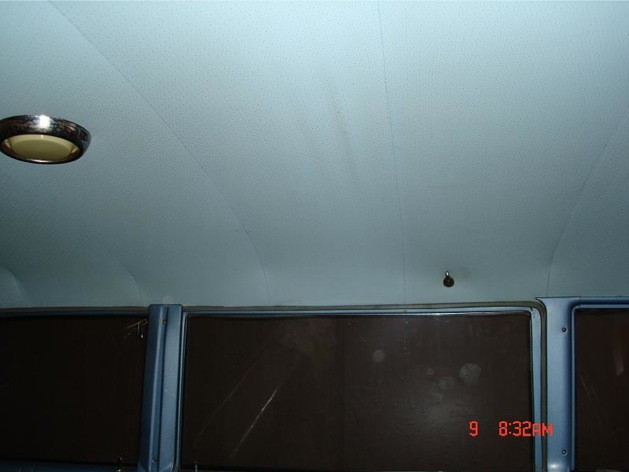
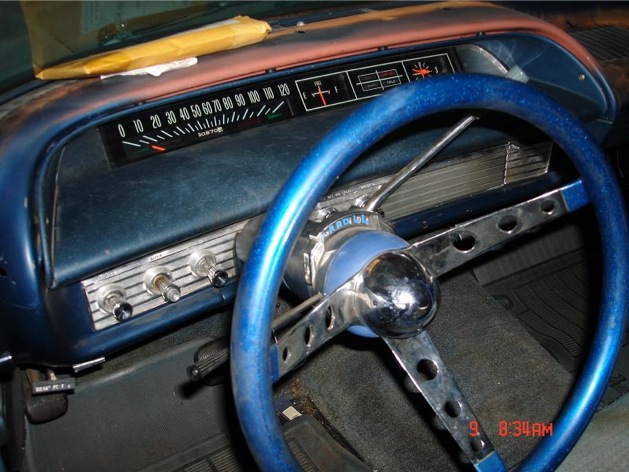
Here’s the interior, cleanly laid out with high-quality upholstery. It just needs some minor cleaning and restoration:
An update on the car’s condition upon arrival from Neal’s dad, Mark:
I have 14″ wheels in the front with 17″ in the back, but not to worry. The car will get a nice set of Chevrolet Ralley at all 4 corners. 15″X7″ in front and 15″X8″ in the back.
The rear differential seems to be a built Ford 9”.
There are a few problems with the car.
As of now I have a major fuel leak back by the fuel pump. The transmission will not go in to park, but Monday I’m taking it in for that and the fuel leak.
Nothing in or on my dash works but I have to say I’m not surprised after the motor swap, as there now lives an LT1 under the hood. And they say it is from a 1996 Impala SS (Edit: Actually found out it’s from a 1995 Z28!).
——————————————————-
From here onward, Mark Hartman is doing the storytelling and writing the descriptions.
——————————————————-
Arrival day, March 5th, 2009:
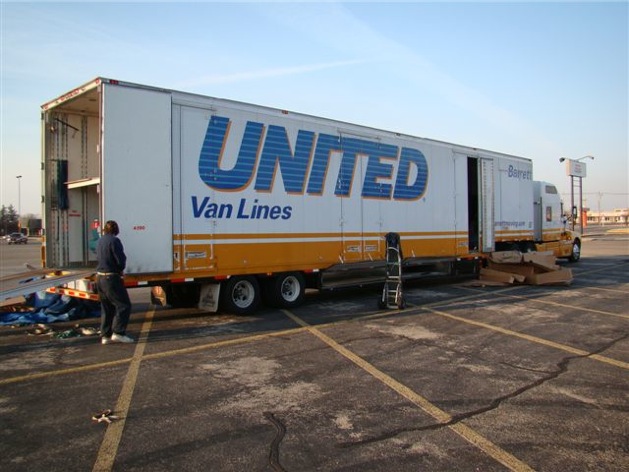
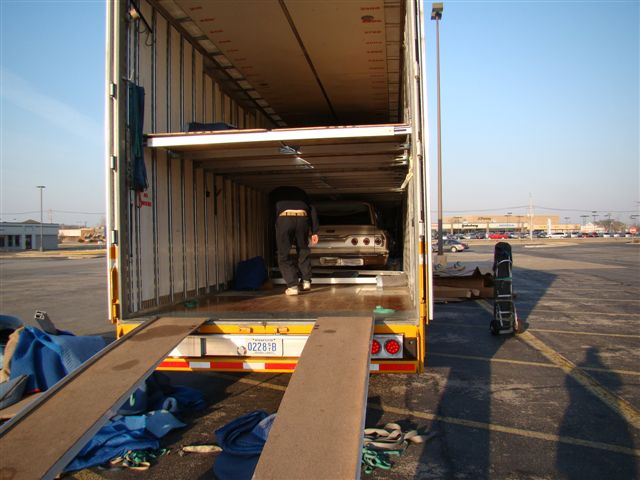
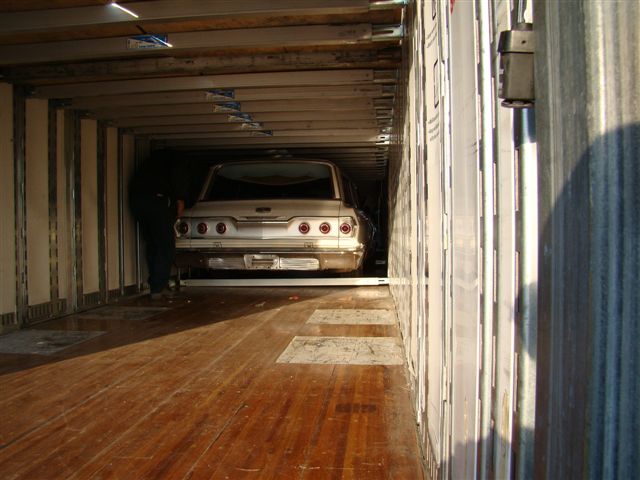
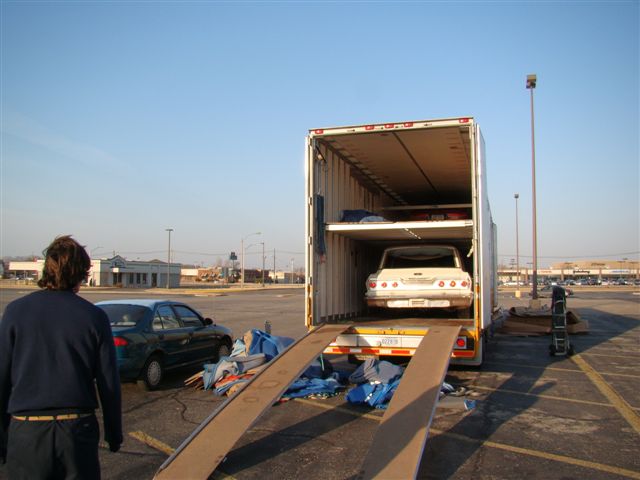
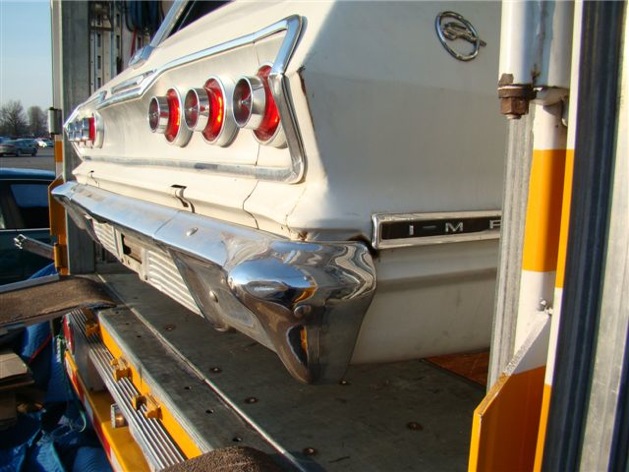
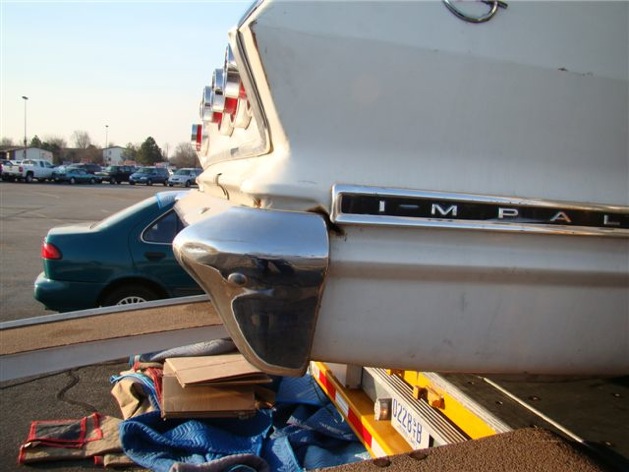
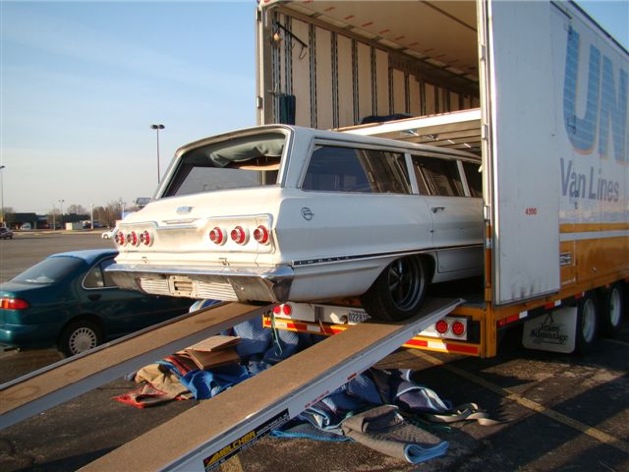
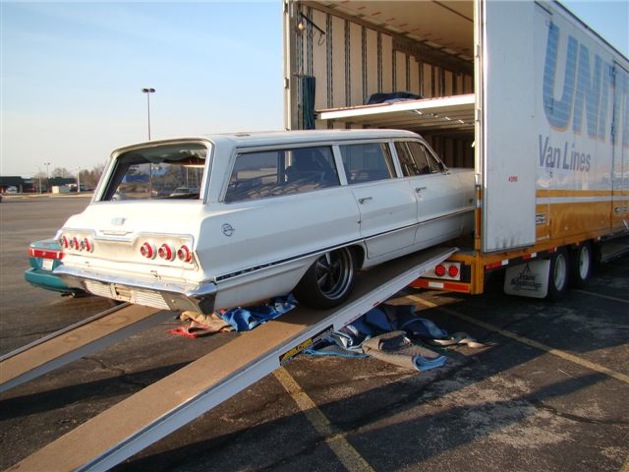
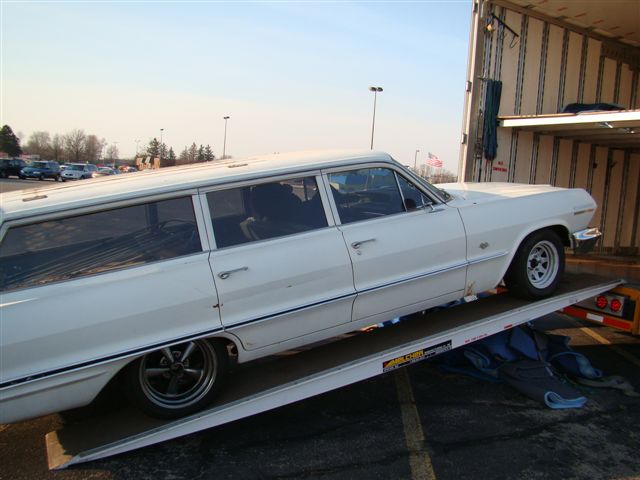
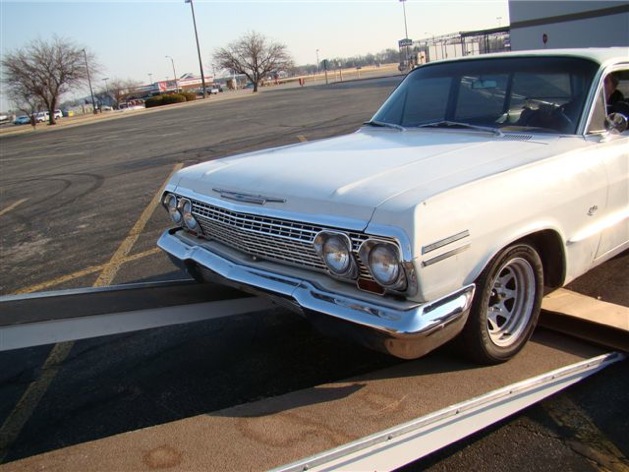
Landing complete in cold Northern Illinois.
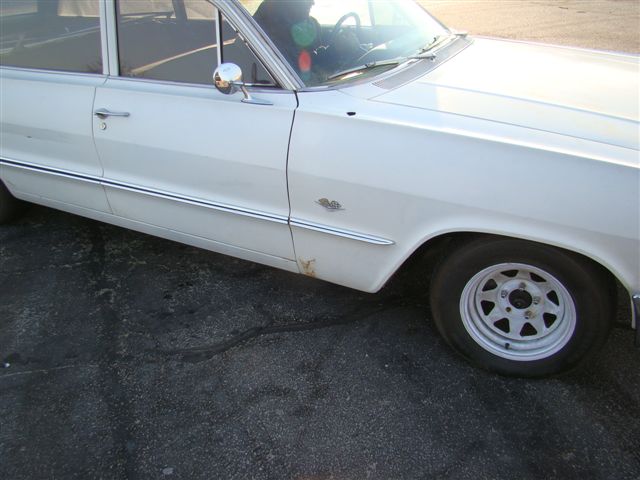
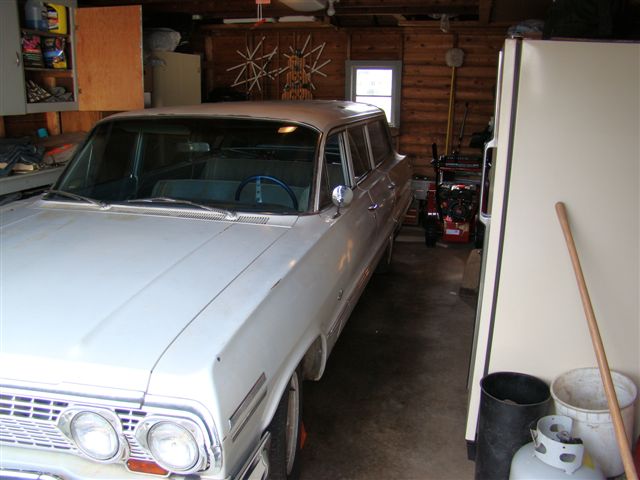
Now, time to put you in the garage…This garage used to be the home of a 1990 Toyota Corolla that my mother-in-law owned. There was lots of room in there for that car. Sadly, she passed away in 2007 and the Corolla was sold. Now, the Impala will call it home.
Notice the wheel chock?
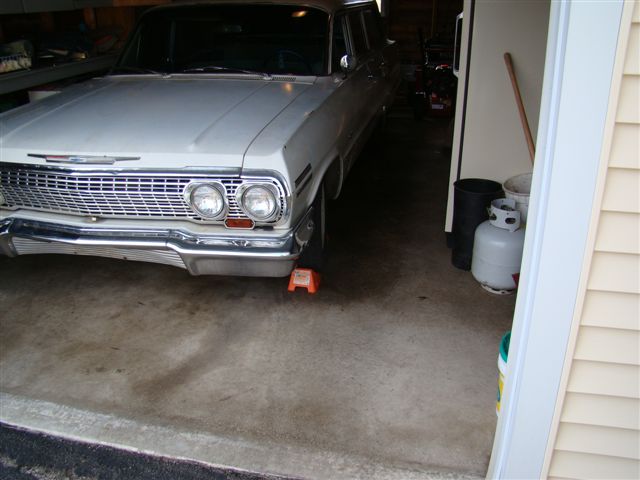
Passenger side…wowzers!! That’s close.
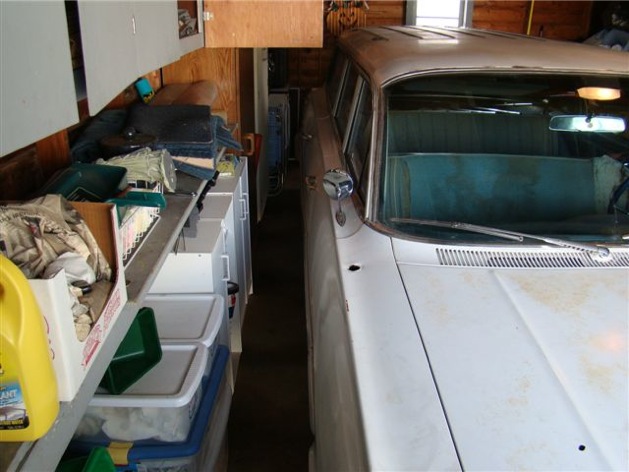
Room in the back, too.
——————————————————-
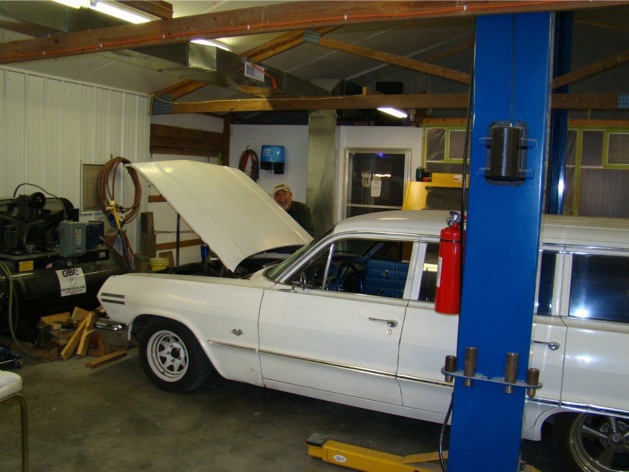
March 11th, 2009:
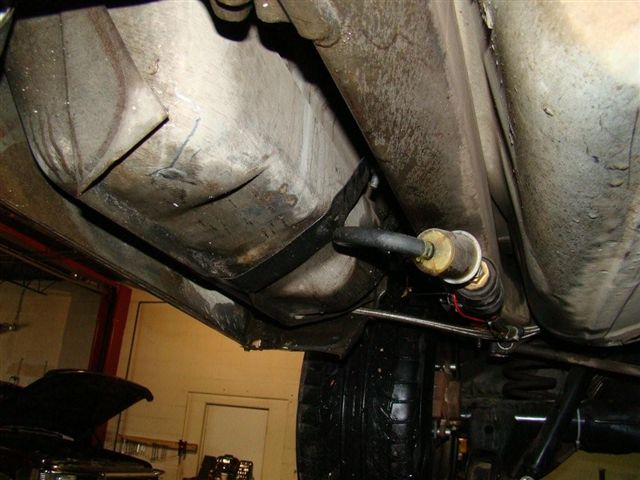
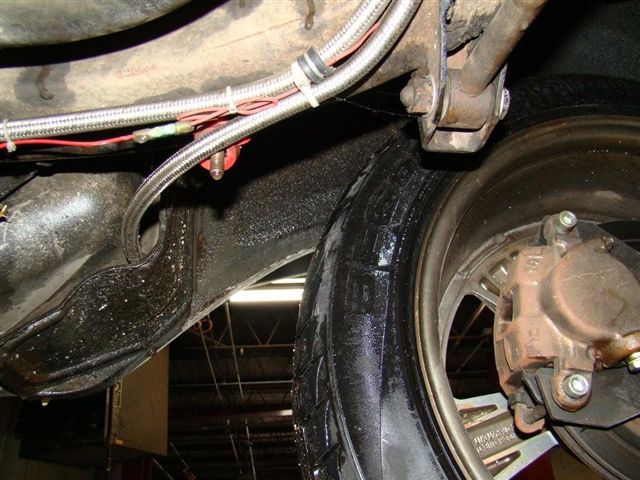
Got the car up on the lift and found some interesting things.
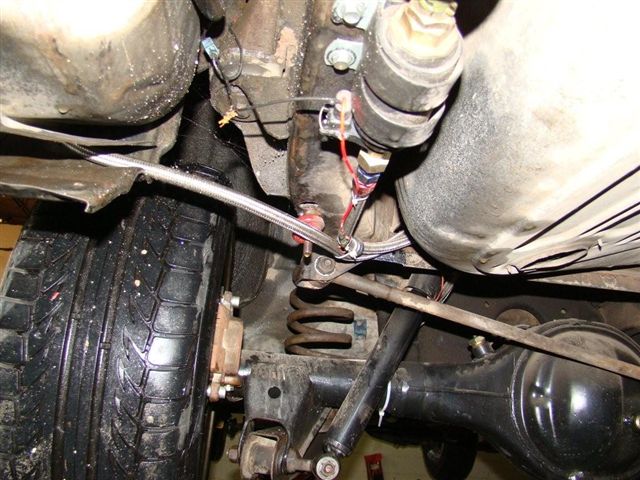
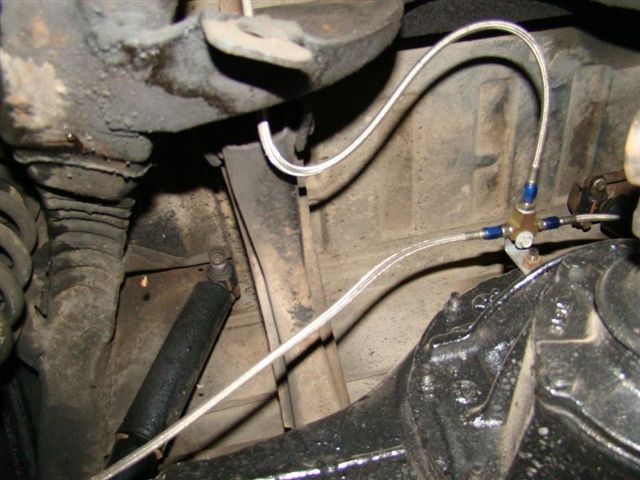
One being, that when they ran the new fuel line, they used steel braided instead of hard line. It’s zip-tied to parts of the frame rails and also parts of the body, which has some sharp edges on it…not a smart thing. It also doesn’t have a fuel return line like most fuel injected engines have/need.

Braided line from the fuel tank:
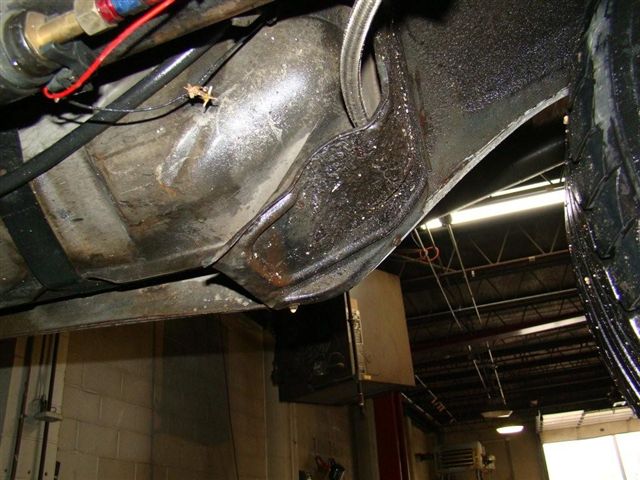
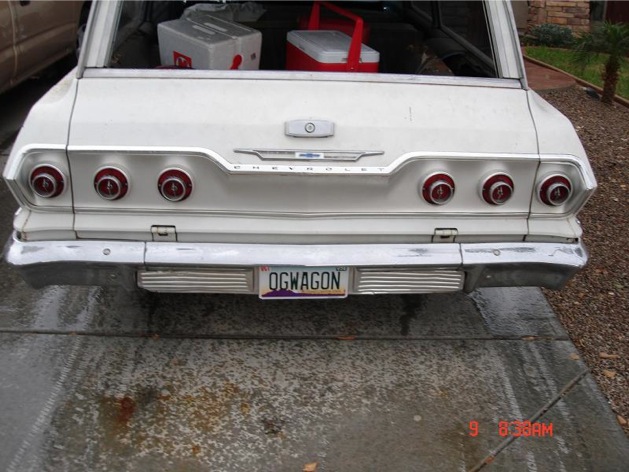
This is also where we found it was a Ford 9″ in the back end as well. Notice the angled drain plug on it, too.
Ford 9″? Yes, please.

Another interesting tidbit; this car has had a power disc brake upgrade done as well:
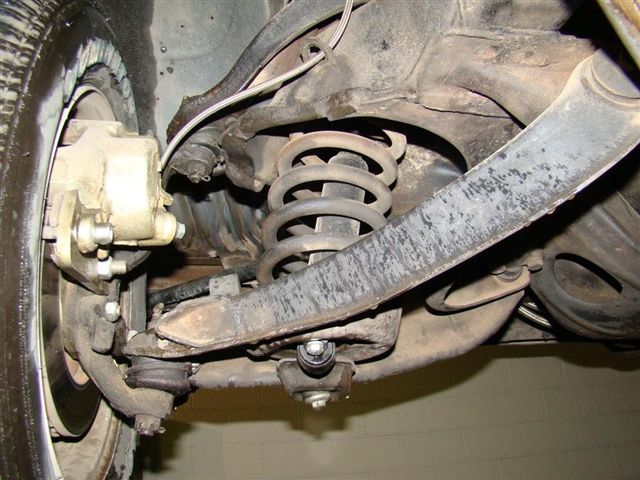
In this one, you can see the lines for the rear disc brakes:
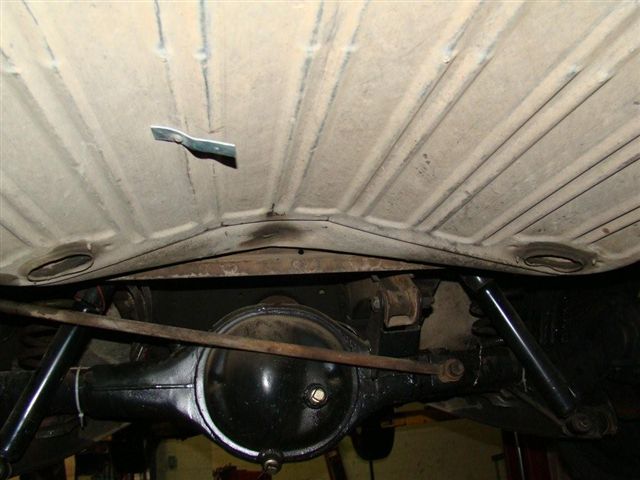
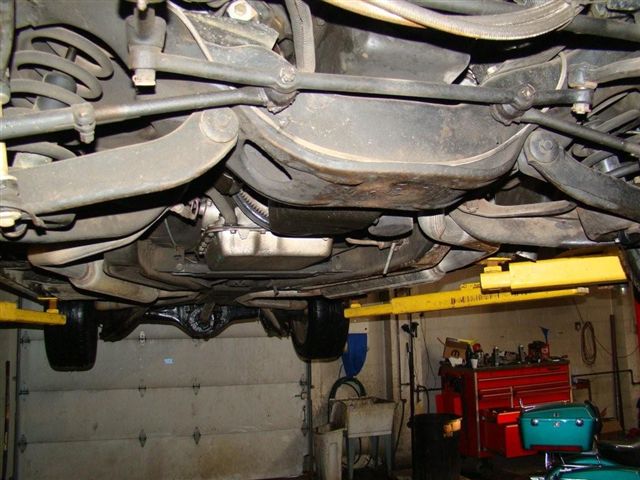
Underbelly shot. You can see the exhaust running down the unique X-chassis.
——————————————————-
March 15th, 2009:
Little bit of background story first.
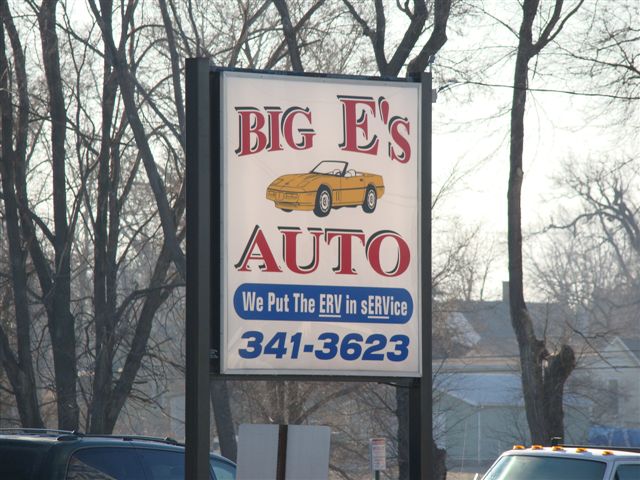
I mentioned the shop that let me put the GFB (the car was named “Go For Broke”) up on the lift, so thought I would elaborate more on it.
Erv Beckner is a guy that Neal met long ago when he worked at the McDonald’s our local shopping mall used to have several years ago. There is a Sears store there as well, and Erv used to work in the auto department and would visit McD’s regularly on his breaks.
He and Neal both had an interest in cars and became friends. Erv also put a set of air shocks on Neal’s first car, a 1985 Caprice Classic 4 door.
Anyway, Erv left Sears and proceeded to a tire shop that has since gone out of business. It was there that I got to know him as one of the shop managers was a guy I had done business with for many years.
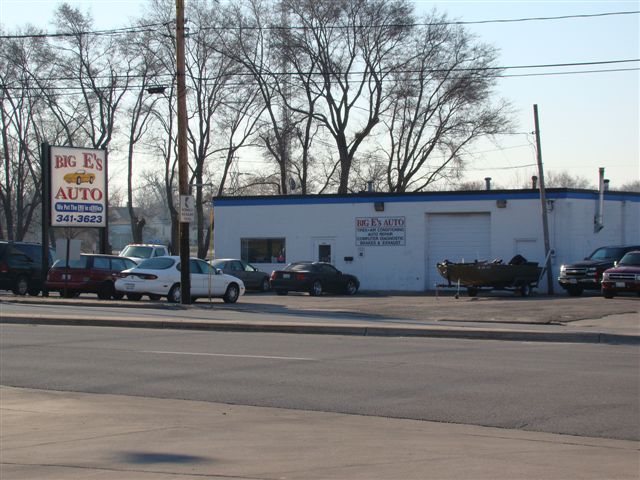
After leaving that shop before it went under, Erv opened his own shop, “Big E’s Auto”. It started in a small corner building, then he eventually was able to re-locate to a larger area.
And, when I went to visit Neal and his family in Japan, Erv asked me to get some pictures for his shop. He gave me two t-shirts for Neal and his wife, and asked for pictures with the t-shirts to be taken at various locations in Japan. Well, we got one location. Would have had two, but the live show Neal played at, to many people kept getting in the way and I couldn’t get a good photo.
Here are Neal and his wife at a temple in Asakusa:
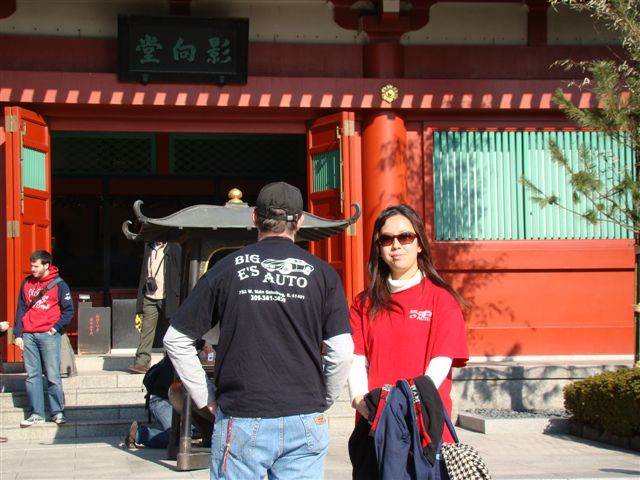

I think Erv liked his photos.
So, if you are ever in Galesburg, Illinois and need some work done to a car, he’s the guy to go to.
Now, on to some other bits and pieces.
Some basic facts about the 1963 Chevrolet Impala:
Length: 209.3 inches
Wheelbase: 119.0 inches
Width: 76.0 inches
Height: 56.0 inches (Station Wagons and Convertibles); 55.5 inches (All other models)
Weight: From 3,390 pounds (2-dr Sport Coupe) to 3,835 pounds (station wagon)
Engine sizes: From a 230 cu. in. inline 6 cylinder to a 409 cu. in. V8
Horsepower range: 140@4400 RPM (230 cu. in.) to 425@6000 RPM (409 cu. in.)
Carburetion: single, 2- or 4-barrel Rochester, 4-barrel Carter AFB, dual 4-barrel Rochester or Carter AFB
Transmissions available: 3- and 4-speed manual and a Powerglide automatic (2-speed automatic).
Rear gear ratios: 3.08:1 to 3.70:1
Price (1963): From $2,615 to $3,186
Models: Biscayne, Bel Air, Impala, Impala SS
Styles: 2- and 4-door sedan, 2-door sport sedan, 6- and 9-passenger station wagon, 2-door convertible.
Now, as mentioned before, I am looking to get a full set of Chevy Ralley wheels for the GFB, and here is a photo of what it could look like.
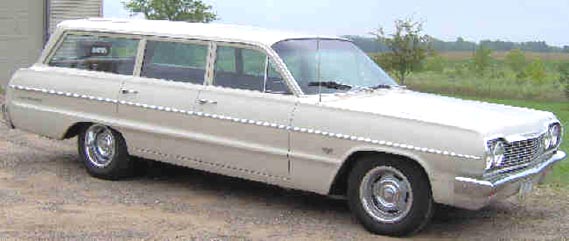
The car in the photo below is a 1964, but it won’t be too different.
The wagon goes in this week for some work on the transmission and fuel leak. More to follow once that’s done.
And as I have mentioned, I plan on a set of Chevrolet Rally wheels for it. This is what it could look like. (The photo is actually a 1964, but it’s close enough.)
——————————————————-
March 17th, 2009:
I’ve got park now. Turns out that when the swap was done, the linkage wasn’t adjusted right. Well, it’s right now, and she doesn’t need wheel choks to keep fro mrolling out the garage.
And Monday March 23rd, the S.S. G.F.B. is going back in to Glenn’s Radiator and Service for about 400 inches or 33.3ft of steel fuel line. That’s feed and return line to replace the steel braided lines used during the original swap of the LT1. Maybe that will stop the leak.
If I get the coil springs ordered and delievered on time, I’ll have them done also, stock in front and stock plus 1 inch in back.
——————————————————-
March 31st, 2009:
I had planned to get hard lines run from the engine back to the fuel tank for the wagon to replace the braided rubber lines.
Well, I dropped the car off at the shop a week ago before I went out of town for a union meeting in Iowa. Got back Friday, but not before the shop had closed, and then couldn’t pick it up till Monday…or so I thought.
The car will be in the shop until Friday the 3rd now. They are doing the work in between other jobs.
The fuel lines are all fubar’ed as they (the shop that did the swap originally) cut the ends off the factory side of the LT1 for some reason, or so I am told. They are doing the lines in the factory sizes this time also.
As for the brakes, the lines are one size to small but the pressure will be fine, just not the same amount of fluid. I thought about changing to the right size line, but too much money in valves, fitting and such to do all that.
So, hopefully when this gets back on the weekend, it’ll be done correctly and I won’t have to tear heads off of people.
——————————————————-
April 4th, 2009:
I have an update for you today, and boy is it a duesey.
This is what was found to be wrong with the car while it was getting it’s hardlines for the fuel done.
The front hubs are 5X4.75” bolt pattern which is stock, but the back, I was just told, is 5X5″. So now I have to do some thinking as to what I should do because I was a set of Cheverolet Ralley wheels on here.
Also the right rear axle seal was changed and guess what? The hub is fubard, which is the reason the seal was shot.
So do I buy new hubs all around the same size, or just one and drill the fronts to 5X5″?
I am thinking about a trip out to AZ, and go find the shop at did this kind of work and take their photos and locale to the internet so no one else gets this poor work done to them.
——————————————————-
May 4th, 2009:
As for updates, don’t have much, but here you go.
Seem to have an issue with either a power draw from the battery or a bad alternator on the LT. Haven’t had time to get it looked at yet, but will as soon as time/money/wifey permits.
In other new, I am hoping that an old friend of mine from back in my crazy days, who coicidentally happens to be a body guy, will have a chance to swing by and take a look at the car at Big E’s place when it’s up on the lift.
The guy I am using for my body work has had the same Corvette that I blew the engine of my 1968 Firebird vert racing back in the 70’s. He’s old like me now, too, but hopefully will be able to bring the S.S. Go For Broke back to it’s glory days.
——————————————————-
April 22nd, 2010:
After months of waiting for a certain person to get to work on my car, I took it to the same place that redid my fuel and brake lines shortly after I got it. They also took care of that pesky not-wanting-to-go-into-park issue the car had. I literally had to use wheel chocks for the first few months I had the thing. It still has some issues, like no speedo, one of the rear wheel hubs eventually going to crap quicker than it should…etc.
So, about the only real update I have is that the car is going into get this put in.
http://www.dakotadigital.com/index.cfm/page/ptype=product/product_id=173/category_id=423/home_id=-1/mode=prod/prd173.htm
I am getting it in teal with no clock, and according to the website, it’s a direct replacement for the stock dash. I also got the Factory Fit wiring harness as well.
——————————————————-
May 11th, 2010:
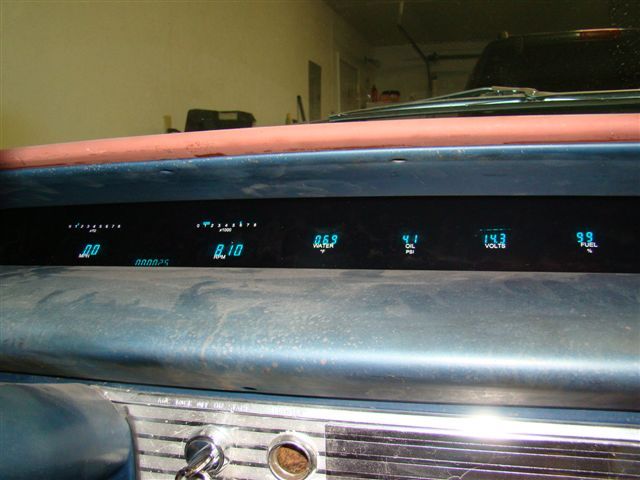
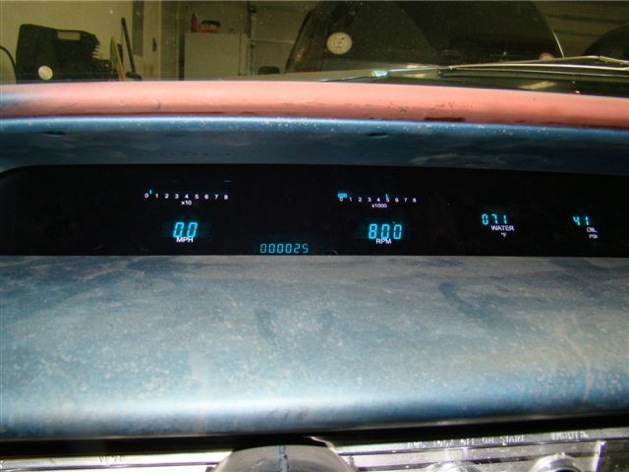
I finally got the Dakota Digital dash put in last week and had the Mrs. pick up the car on Friday because it was finally going to Missouri to my friends place to start the restoration/rebuild.
A few things on the dash. The fuel display is in percentage and not gallons. Takes a bit of getting used to, but hey, it works. The speedo and tach both have digital readouts and also a bar readout above that. Dash still needs the button(s) to go between trip and normal odometer and also the demo mode for when car is not running…if I understand the instructions for it.
On the exterior of the car, I eventually want to change from round mirrors to rectangular mirrors. Having some thoughts about the roof rack and whether or not I want to put it back on. Re-chroming, according to a shop I talked to, seems to be, and I quote, “Astronomical. You can’t afford it.” Anyone know any good shops that don’t charge arms, legs and testicles to re-chrome? Or anyone know any good places to find trim parts for wagons?
I’m also hoping to have a new gas tank made for it that is set up for fuel injected engines. The current one is just cobbled together and has an external electric pump. The one I’d like to get made will have fuel delivery/return lines and an internal pump with an access plate along with baffles inside it. But, just depends on what it’s all going to cost in the long run. Damn hobbies that cost money!
Also would like to get some mint/near mint Chevy Ralley wheels for her too. Ideally, I’d like 14″, but with my disk brake conversions, I don’t know if the rotors/calipers will fit inside. So, might have to go with 15″, possibly 16″. Will try to get 7″ wide in the front and 8″ wide for the rears. Wish me luck on that.
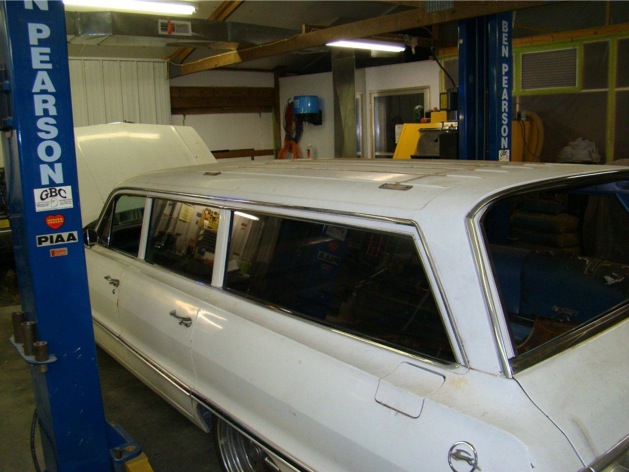
Well, now the car is down at my friends place for a year or so while he does his thing. He does all the work by himself in a shop that started out as a plant nursery then eventually converted to a body shop. Let’s hope the car turns out as nice as I’d like it to be.
And now to tide you over…some pictures.
First of the Dakota Digital dash.
Yeah, it’s dirty in there, but hey…it’ll be nice and clean when I get it back.


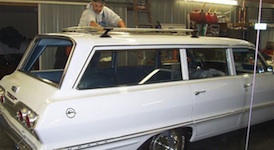
And a few photos of the shop that the car is at now. Say hello to Crossed Flags Restoration LLC.
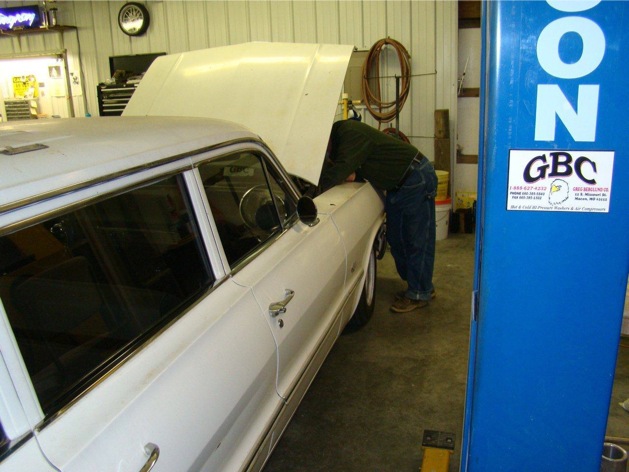

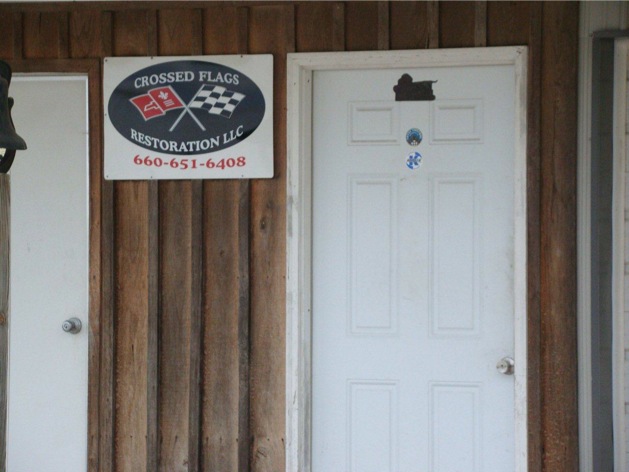
And say hello to the owner, Rick Carpenter. Known this guy since high school.
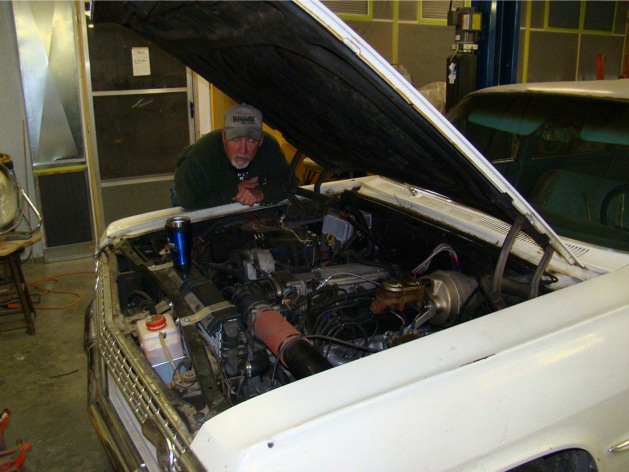
Rick and I contemplating what to do under the hood. (I’m taking the photos, of course)