1963 Impala restoration project.
This is a story about an American classic that was acquired, rebuilt, and restored. Republished with permission from Neal Hartman. Captions, photos, and story are primarily by his father, Mark Hartman.
——————————————————-
August 23rd, 2010:
Glad everyone is enjoying it. I am enjoying it as well, even though it’s vicariously through Rick as he builds her back to glory for me.
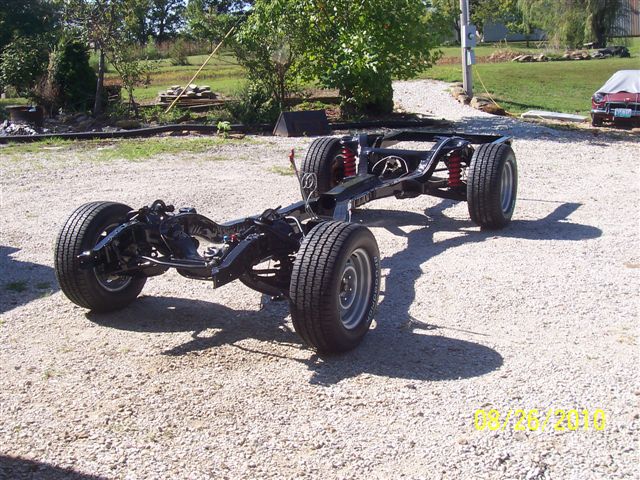
Anyway, I have some more pictures for you with an update on the front suspension.
Enjoy!
Mark,
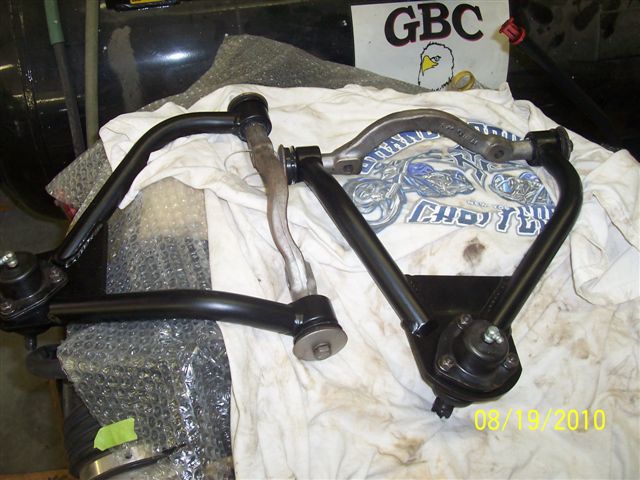
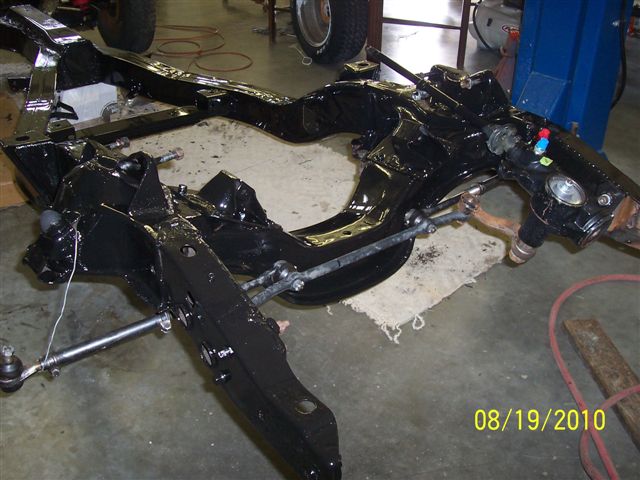
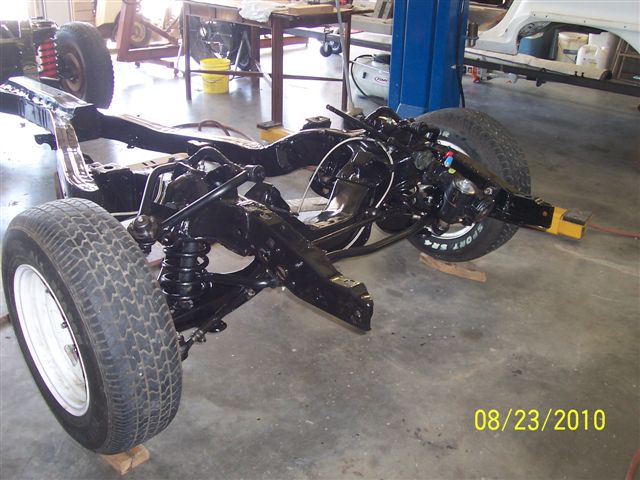
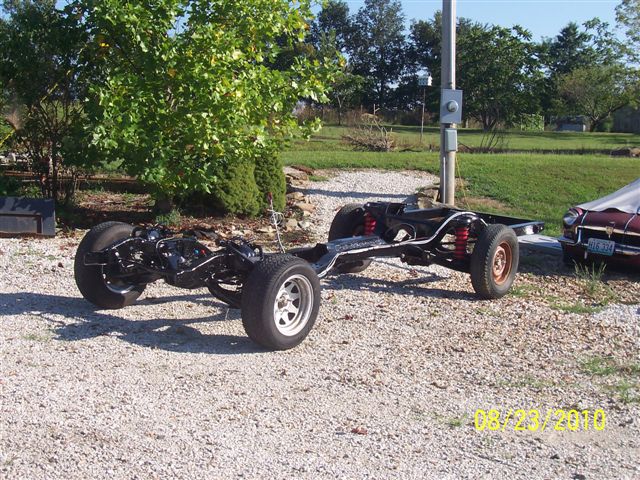
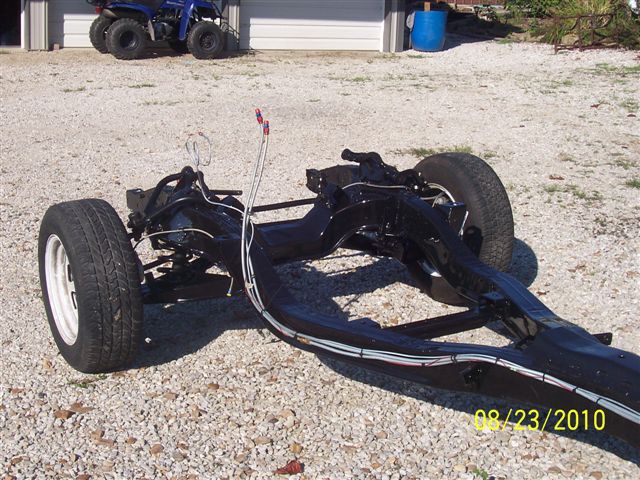
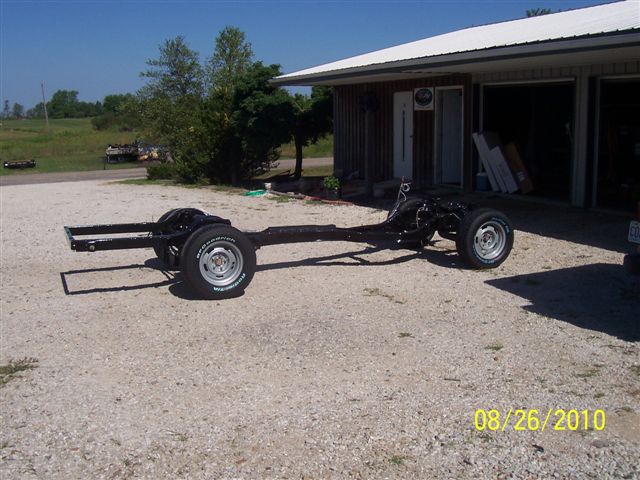
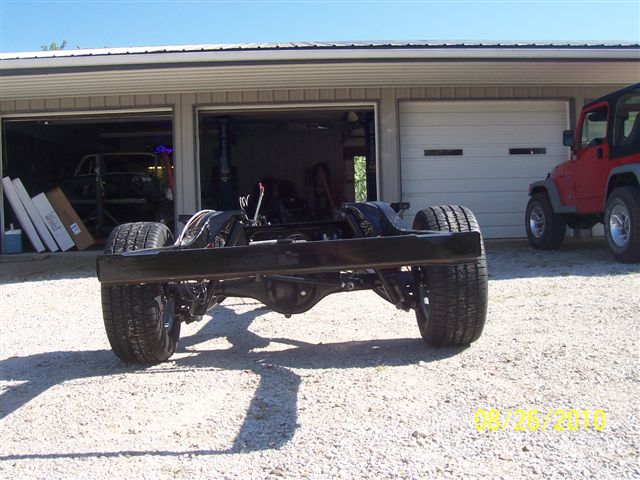
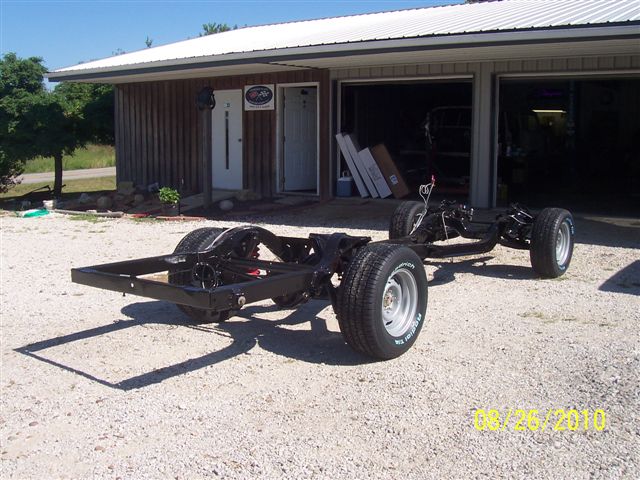
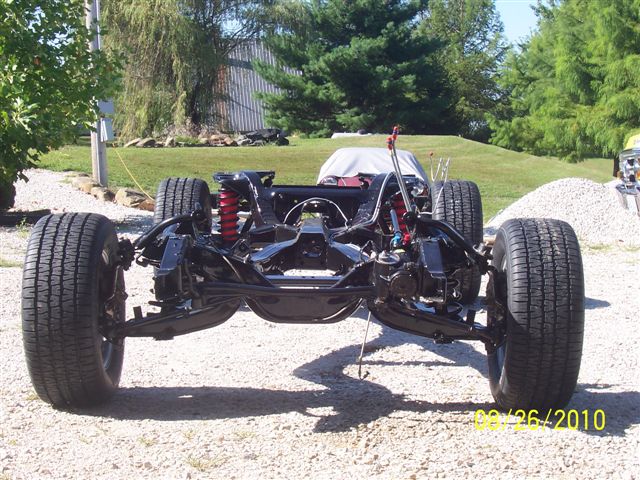
Here’re some pics of the front suspension completed. ALL bushings and lower ball Joints replaced. All A-arm bushings are urethane upper and lower…This car should handle GREAT!!!!!!!!!
The Ole Man in Missouri……ENJOY!

——————————————————-
August 26th, 2010:
I have an update for ya today, courtesy of our good friend (and auto restorer), Rockin Rick, down in Missouri.
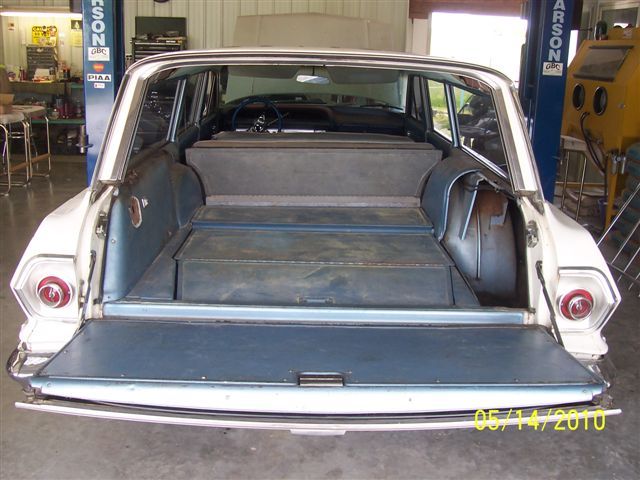
Mark,
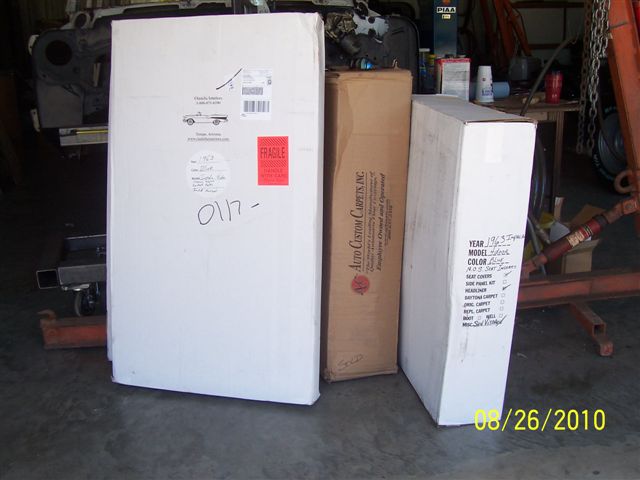
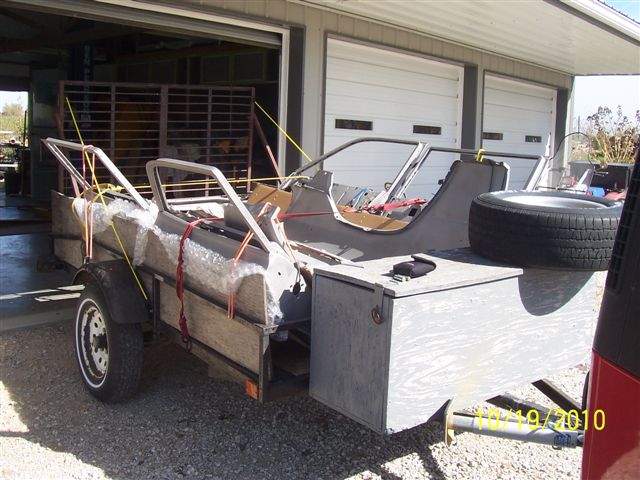
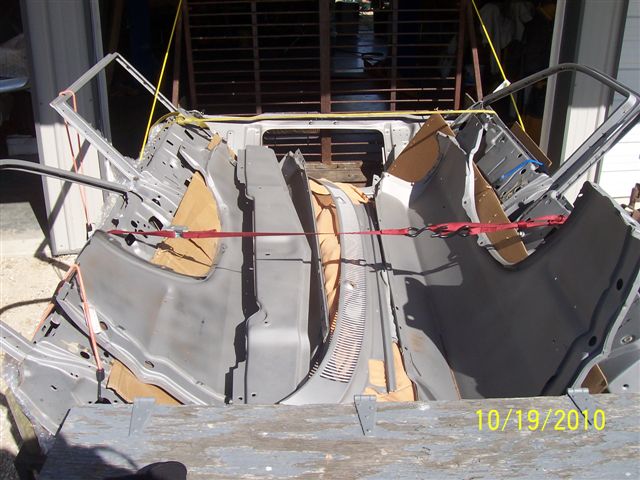
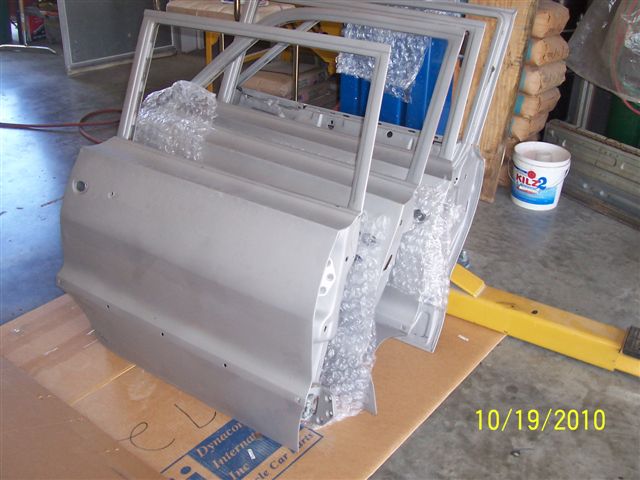
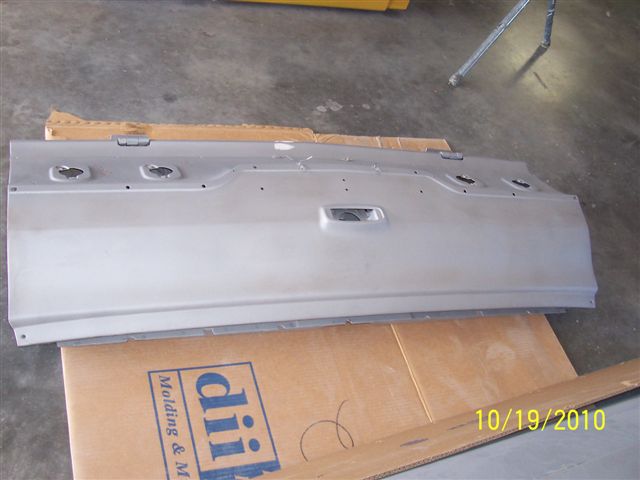
Just some more eye candy for you to view. Much of the interior came in this morning and it sure does look VERY NICE!!! I did not unwrap everything as it arrived in good shape and is packaged very well. Door panels are sweet. It sure is good to see quality stuff made here in the Good Ole U.S.A. I’ll e-mail the tire info in a few minutes.
Rick
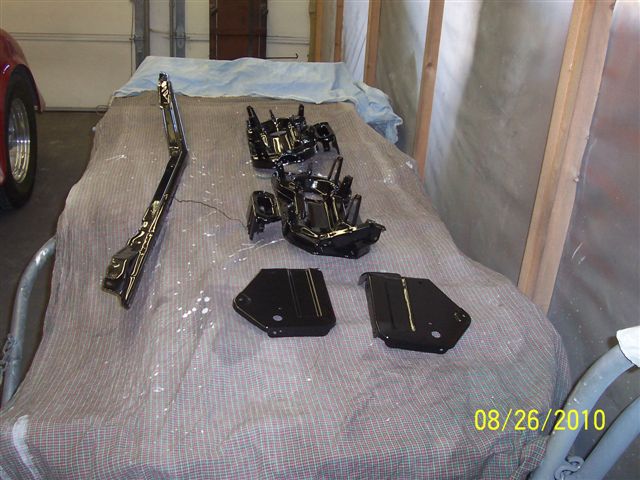
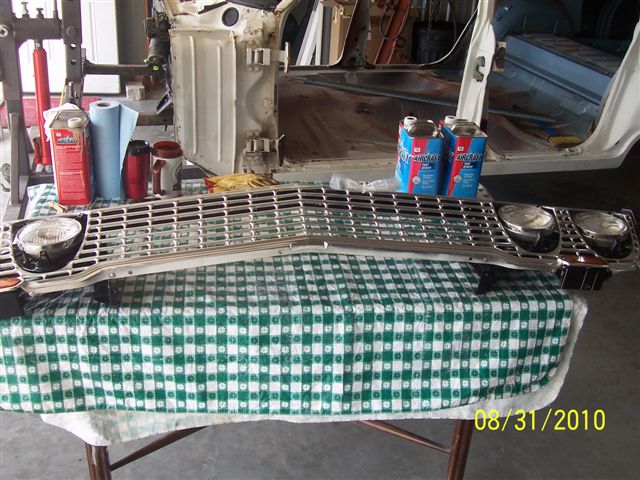
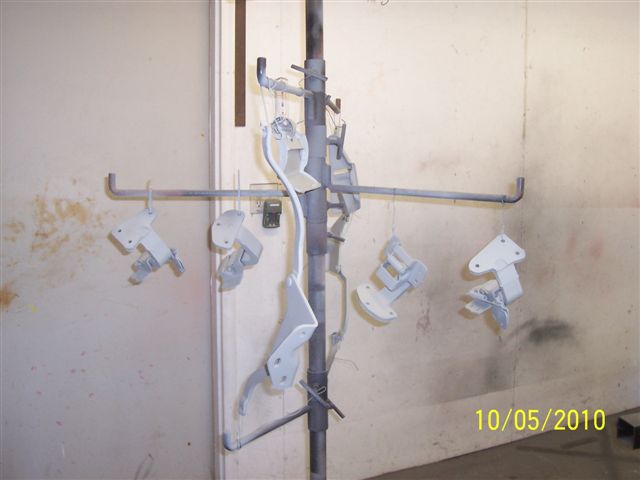
Interior bits..
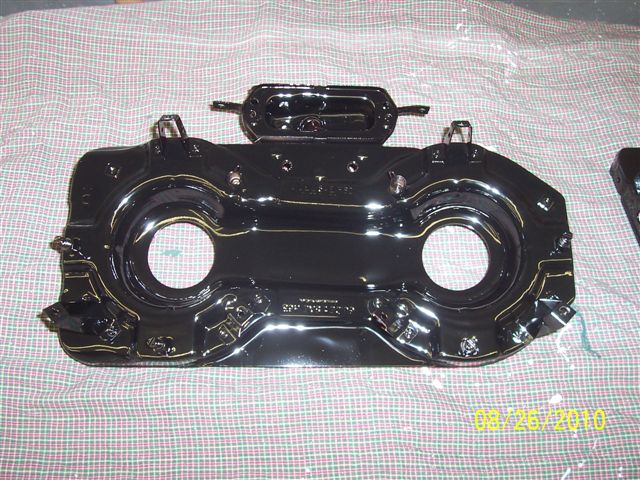
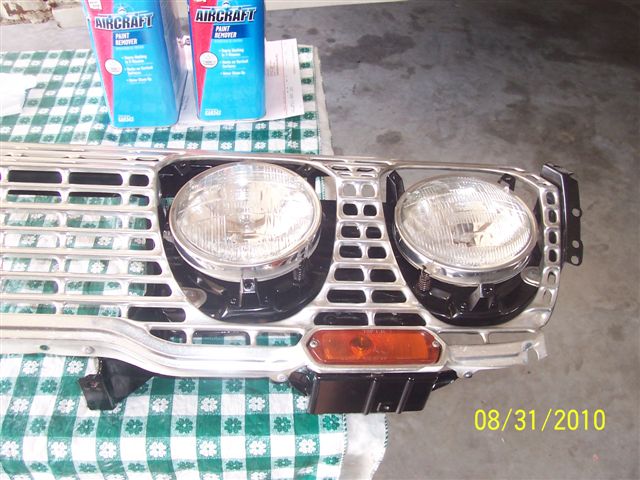
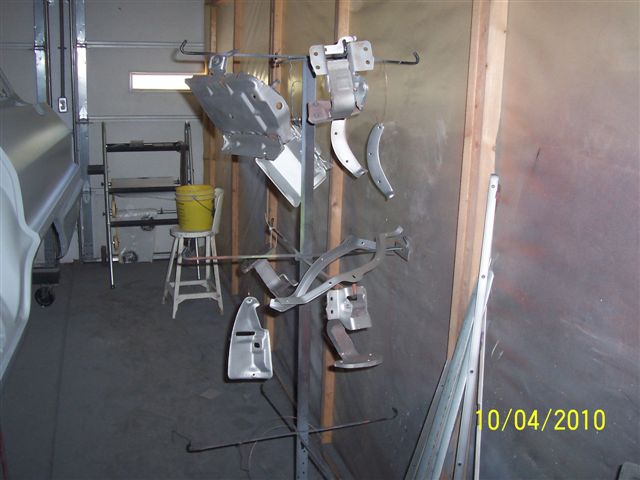
Headlight and grill support pieces:
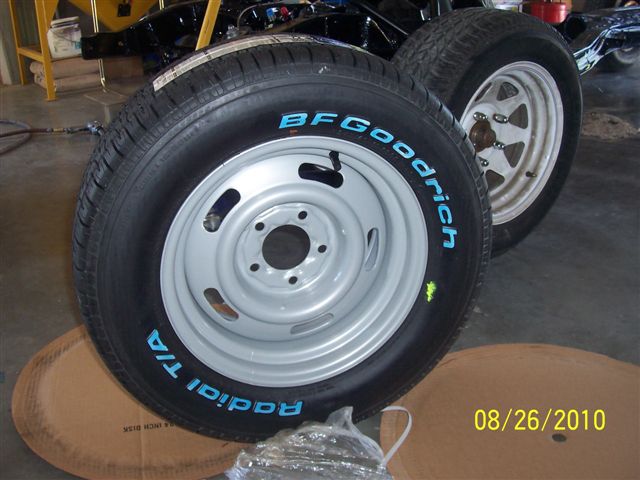
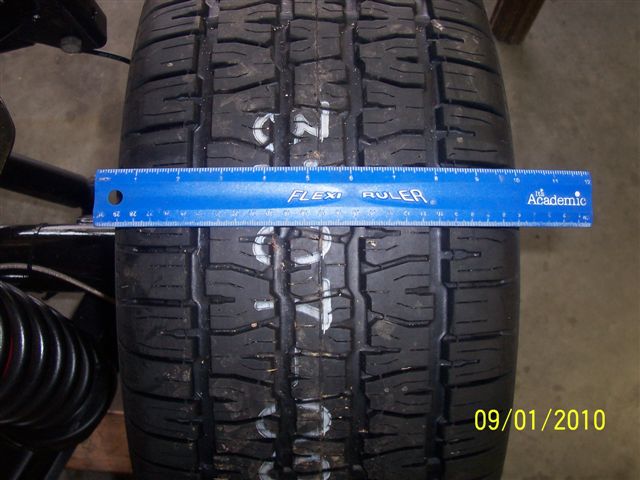
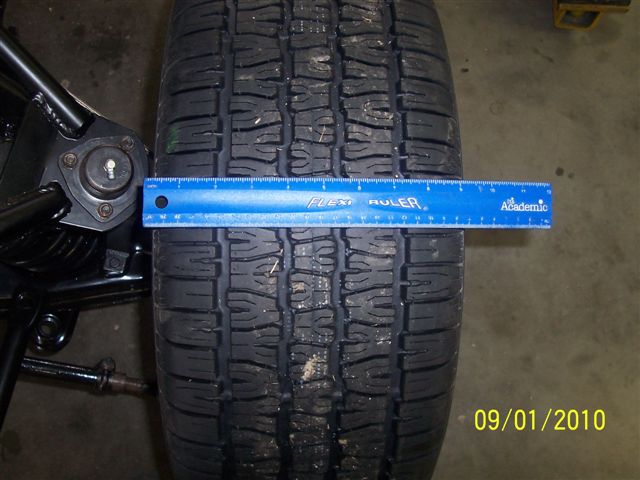
Corvette Rallye wheels with BFGoodrich Radial T/A’s. BEEFY!!
——————————————————-
September 4th, 2010:
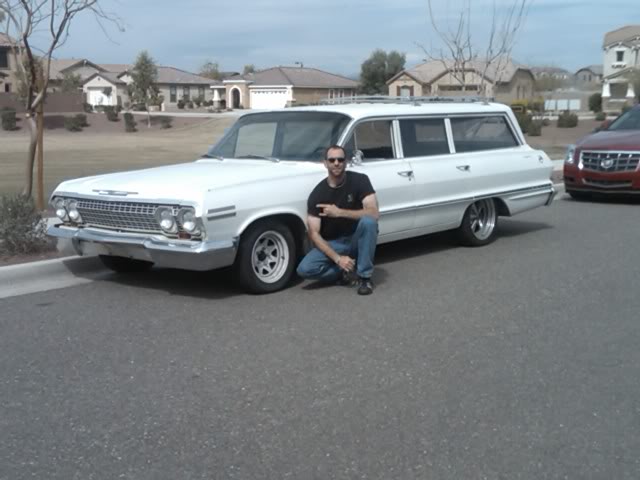
Greg posted a picture of the car from the day he picked it up for Mark in Arizona:
——————————————————-
September 9th, 2010:
Well, after having some down time while Rick was on vacation, and me taking my time getting pictures hosted…I figured it was time for an update.
The ole girl has made quite a bit of progress in the last several months, and I have to extend a large robust “Thank You!” to Rick. For a one man operation, he has been busting his backside to get this done for me. I am much obliged.
Well, anyway, on to some pictures.
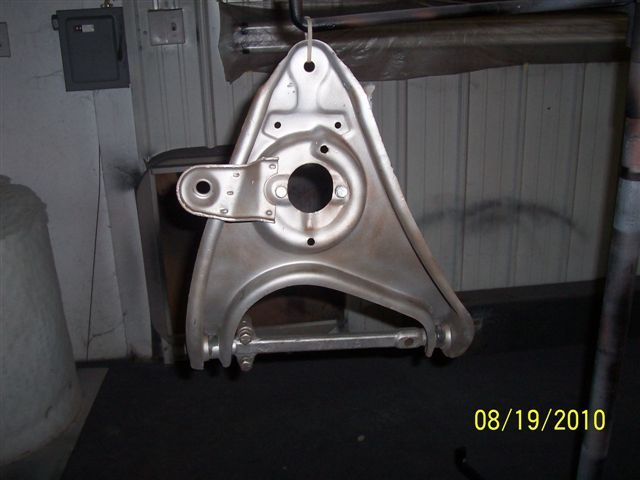
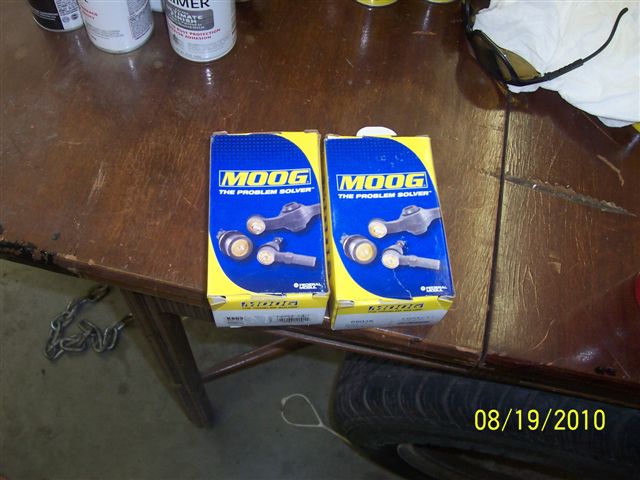
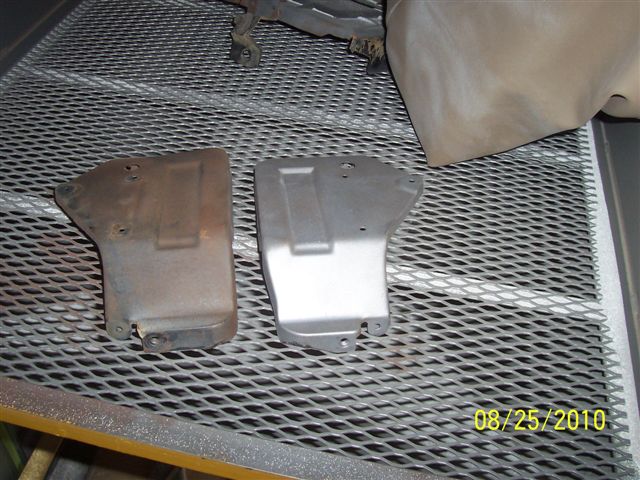
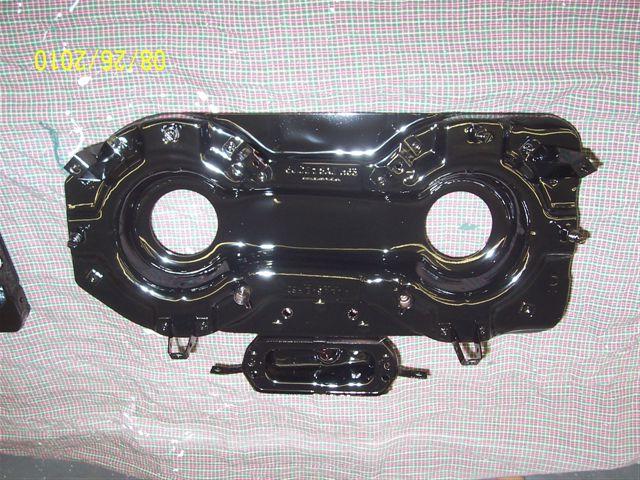
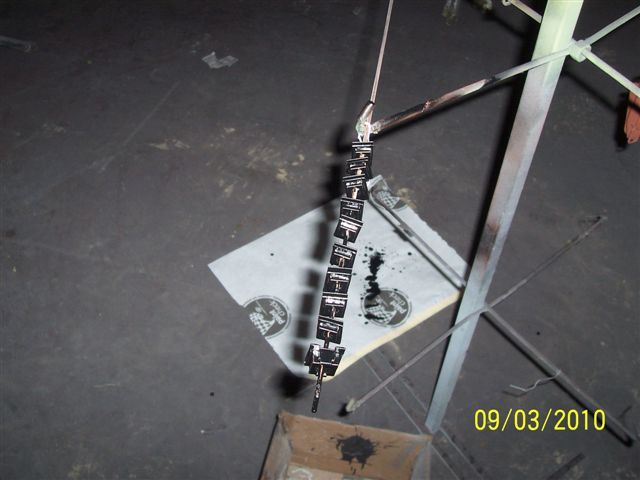
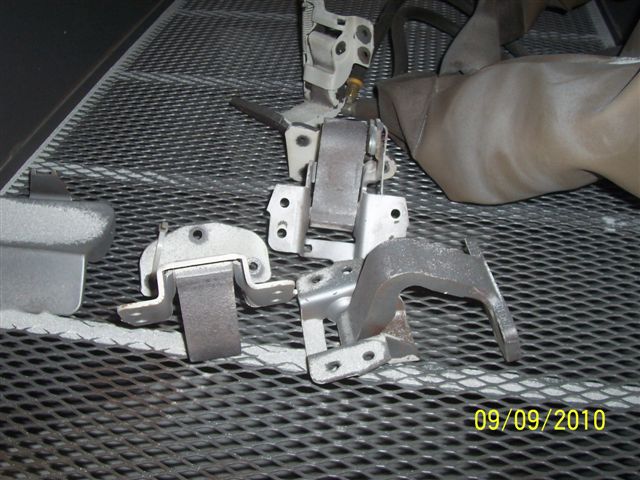
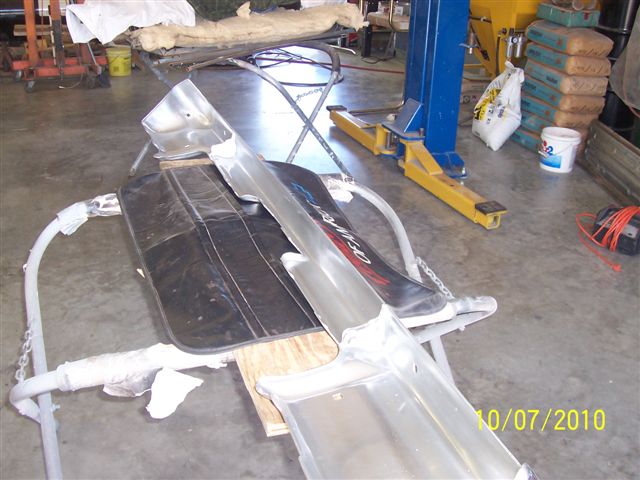
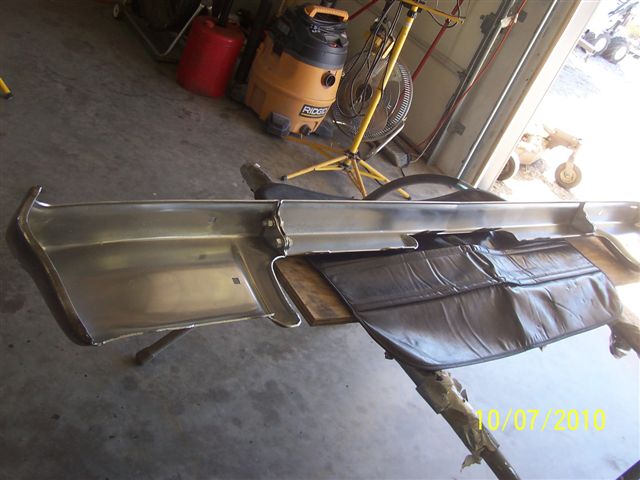
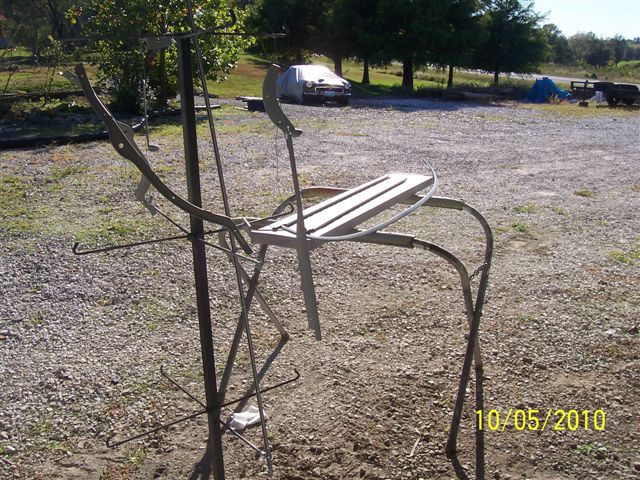
A few posts ago, there were some parts that were shown. Some of them may not have been to obvious on what they were. Well, now you know what one of those sets of parts were for.
Yes, I know this picture is upside down, but now you see how it fits where it’s supposed to go.
Front and back tires should hold the road, but will suck on snow and ice.
As you can see, she does not want to remove her clothes for just anyone.
She is making Rick work for it:
From Rick:
Mark,
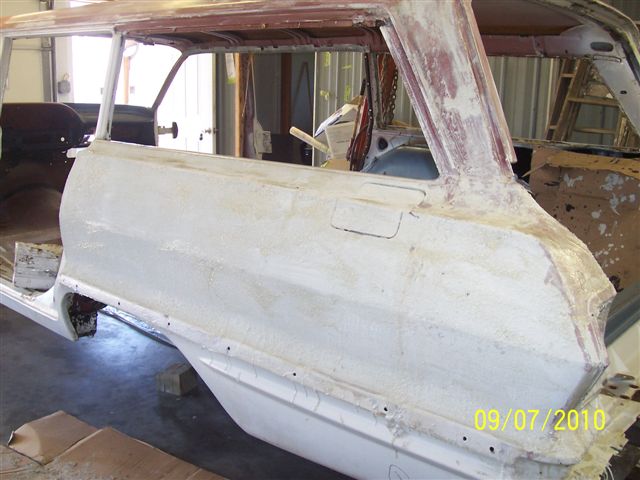
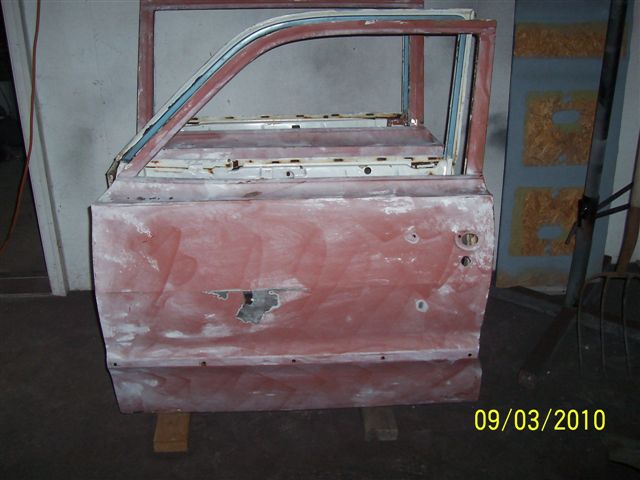
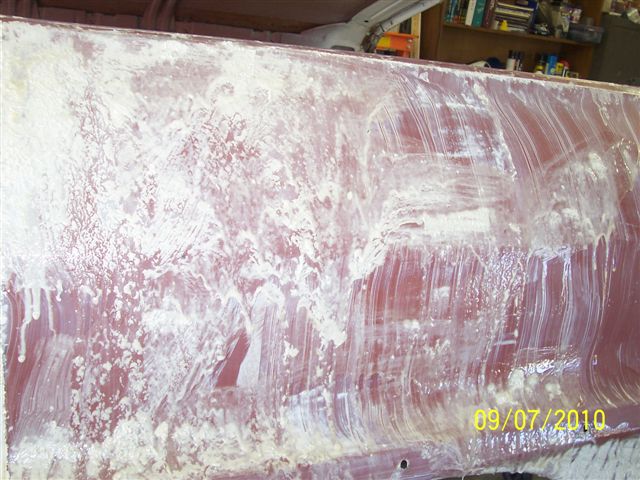
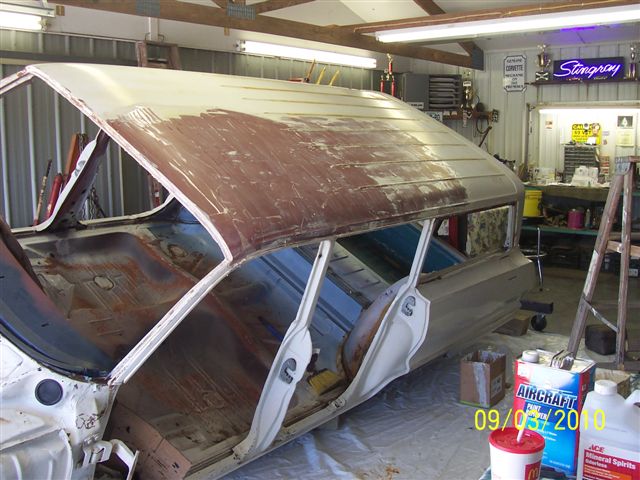
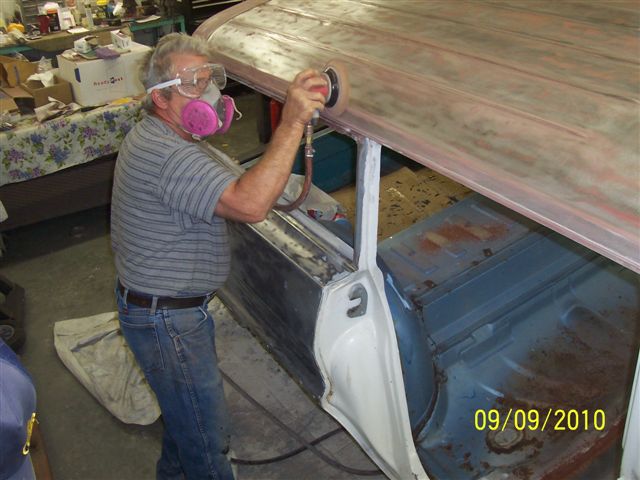
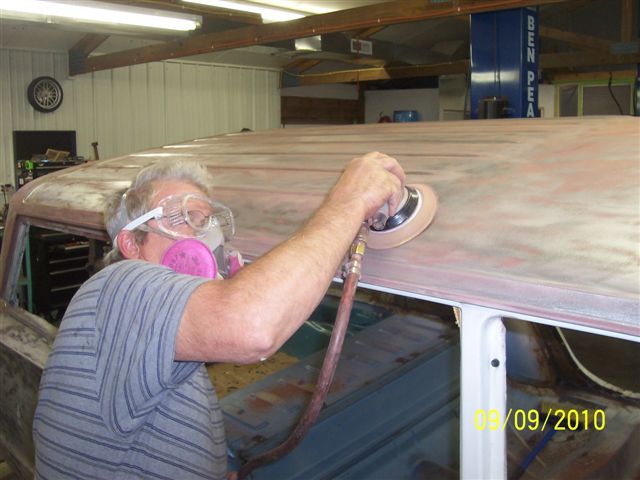
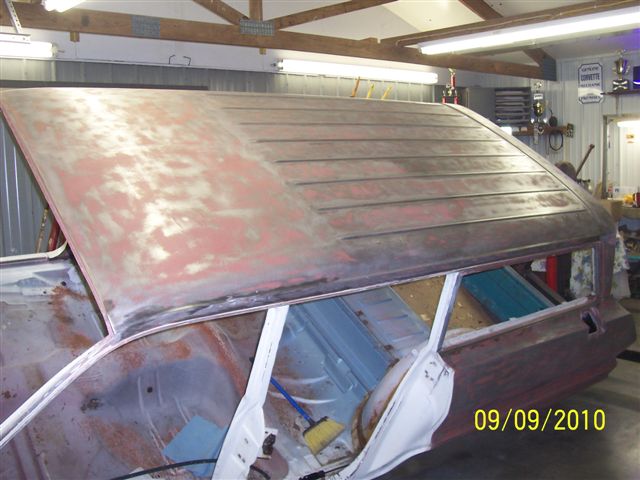
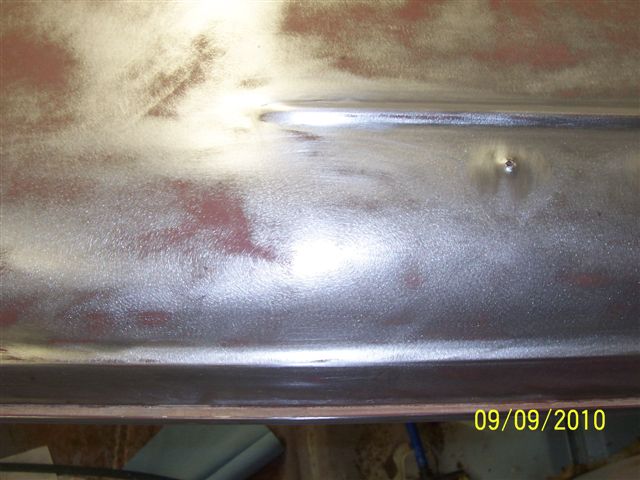
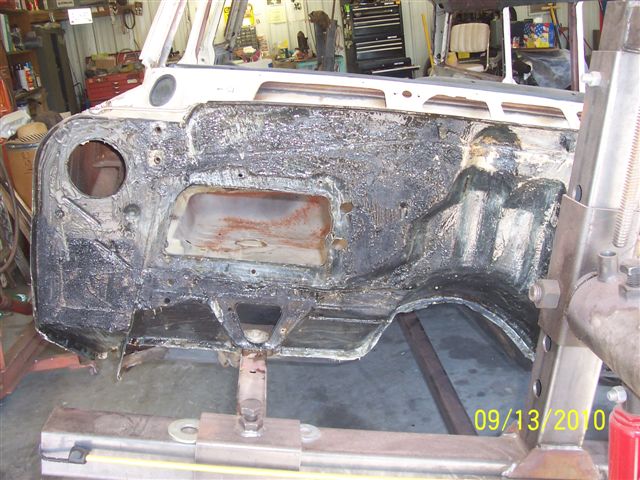
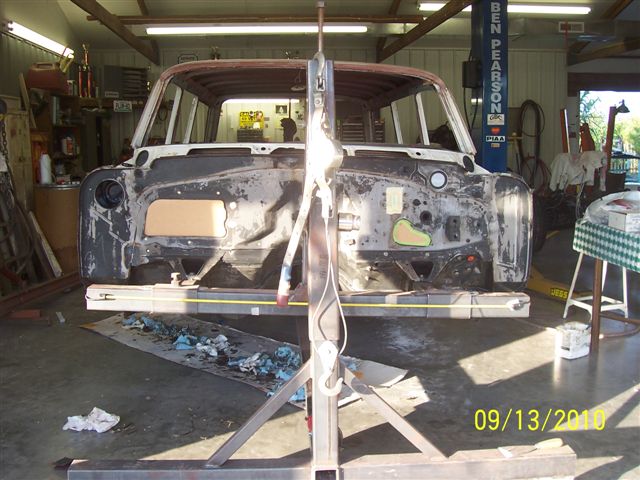
Here are some more progress pics for you. As you can see, the paint strip process is a slow messy job. I was surprised that the base red oxide primer was so tough. I will have to sand off with 80 grit and a DA sander. You can see this in the last pic.
Talk to you soon,
Rick

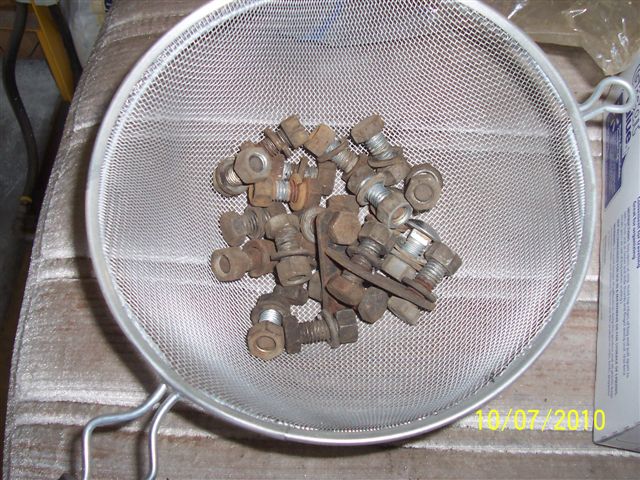
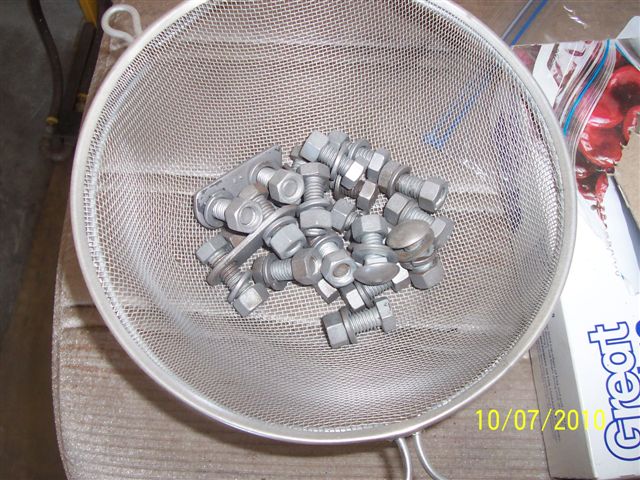
And…just some random parts:
All for now. Hope you all had a nice Labor Day holiday.
——————————————————-
September 11th, 2010:
Hey, kids…and us oldies, as well…How’s everyone doing today?
To start off, I would first like to say something.
Nine years ago today, terrorists attacked the United States in the single most deadly act in all of history. Thousands of men and women lost their lives on those planes, in the WTC, Pentagon and in the field near Shanksville, PA. Along with those that died in the initial attacks, many police and fire fighters, first responders and civilians lost their lives trying to battle the fires and ultimately the collapse of the Twin Towers.
Let it be known that your lives, memories and legacies will never be forgotten.
With that out of the way, I have another update with some more progress on the wagon.
First off, an e-mail from our good friend, Rockin Rick.
Mark,
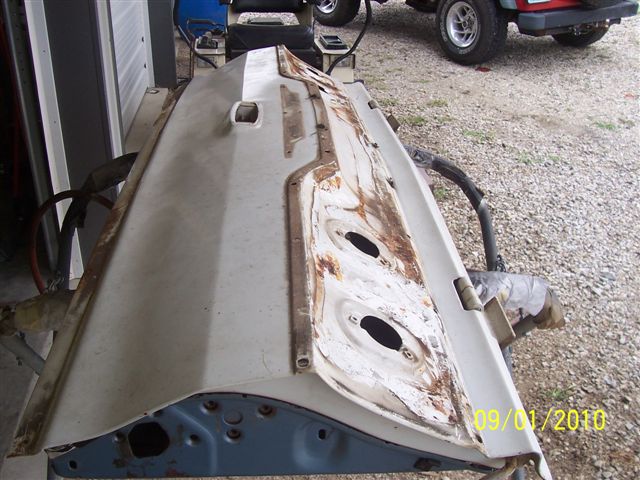
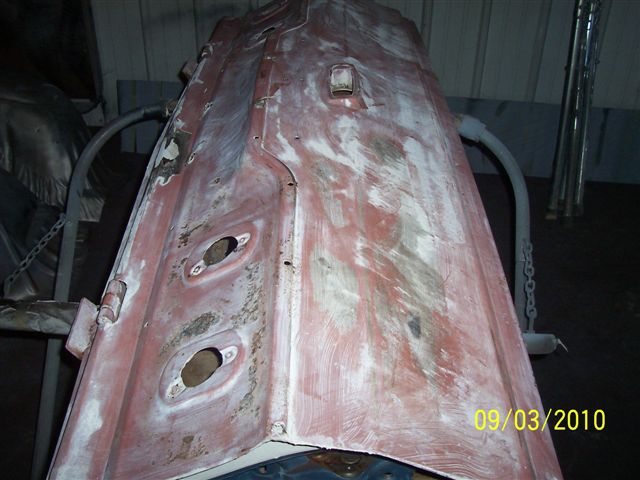
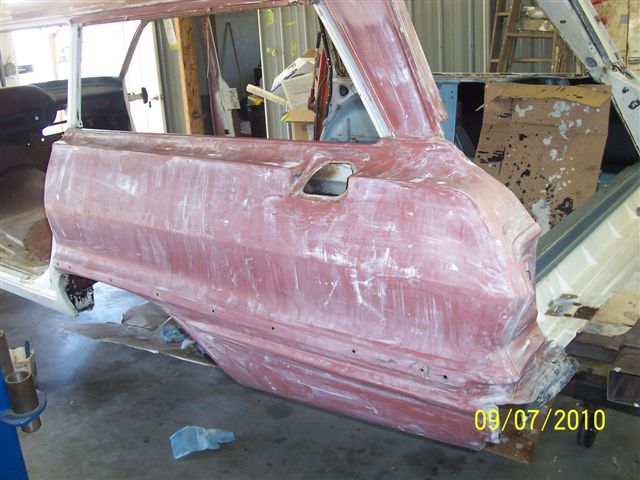
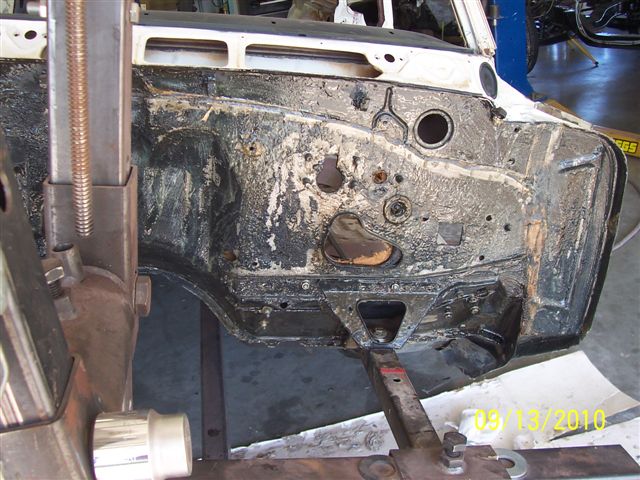
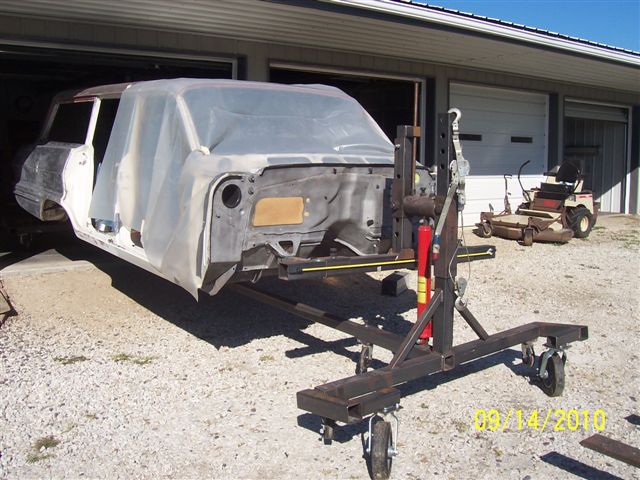
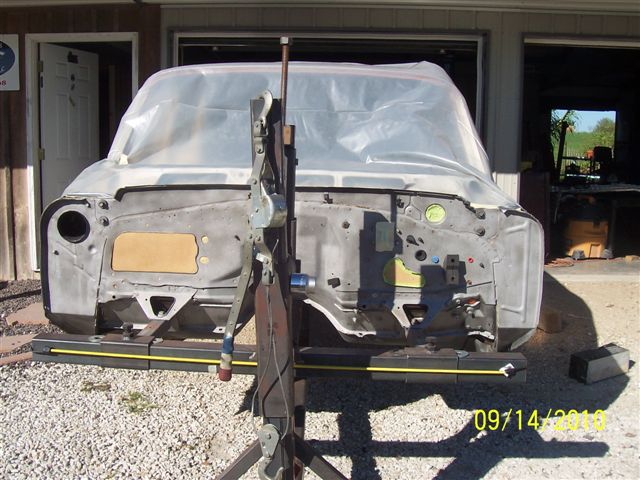
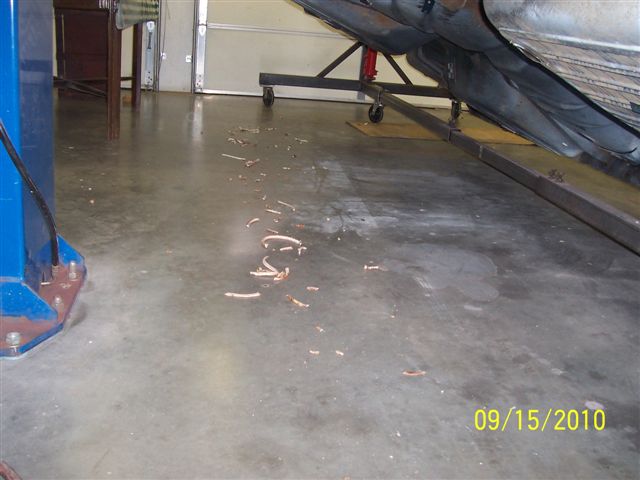
Some more pics of the wagon in the paint removal mode. I sent some pics of actual removal procedure.
I did this as it is very Important to protect yourself while doing this process. ALL of the older cars from the 50’s, 60’s and 70’s contained lead in both the primer and top-coat paint. The red oxide primer in this application was very high in lead content.
ALWAYS wear breathing protection while performing this procedure.
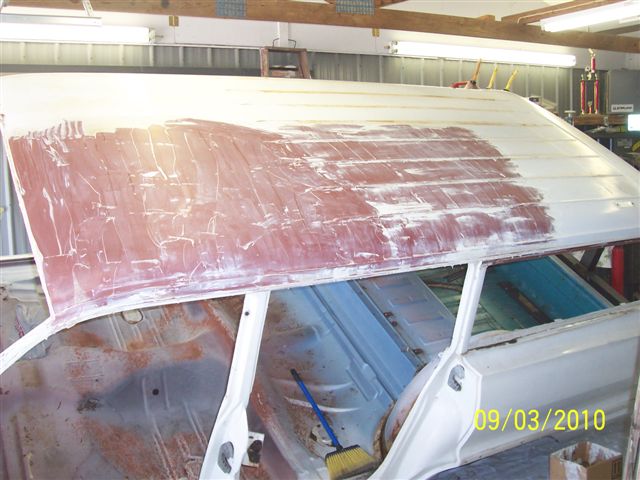
Speaking of the red oxide primer, this ole gal didn’t want to undress easily. The paint stripper would not even phase it…had to remove with a orbital sander and 80 grit sandpaper. This slowed me down some, but has to be done.
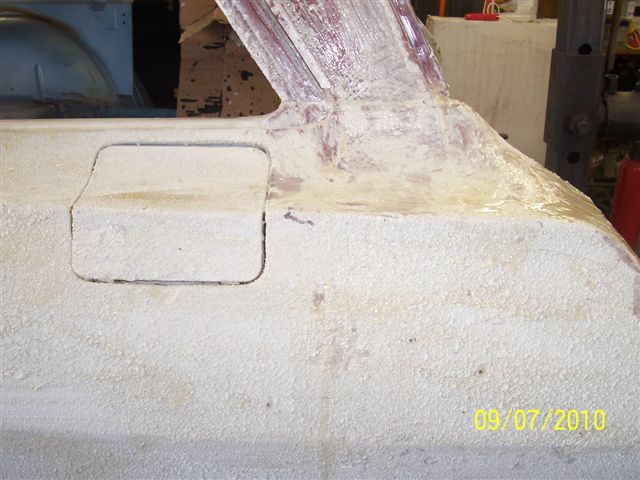
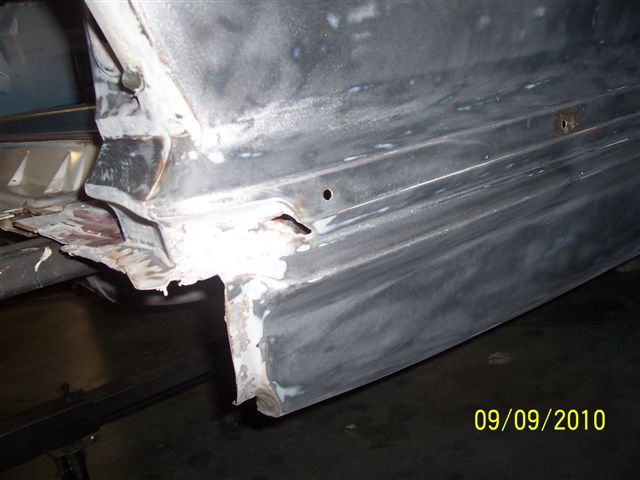
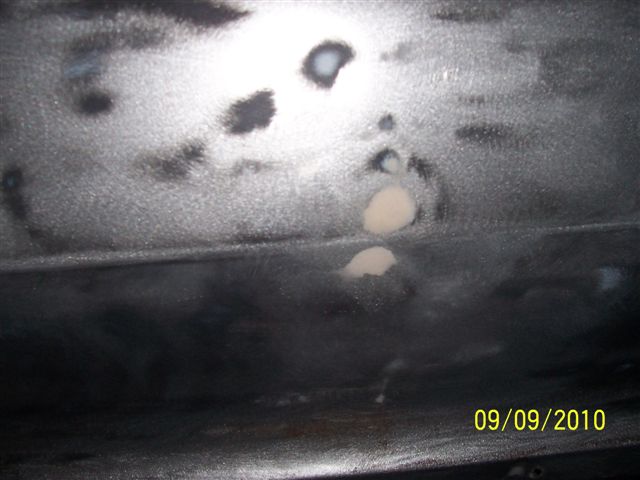
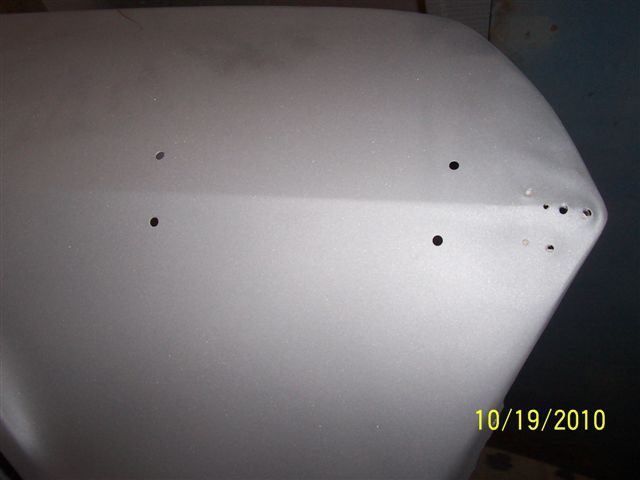
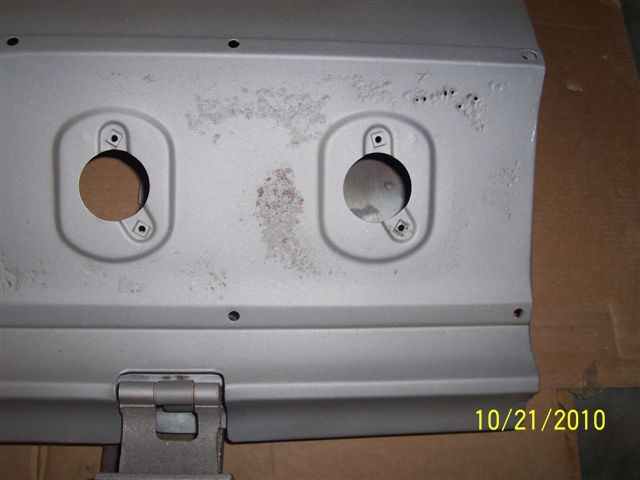
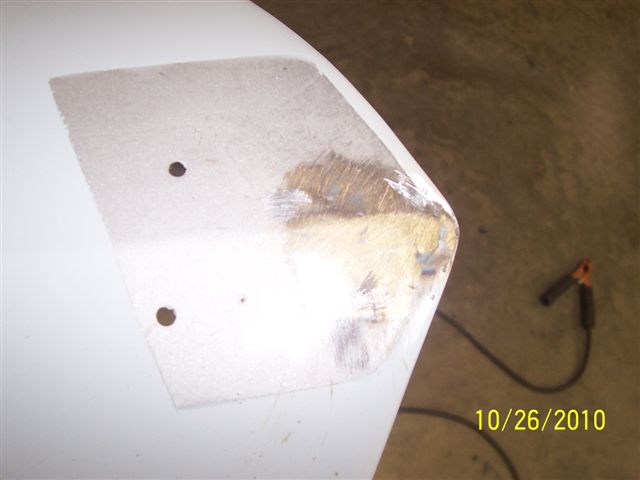
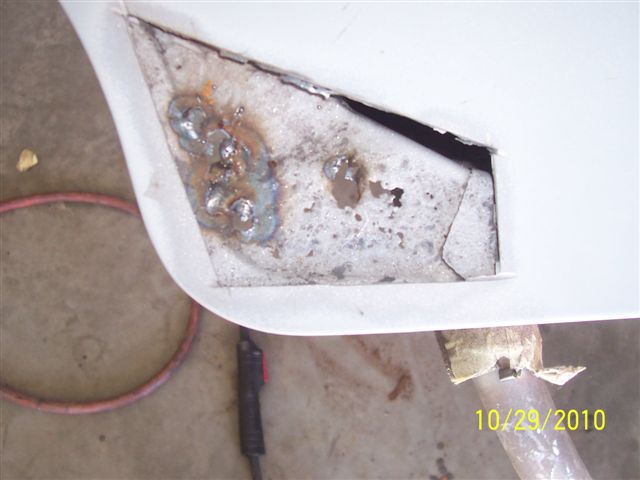
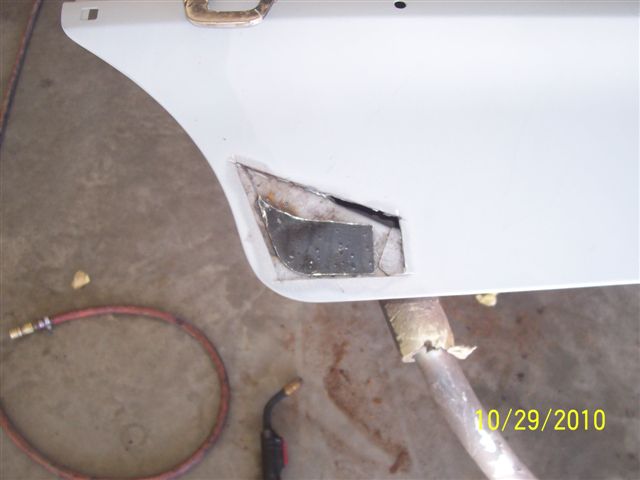
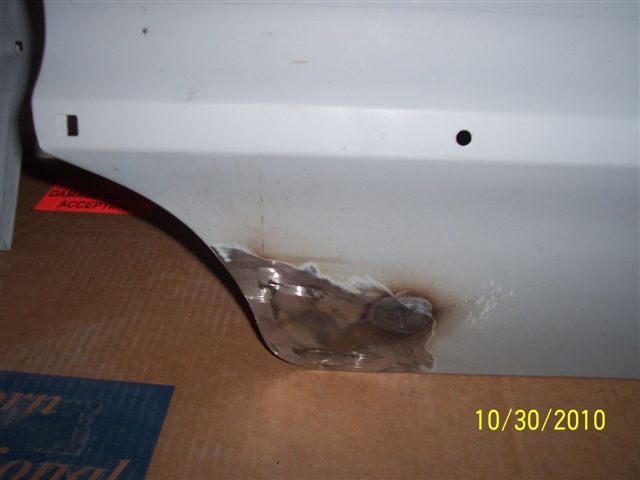
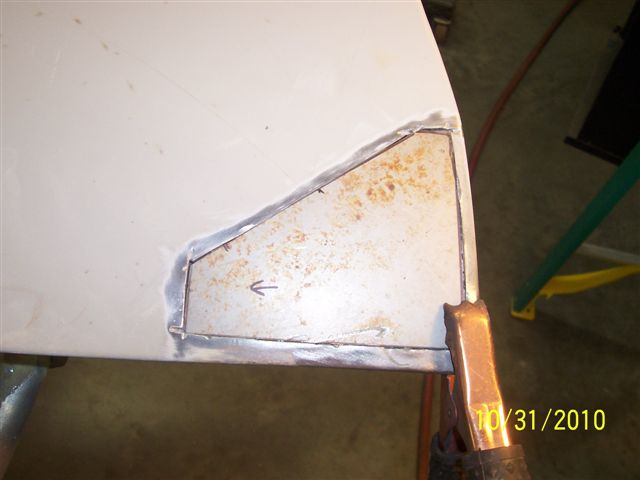
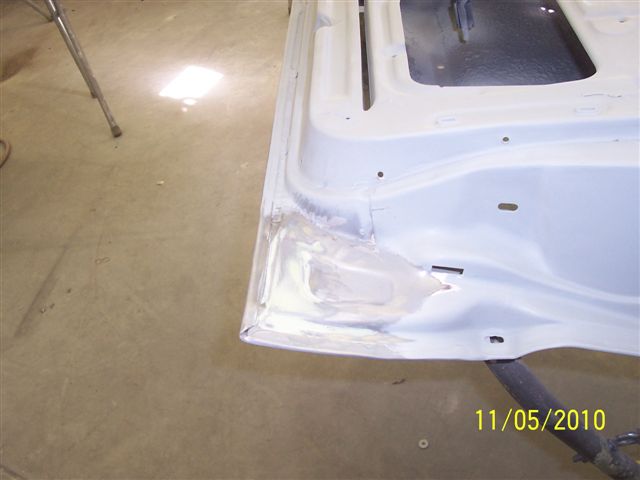
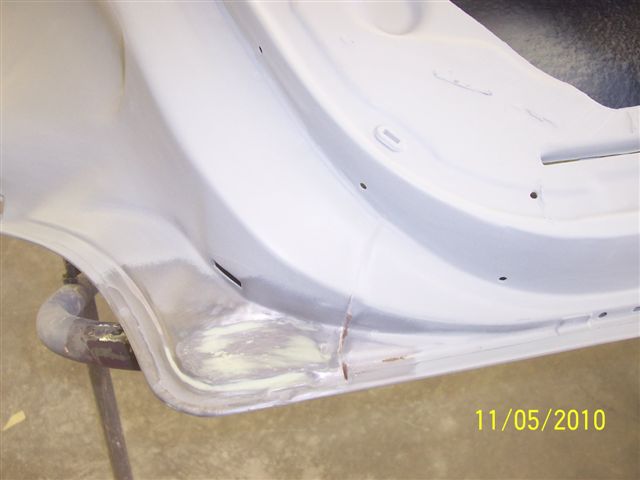
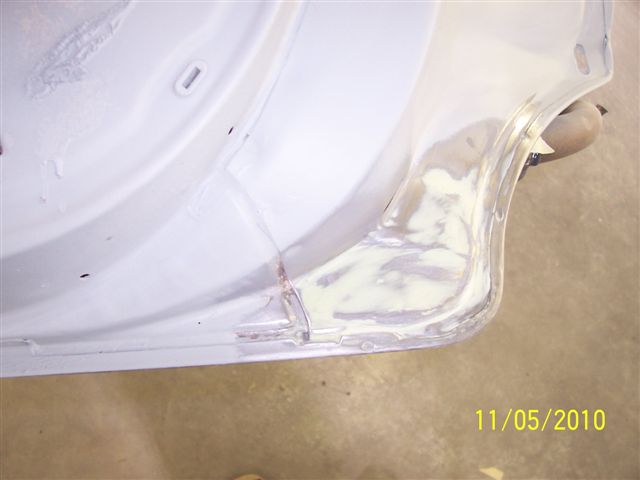
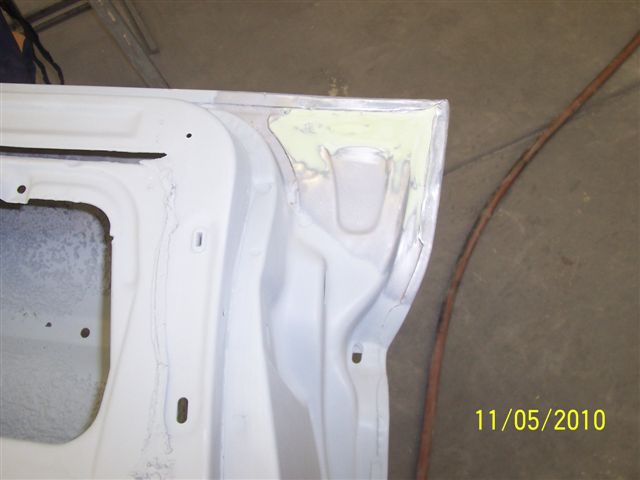
Also sent some pics of the right rear quarter panel, as it needs to be repaired…again. It would be interesting to know what caused the damage…
Will send more pics as I progress.
Rick
And with that…
——————————————————-
September 16th, 2010:
Going broke. It’s a slow going process, I know, but you’re pretty much guaranteed to get weekly updates. Well, that may be a stretch, but it sure sounds good.
Anyway, Rockin Rick has continued to turn and burn on the ole girl, and she is coming right along. The more I see of her, the more excited I get anticipating the day when she’ll be docked back at her berth.
Well, here’s the e-mail from Rick.
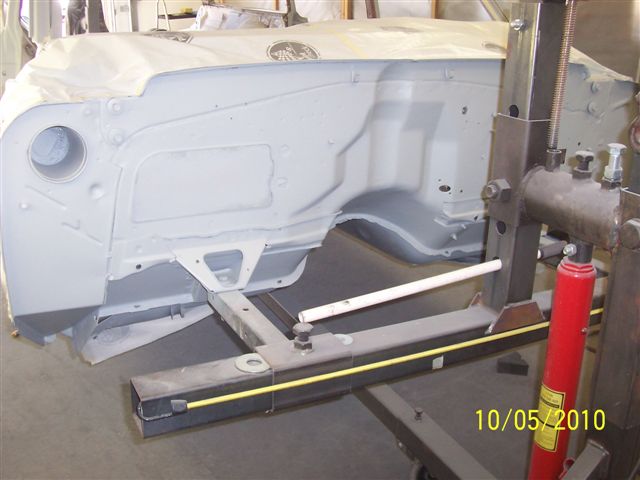
Mark,
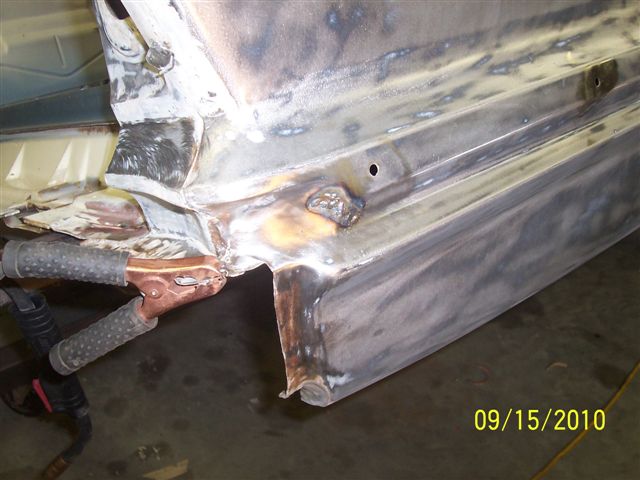
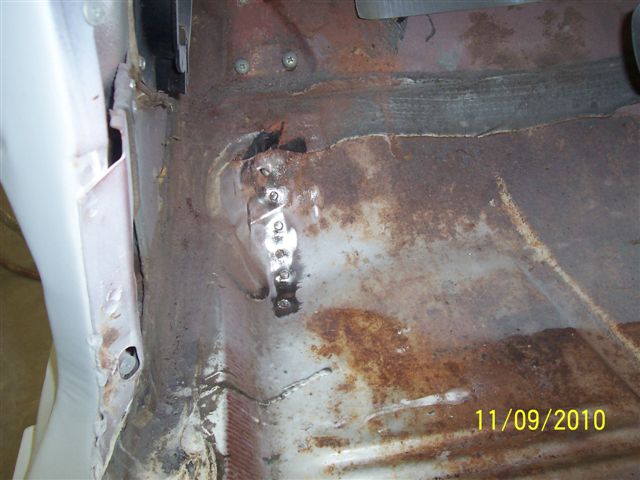
Here are the pics of bodywork progress.
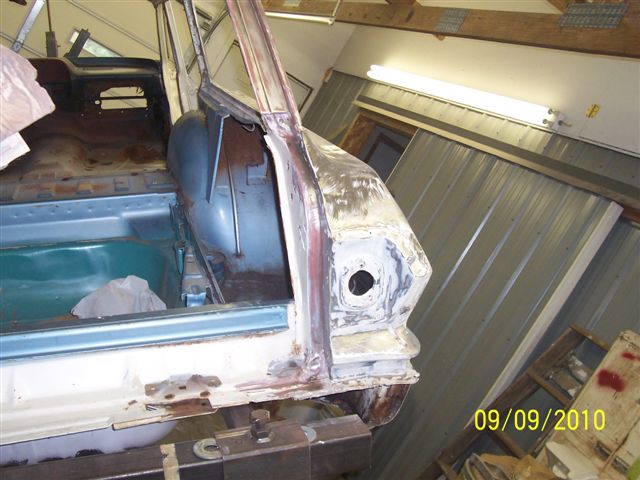
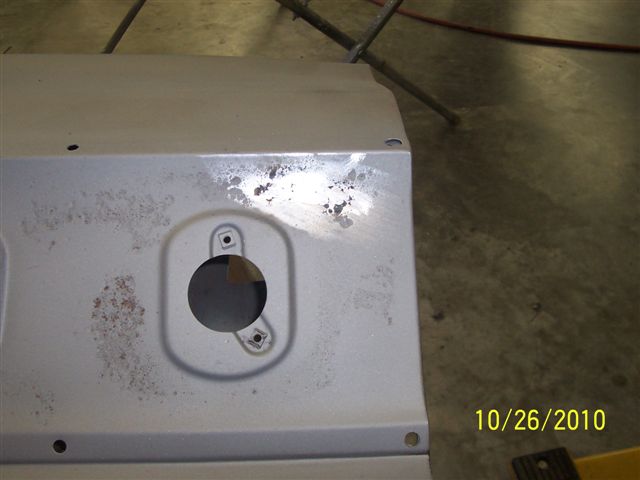
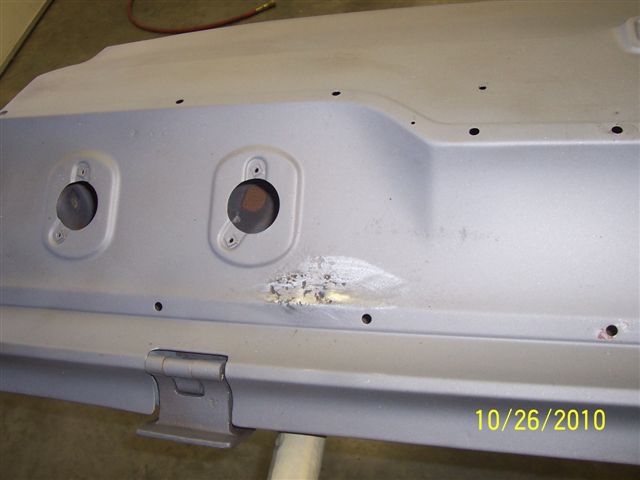
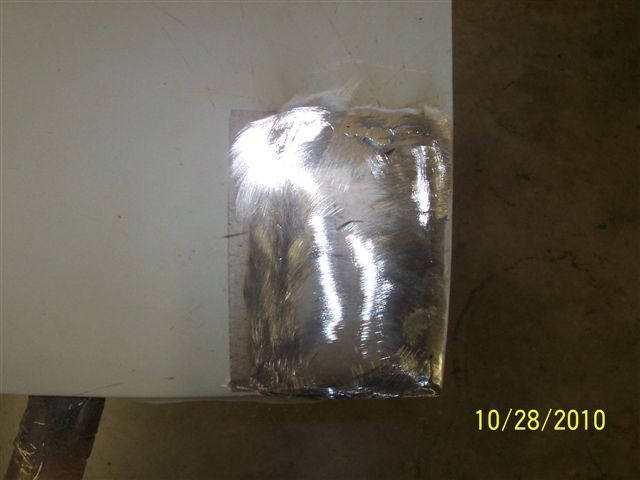
Removed the paint on firewall, sandblasted and removed all seam sealer in drip rails and cleaned for new sealer. (Many guys overlook this very important step.) And rust is still left to continue rusting.
All bare steel will be metal treated before etch primer and resealed with new sealer.
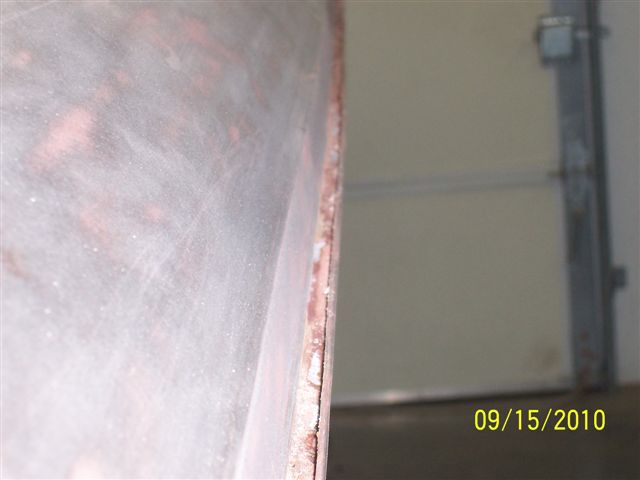
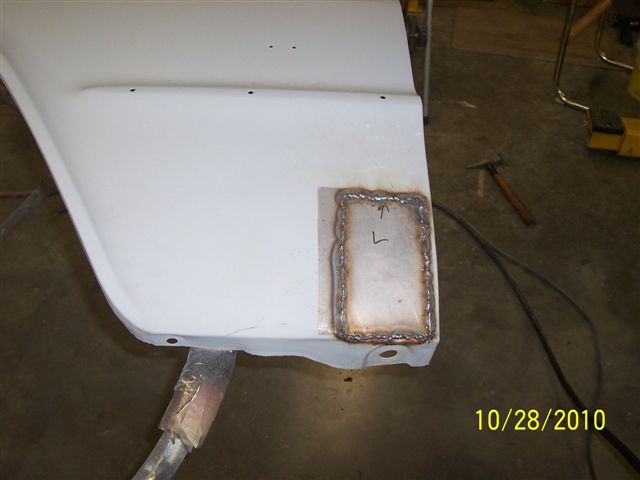
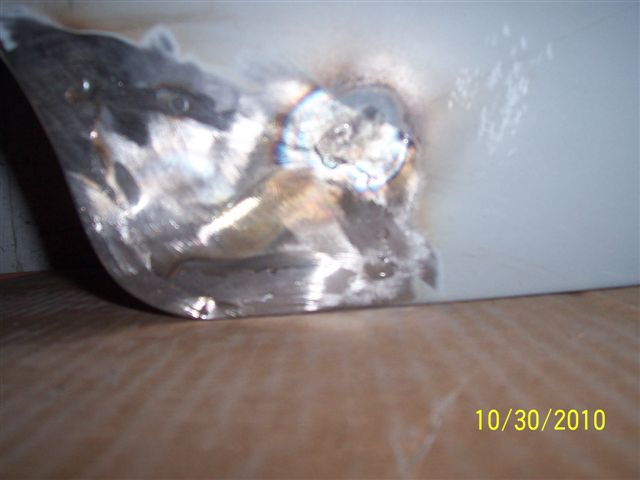
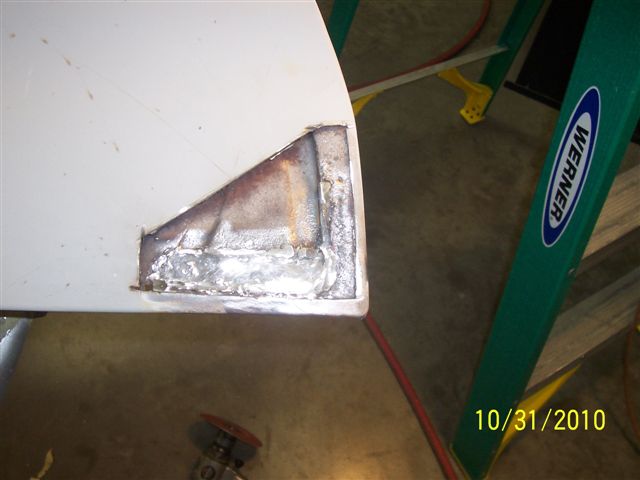
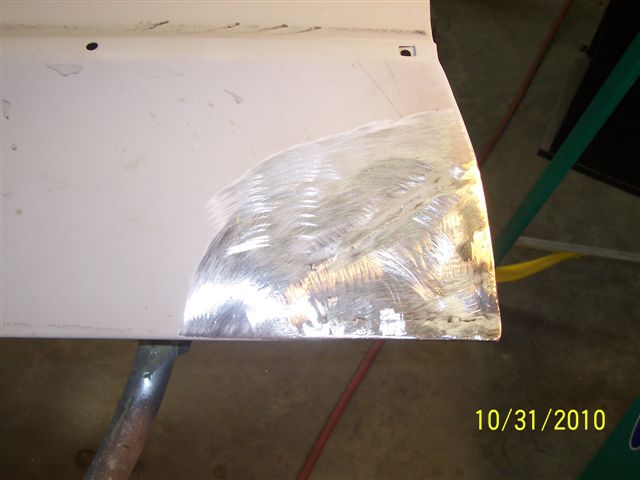
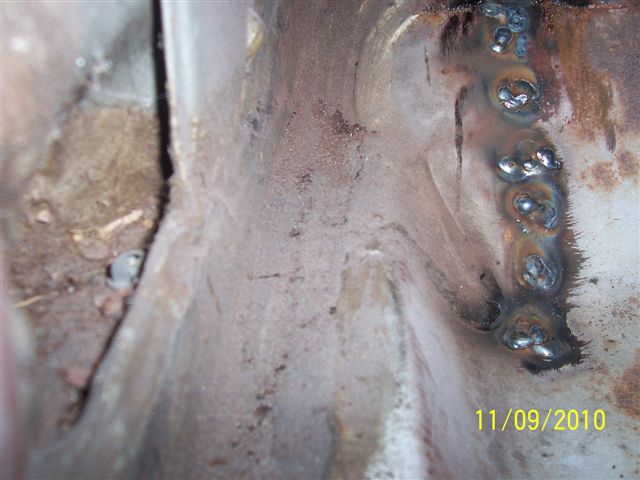
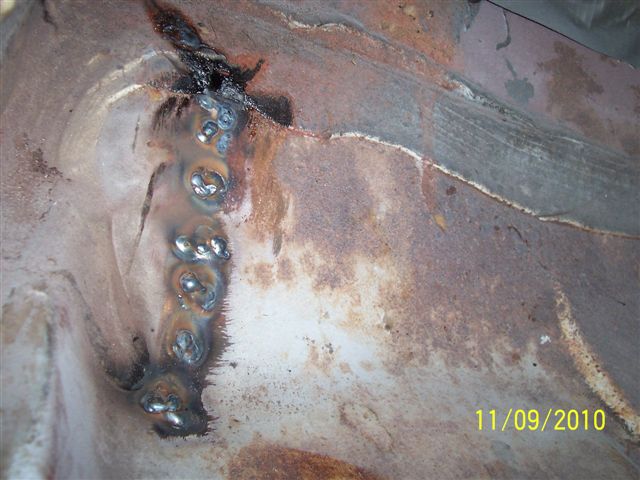
The hole in the rear quarter panel came out very well and, as you can see in picture, it closed back together and welded up good. Hole in the tunnel of the floor is fixed also.
Will finish body work this week and will etch prime body (hopefully) by first of week.
I will be in touch when I have more updates. Hope you have a Good Day!
Rick
And, now for the money shots!
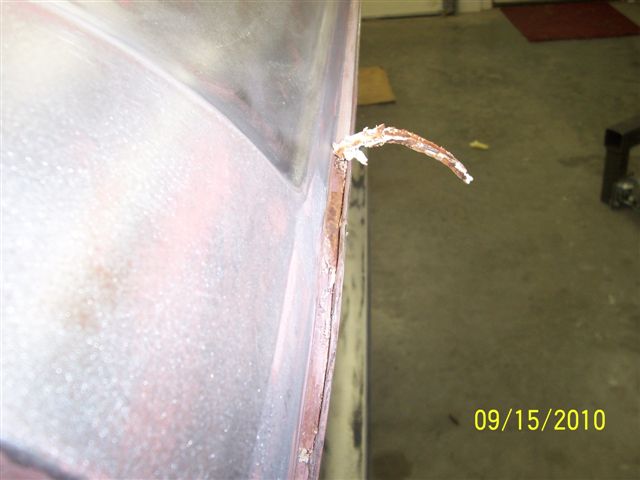
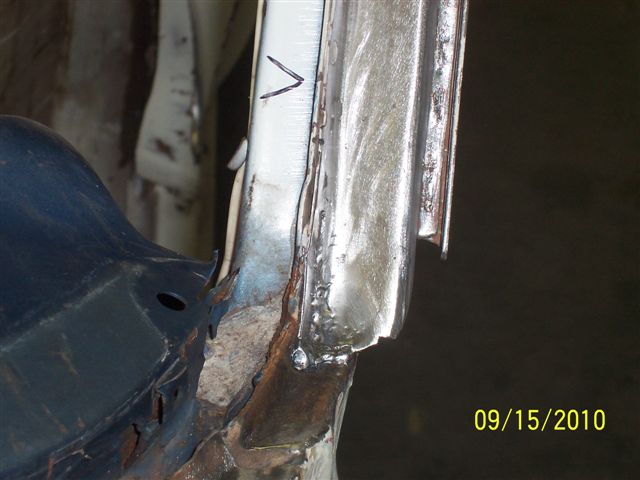
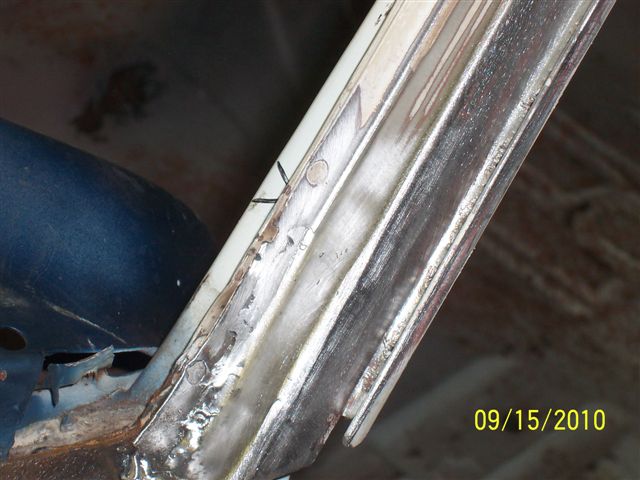
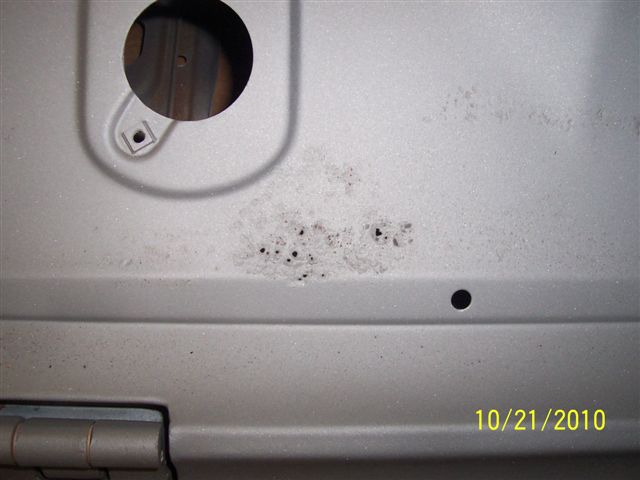
Here is the hole Rick mentioned in the right rear quarter:

And here is the repair job:
——————————————————-
September 27th, 2010:
Got some pictures last week but was a bit under the weather, so I didn’t have time to get to the thread. Well, have no fear, because Rockin Rick has been making steady progress and the car is still moving along nicely.
Mark,
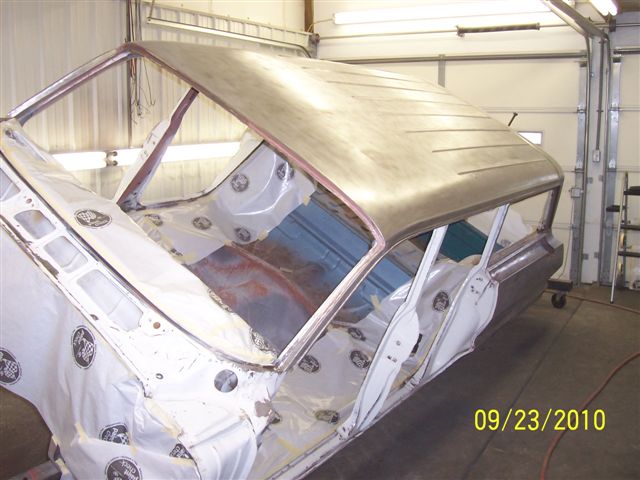
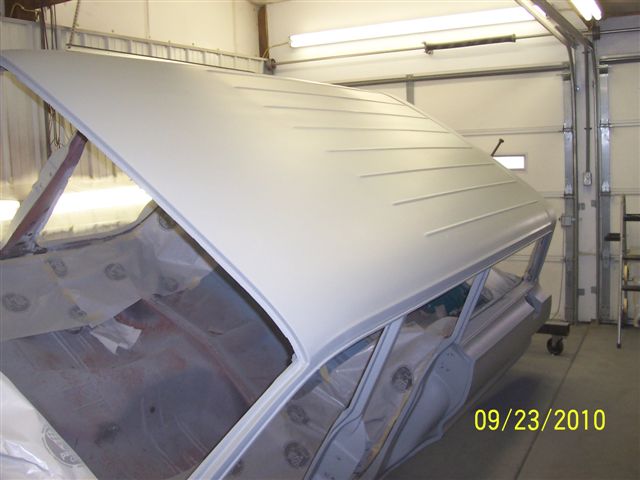
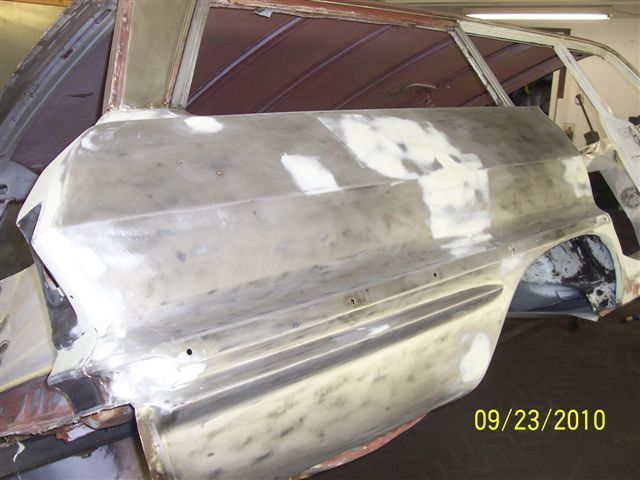
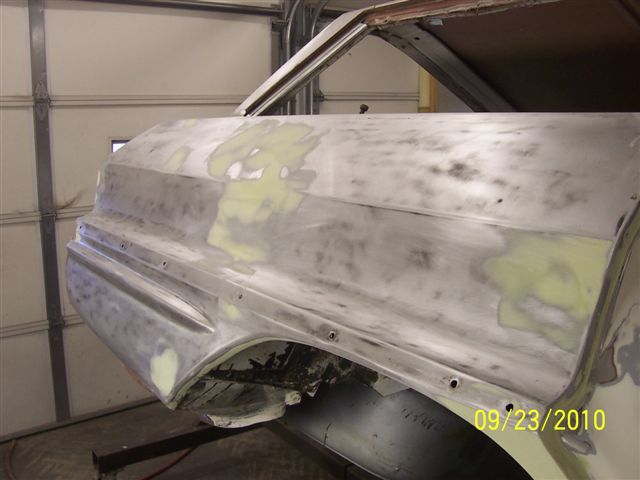
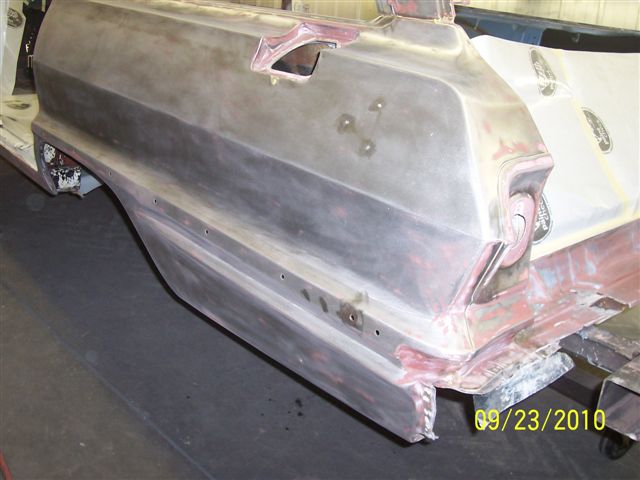
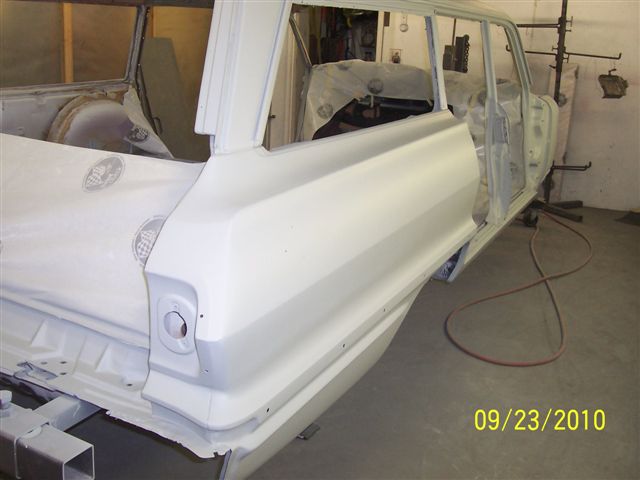
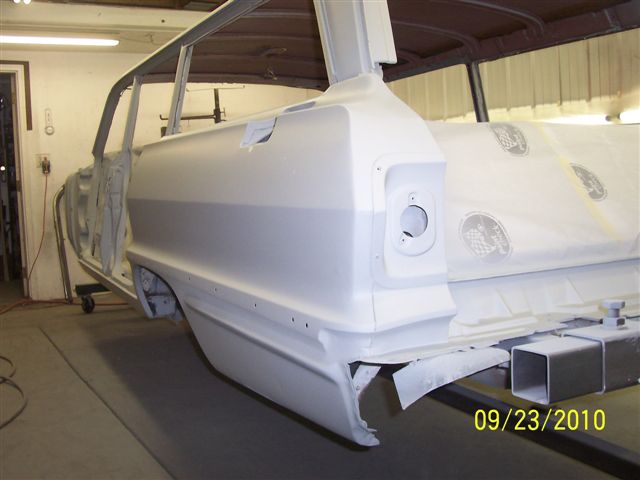
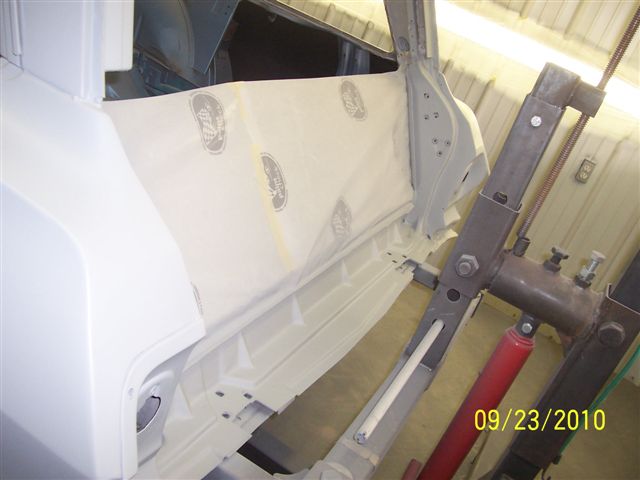
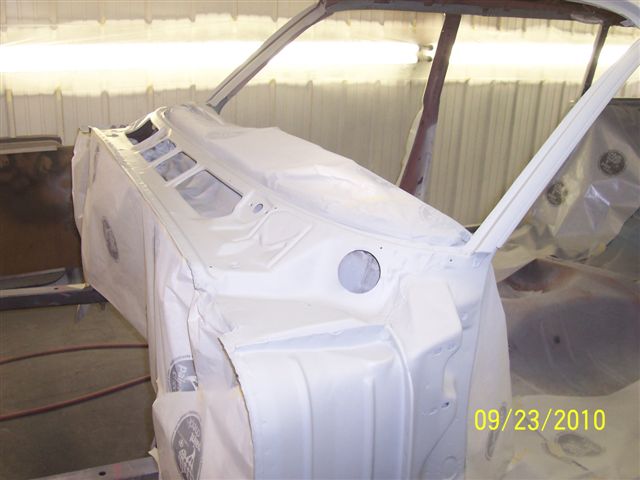
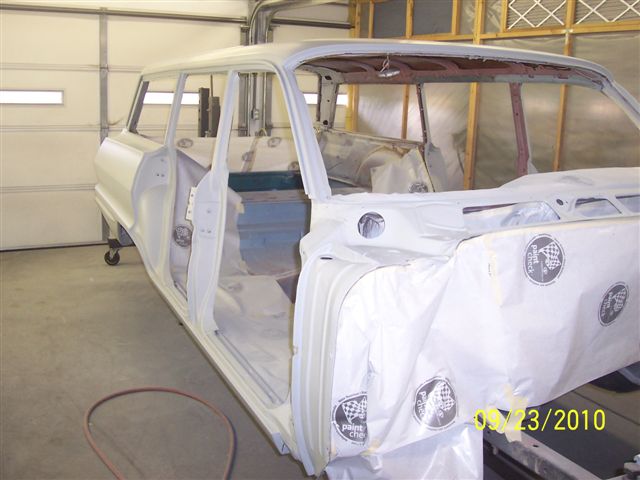
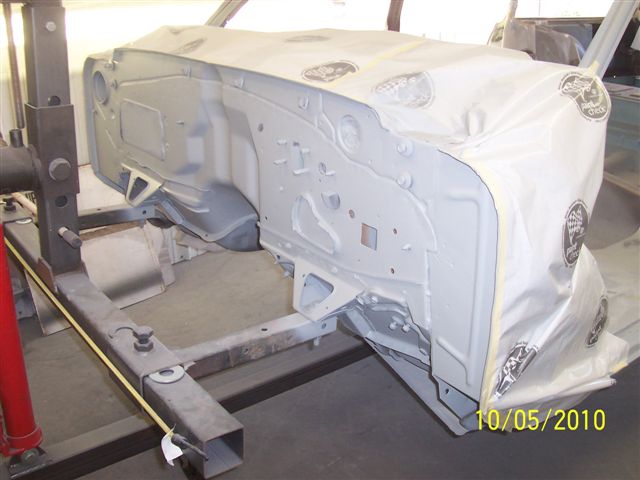
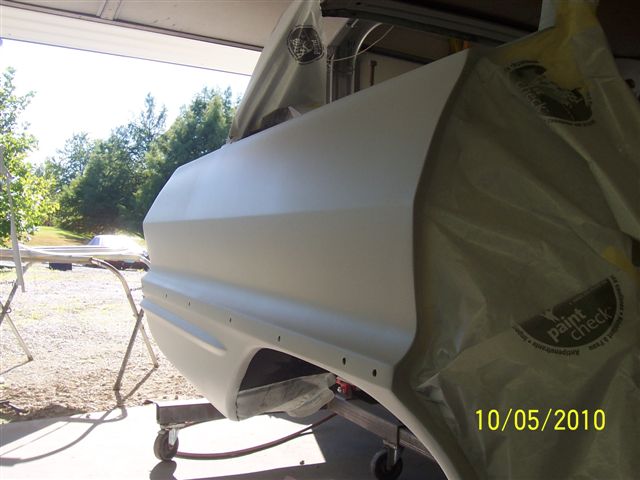
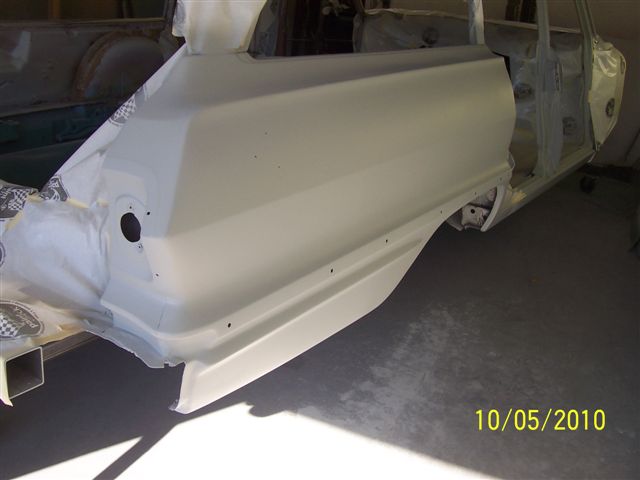
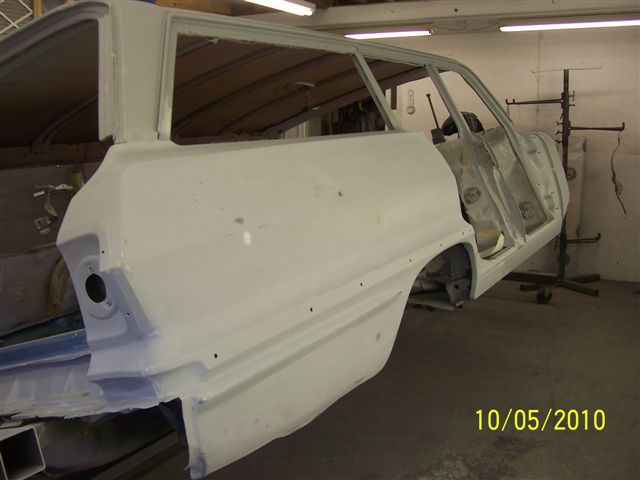
Here are some pics of the final steps of the bodywork and primer application on the wagon. All bodywork on the car body is complete, except for a small dent on lower left quarter. I noticed it while priming the car. I will fix it when I block sand the body.
The rest of the car is smooooooth! This is the result of many prep hours, sanding and blocking. I applied 3 coats of PPG self-etching primer for this base primer. Will block down and re-prime as necessary.
The front fenders, doors, tailgate, radiator support, windshield grille, and upper bumper valance will go to the media blast Monday or Tuesday of next week. Sure was glad to find a media blaster, since the red-oxide primer on this car is so hard to remove.
Talk to you soon,
Rick
P.S. For those who aren’t familiar what etch primer is, I’ll explain.
Etch primer is simply, a very corrosion resistant primer. It contains an acid that kills any surface rust by neutralizing it and then seals it. This prevents rust from working under the new paint!!!!!
And now on to the pictures.


——————————————————-
September 30th, 2010:
Alright, got some more info for all of you.
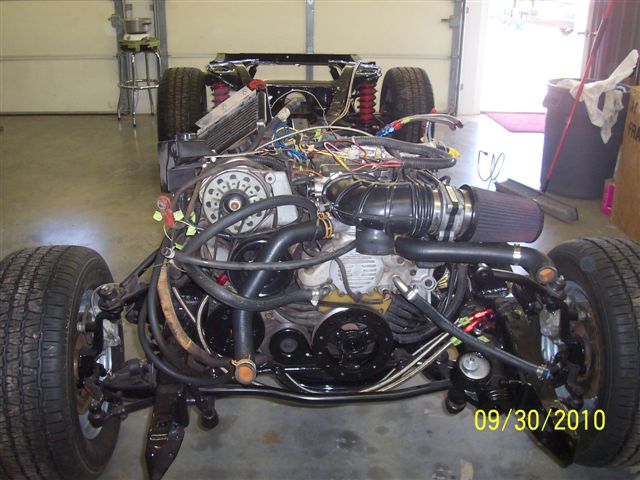
The car has had the engine and transmission placed back in the frame!!!
Mark,
I’ll keep this short as we just spoke on the phone.
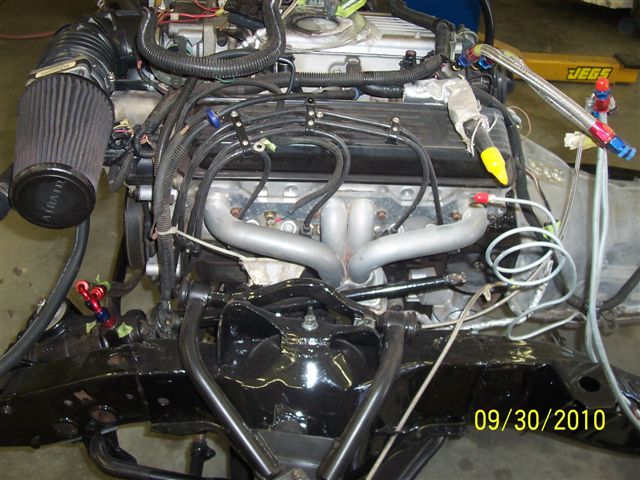
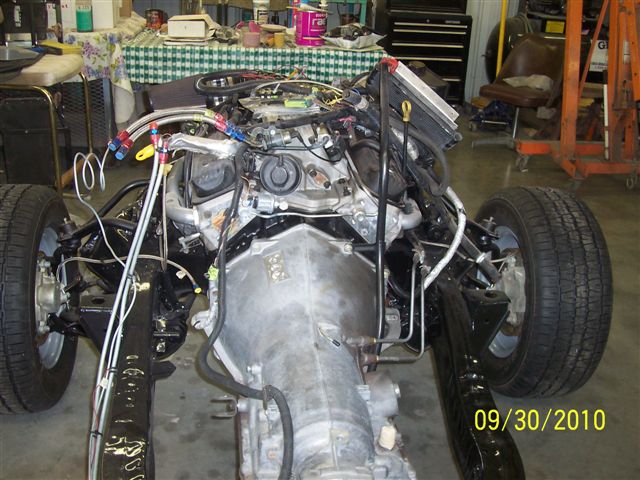
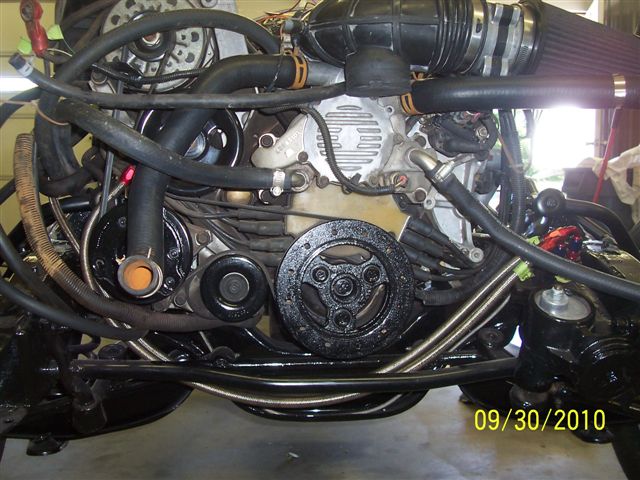
Here are some pics of reinstalled motor and trans. Everything went back in and reconnected just fine. The rolling chassis is now COMPLETE!!! The light now appears at the end of the tunnel, so to speak!
Later,
Rick
P.S. the motor and trans cleaned up pretty good for not using any water.
Not as many pictures as usual, but here ya go!

——————————————————-
October 10th, 2010:
——————————————————-
October 30th, 2010:
Greetings, NICO!
Well, I have an update and some more pictures for you.
Mark,
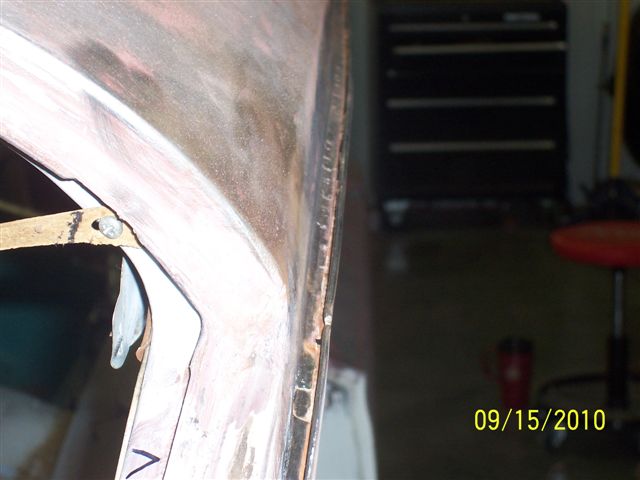
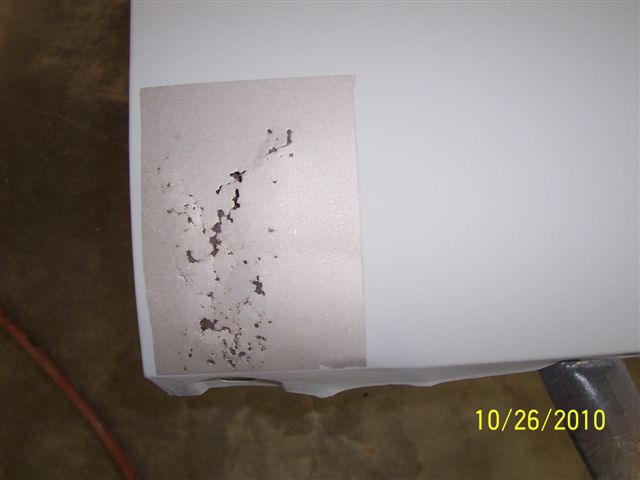
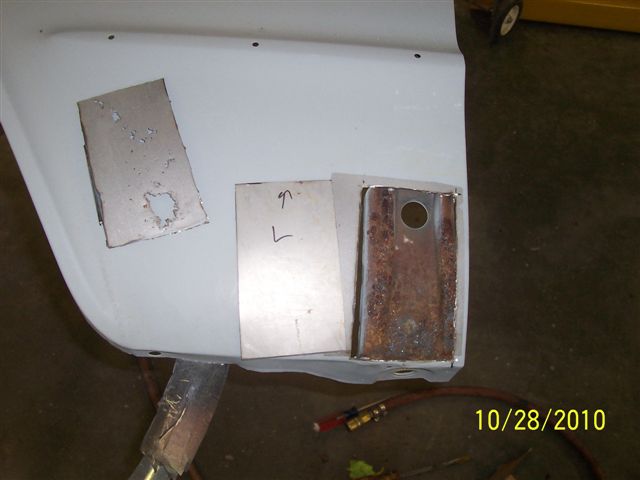
Here are some more pics of the body work that needs to be done (I’m working on). As you can see, there are some rust issues. These will be repaired by cutting out the bad areas and welding in new steel. The fender brace looks worse than it actually is. It’s solid with no pinholes. I will kill the rust and treat the area before covering it with new steel. This area will be treated with POR-15 after completion to stop continuing rust.
I will send more pics as progress happens.
Rick


She is in good hands, as all have seen. That is why I wanted Rick for this job, I knew what he was able to do, and the care and love he puts out and in to the cars that he has a hand in rebirthing, and I say that because each job that he has done is a new life from what he started with. Go and look back at the “T” or my car at the start of this trip and you will see that it is a love of the job and the machine that lets someone do this and keep doing it for this long.
Not too bad a car. Just small trim problems from the pictures. But no one has the trim for the wagons as I just bought NOS from National Impala and all they had at the time was 6 of the 8 that I needed so I am still one front door and the other back door short of NOS (new old stock). And all the car places do not do trim for wagons as they are not the HOT idem to have as a two door.
——————————————————-
November 6th, 2010:
Howdy, howdy NICO. Got some updates for you today.
Today’s updates come in the form of a double post as I was kinda busy the last couple days doing a whole lot of nothing and just couldn’t bring myself to do the work. But, it’s Saturday night, and I have nothing else to do.
So, today, you get the last two e-mails/photo groups that Rockin Rick has sent me in the past week. I apologize for being so lazy, but hey, I am the G.O.B., and I have a reputation to live up to. So, to start it off, here is Ricks e-mail from the first set of pictures, plus a post script at the end…ENJOY!!!
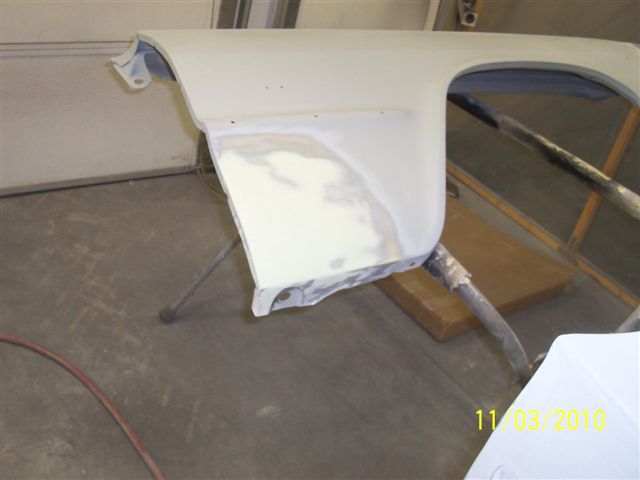
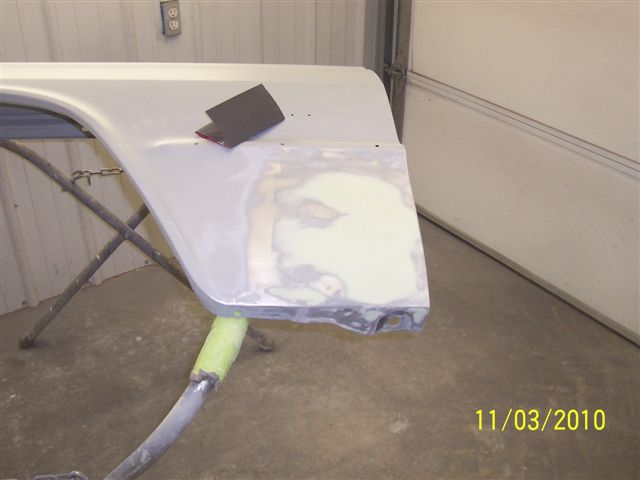
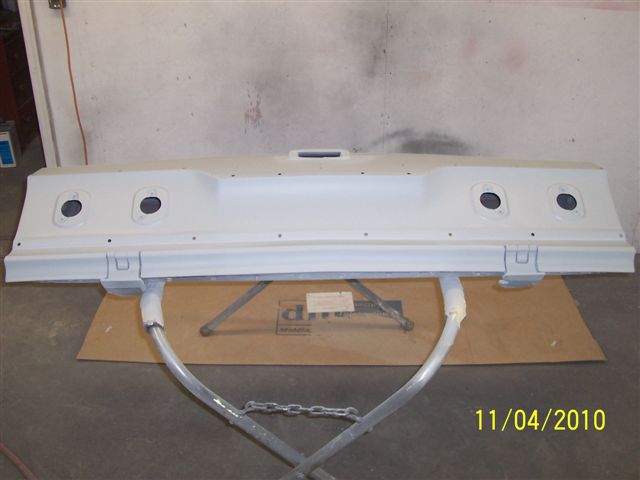
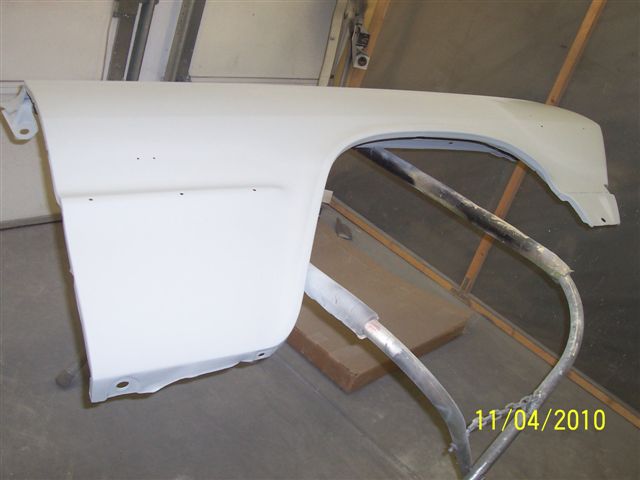
Mark;
Sorry I’m so late getting these pics to you. I just finished ALL body work on the rest of the Impala’s doors and front end. Just need to block down a couple of times, and prep for paint. Got the bed liner material in so I hope to get the underneath done, hopefully, by mid next week depending on what I need to do for additional prep. I’ll keep you posted.
Thanks, my friend!!!!!
Rick
P.S.
I just wanted to say THANKS MARK for all the good publicity you have been giving me.
I really try to do my best on every dream I rebirth for someone, no matter what it may be. I owe this gift to my late father. Dad (Paul) always taught me to take the time to do it right. Then, you have the right to be proud of what you’ve accomplished. Dad taught me everything he knew, from the time I was old enough to crawl in the door, ha ha!!!! So as this build is a tribute to your father, it is to mine also.
To all the good folks following this build, hats off to ya’ll for all of the positive input.
Getting to DO THINGS RIGHT is also very refreshing for me.
SHE WILL BE a very smooth ride!!!!!!
Ole Man in MO.
And, as promised, here is part two.
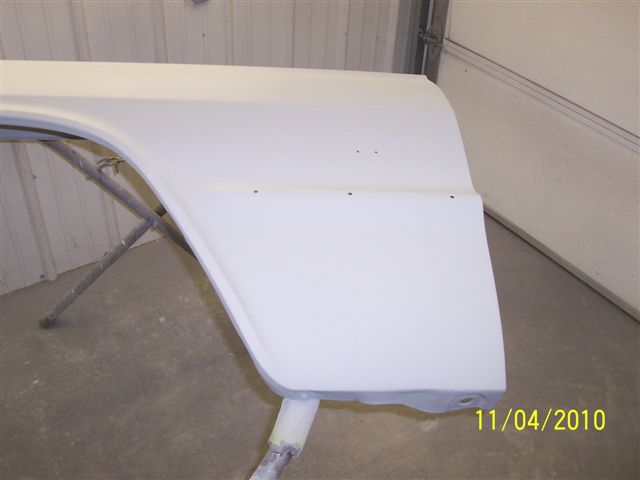
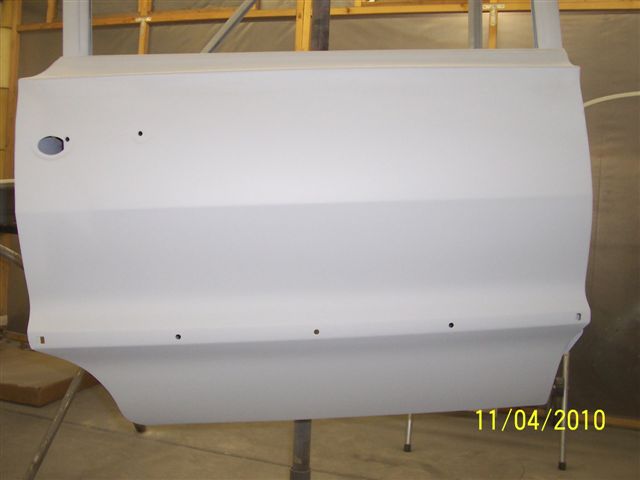
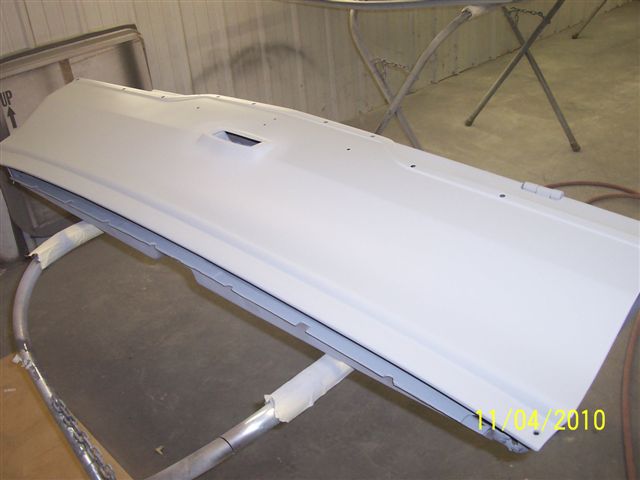
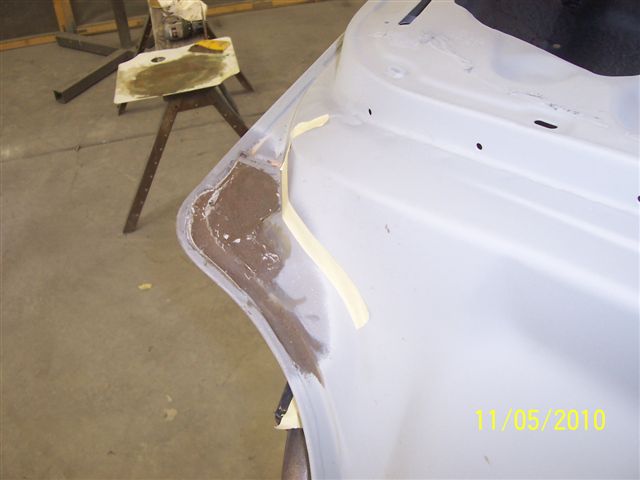
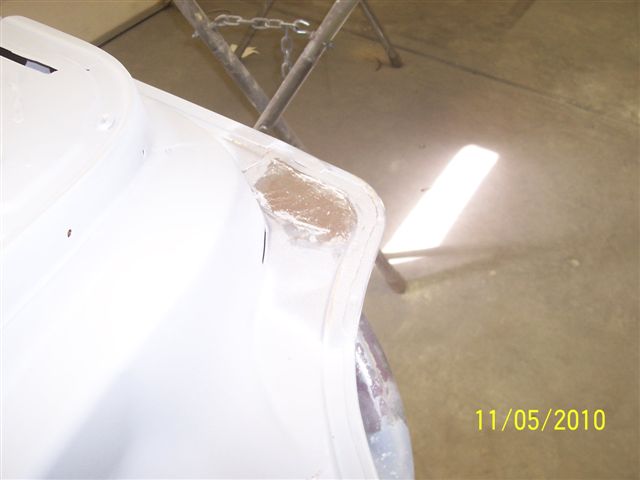
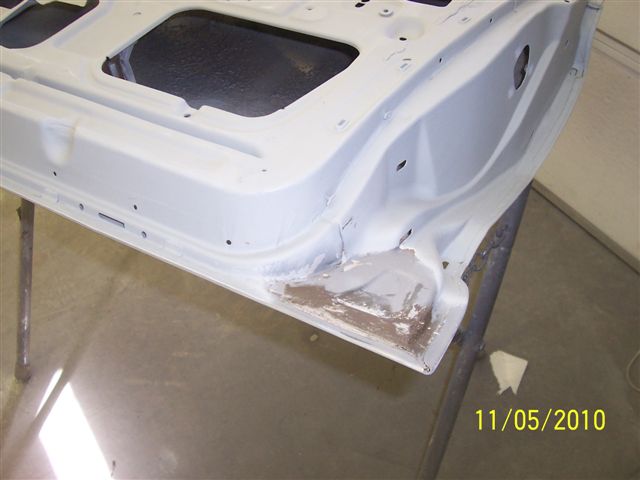
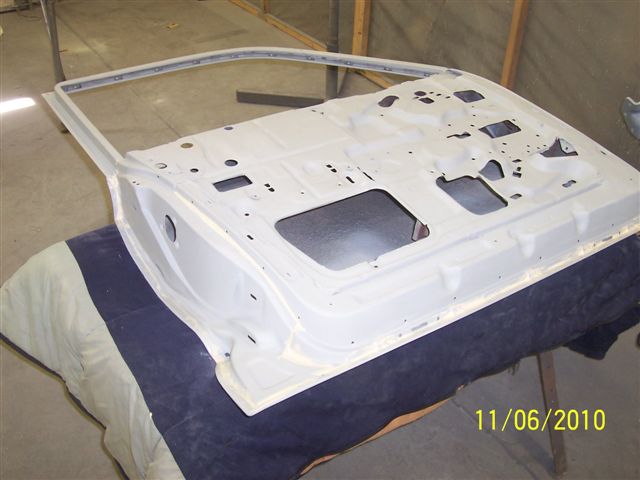
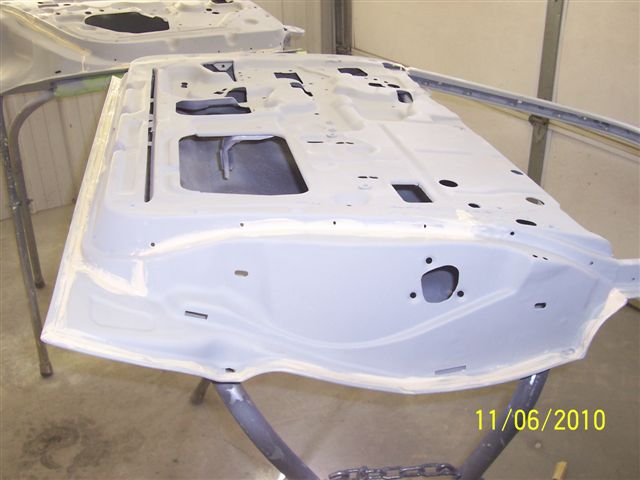
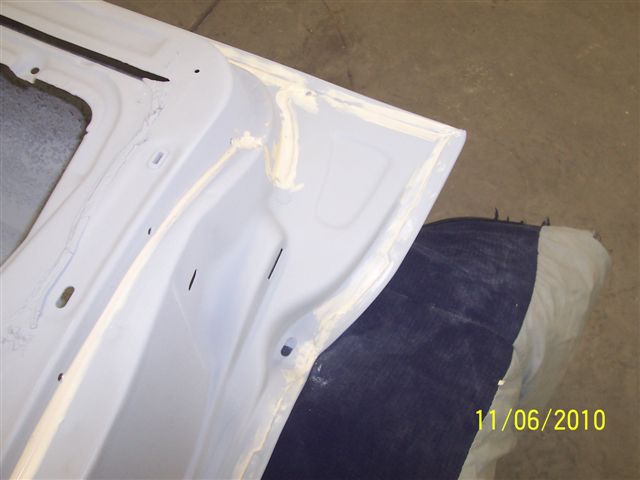
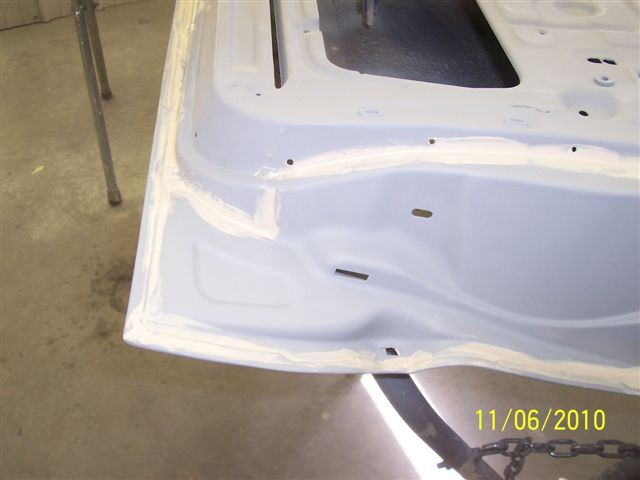
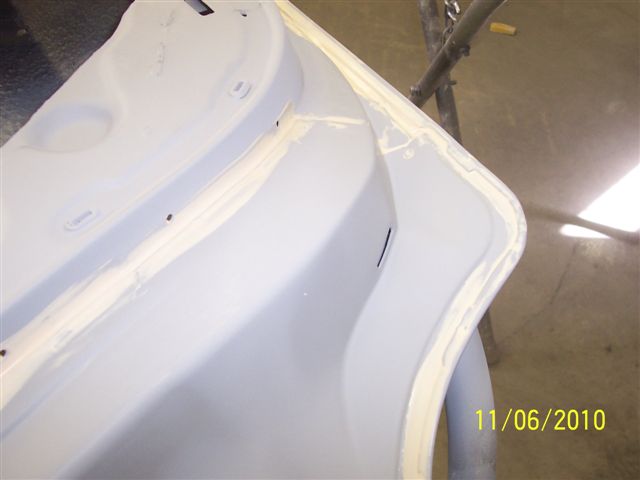
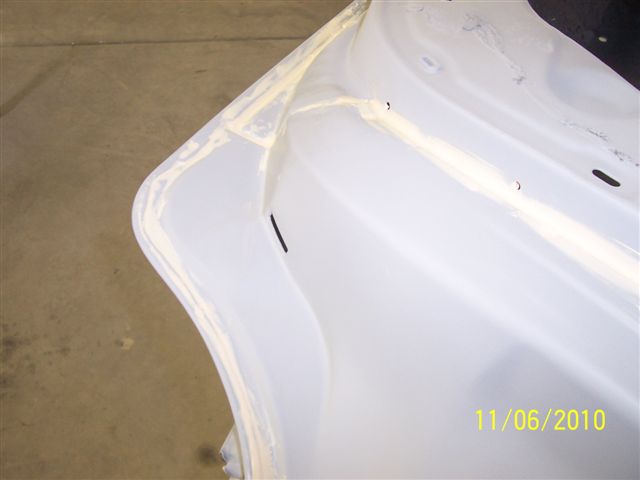
Mark:
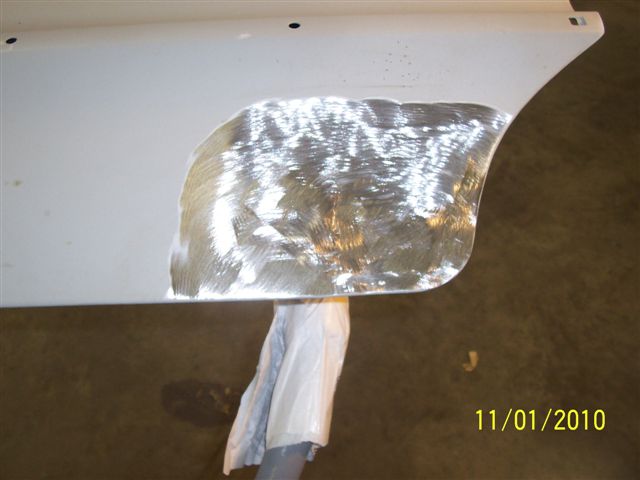
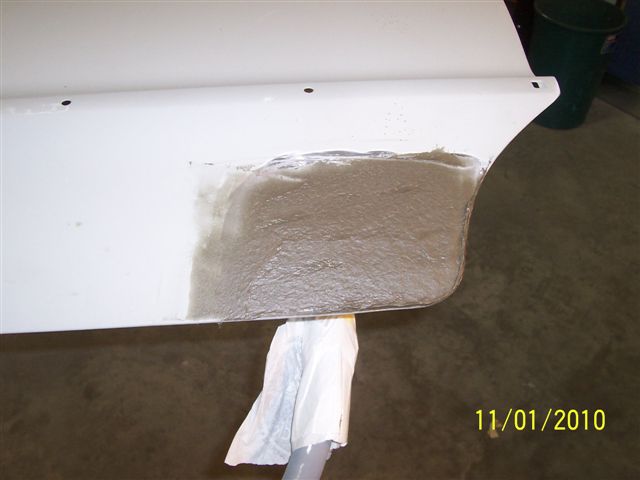
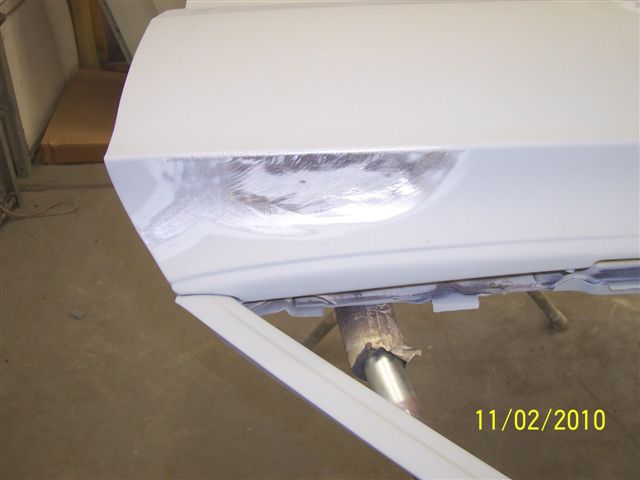
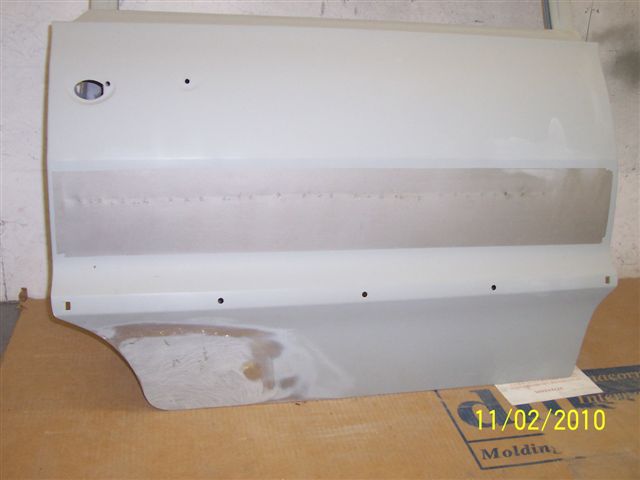
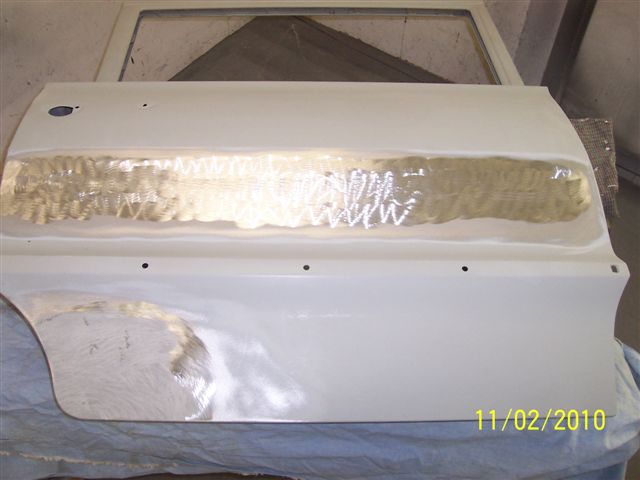
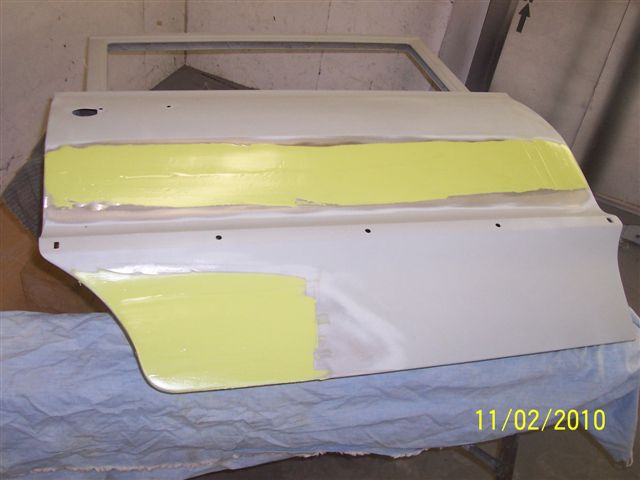
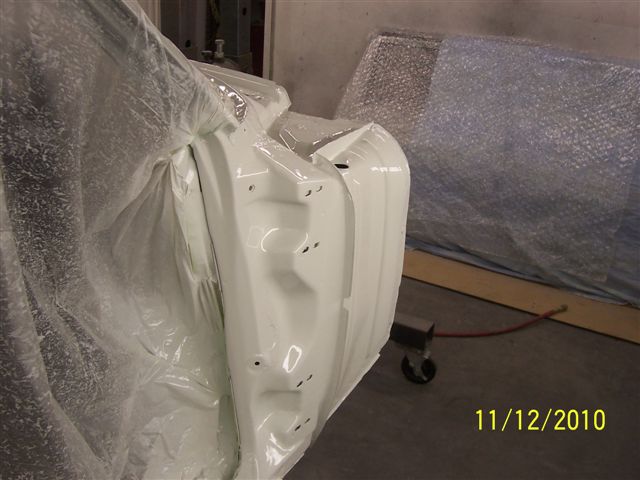
Here are some more pics of the completion of all the bodywork on your Impala.
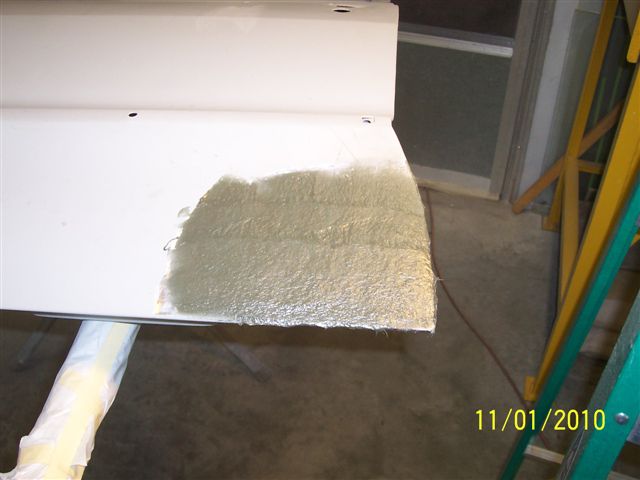
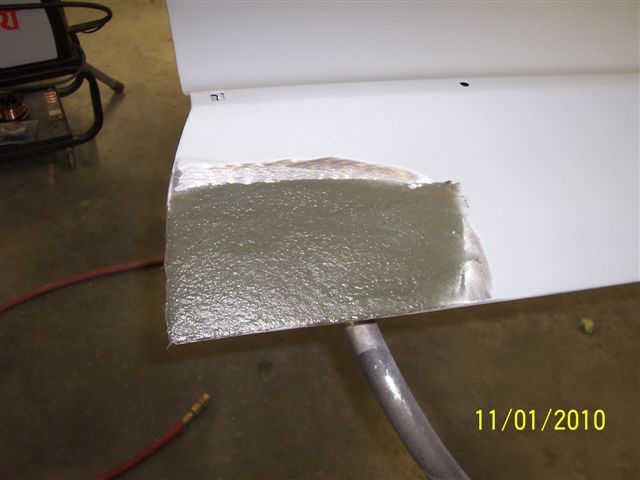
The dark brownish material on the door bottoms is DynaGlass; a short strand chopped fiberglass which is waterproof and strong. I use this before applying regular body filler.
The tan stuff around door edges is new seam sealer. It is smoother to the eye than it looks in pictures.
ALL PARTS are now ready for paint!!!!! I will paint firewall Mon- Tuesday of this coming week and bedliner the underneath following that.
Hope you have a great weekend….
Talk to you soon,
Ole Man in MO.
——————————————————-
November 14th, 2010:
I have an update for you all today.
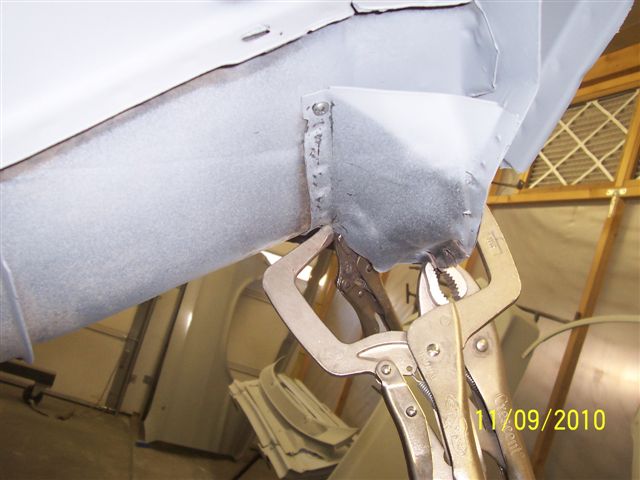
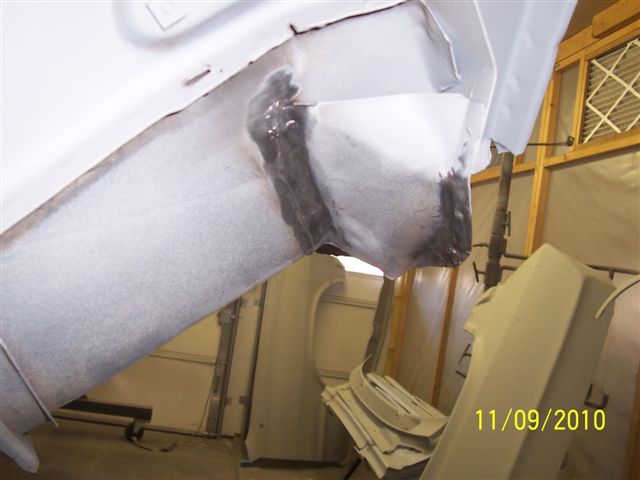
Mark:
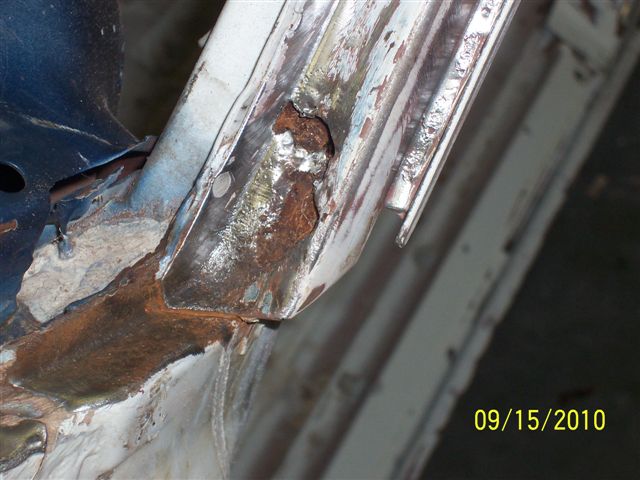
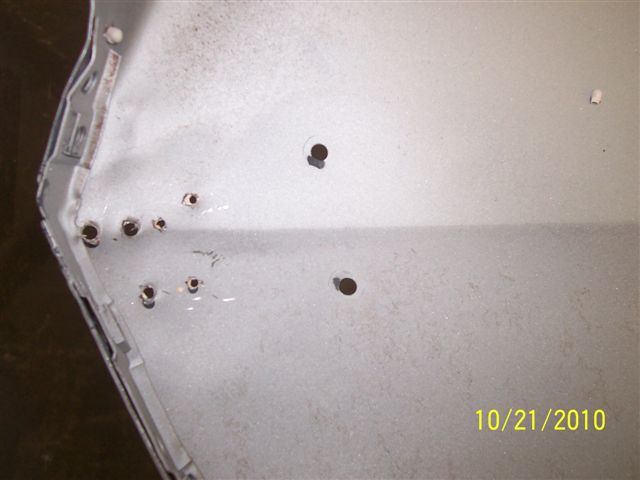
Here are some more progress pics for you. The first ones are a brace on drivers side. That was torn loose from the body on one side. I repositioned it and rewelded it in place.
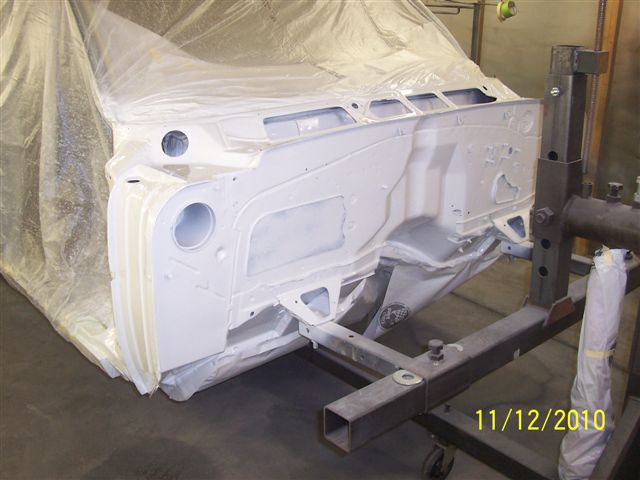
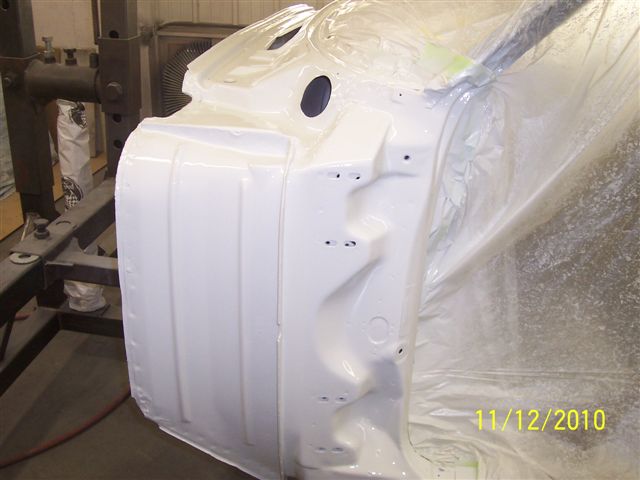
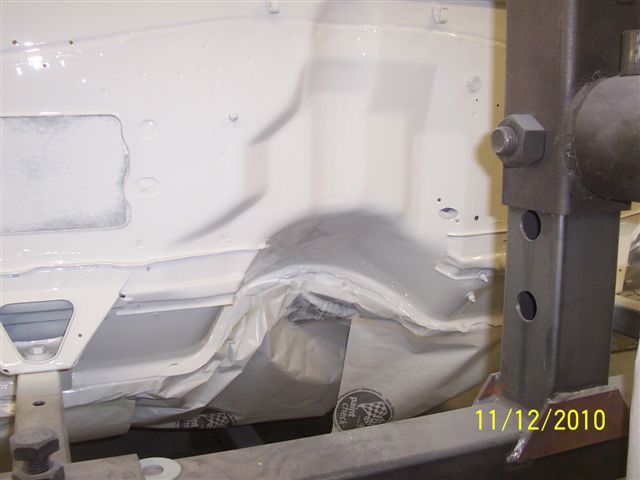
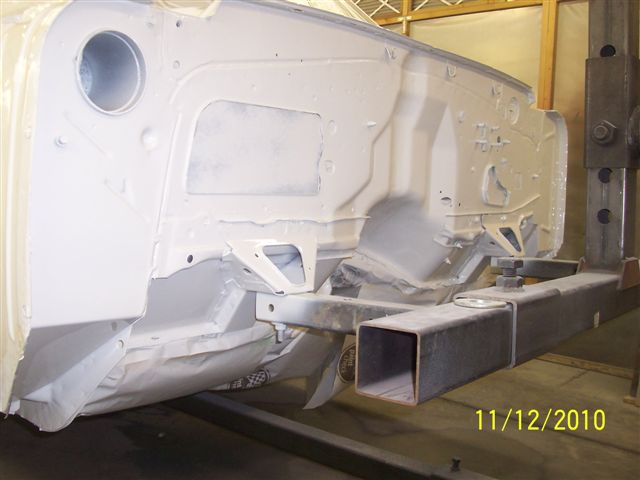
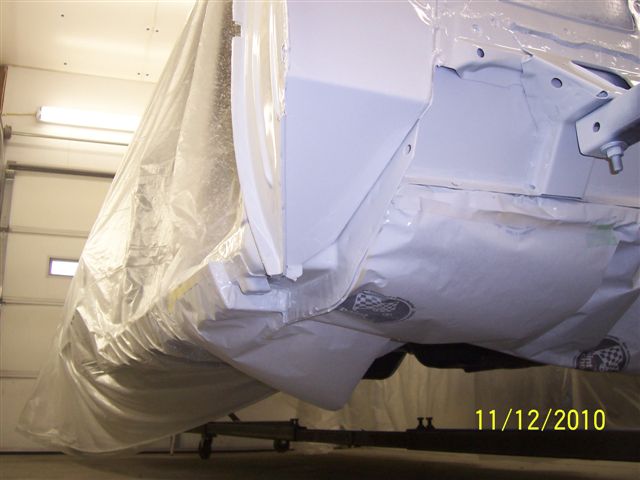
Picture 4and 5 are where I drilled out the spot welds inside the floor pan, and re-welded from the inside. The rest of the pics are your freshly painted firewall and cowl section.
I have not done underside of body as I didn’t get the spray gun for bed liner until yesterday. I had to go over the underbody and fine tune (clean better), degrease and sand the complete underbody with 80 grit sandpaper to insure good adhesion of the bedliner material. I will spray it Monday. I’ll keep you posted.
Some of the firewall pics look a little funny due to reflection from camera flash. Paint came out excellent. Great gloss. NO RUNS!! Had shop temp at 85 degrees when I sprayed. I really liked the way the PPG paint applied.
Thanks,
Rick
——————————————————-
November 18th, 2010:
Hey, everyone. Got some new pictures of the S.S. Going Broke, so I figured you all would want to see them.
Anyway, here’s the usual e-mail from Rick.
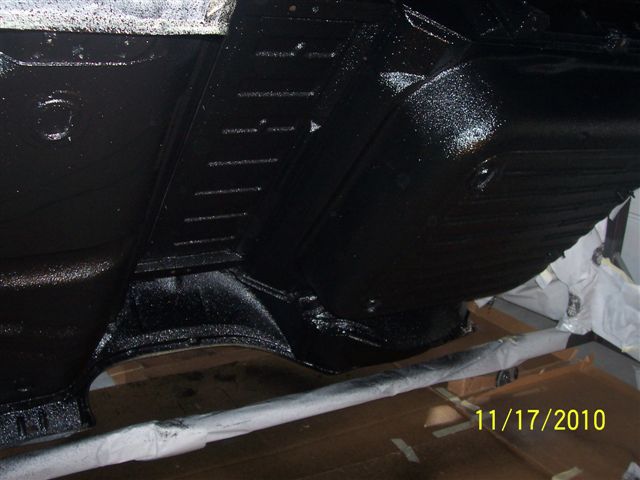
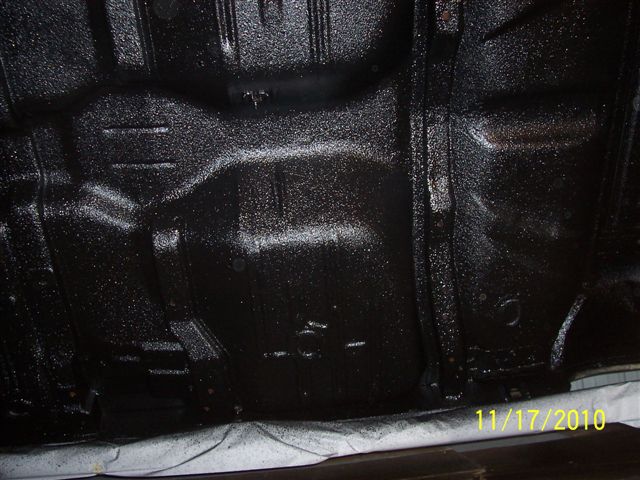
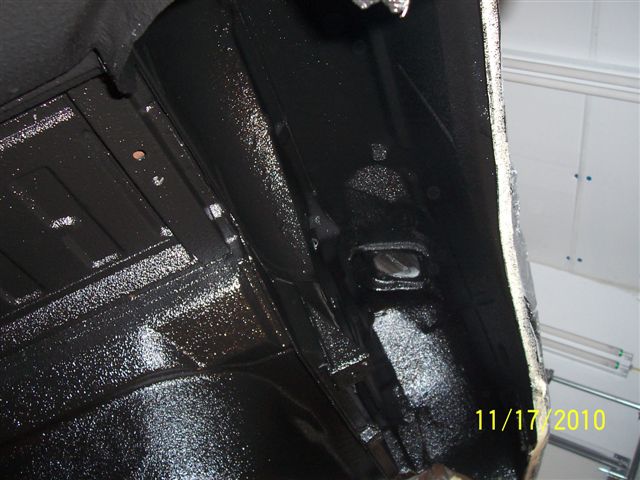
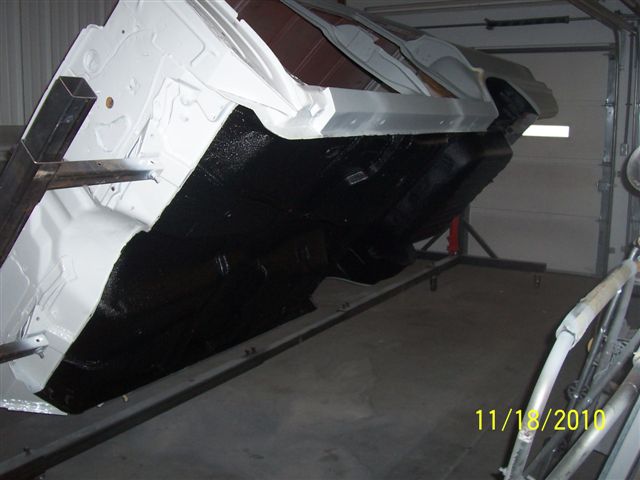
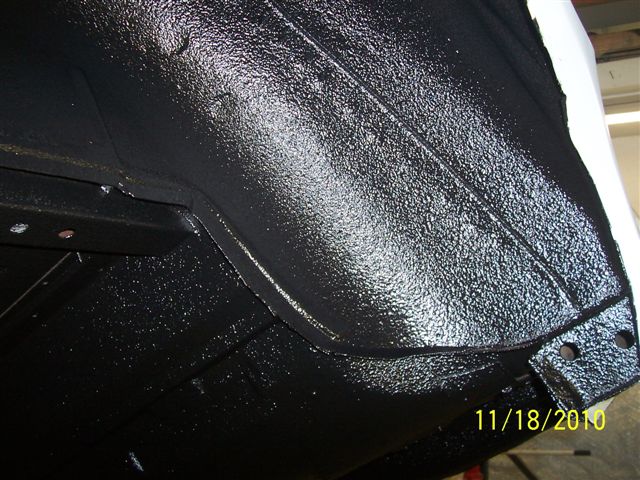
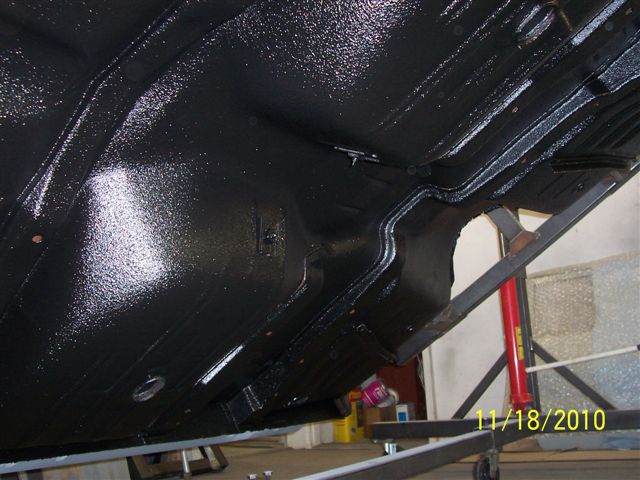
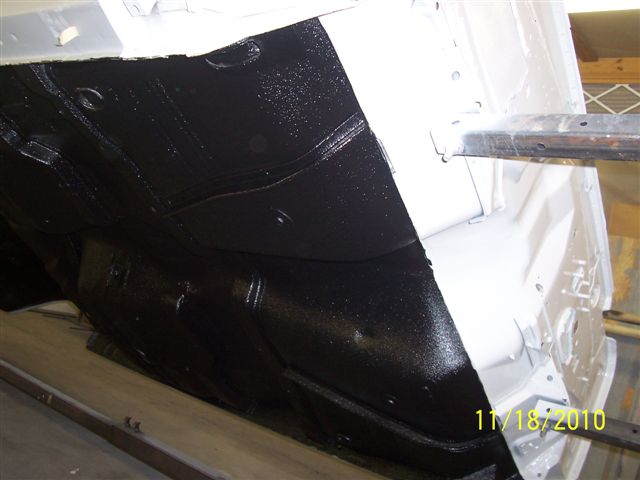
Mark,
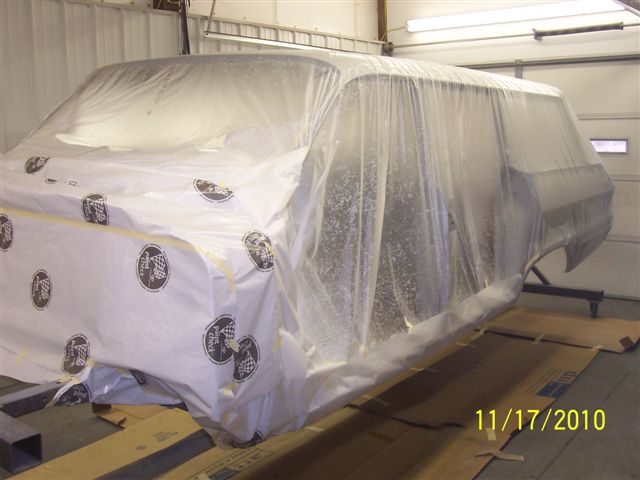
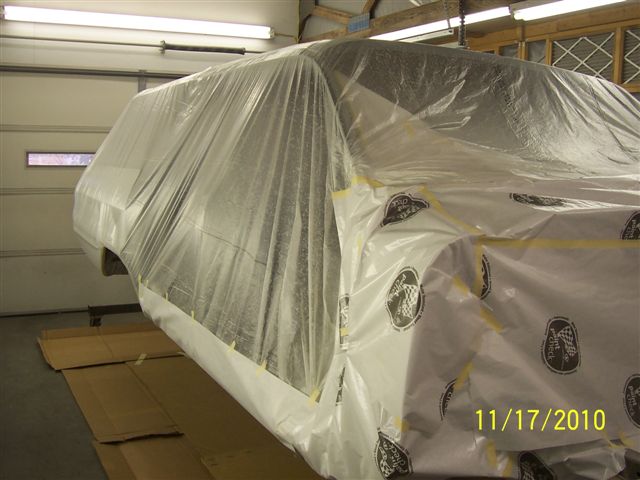
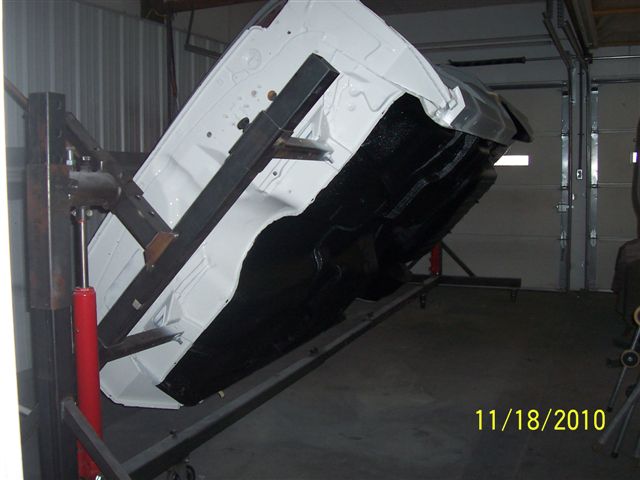
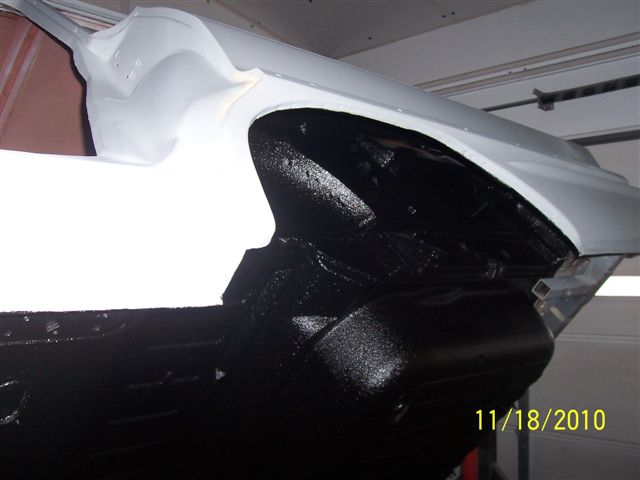
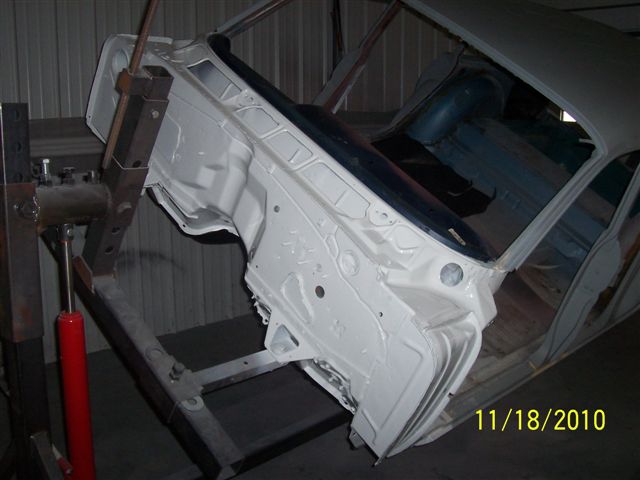
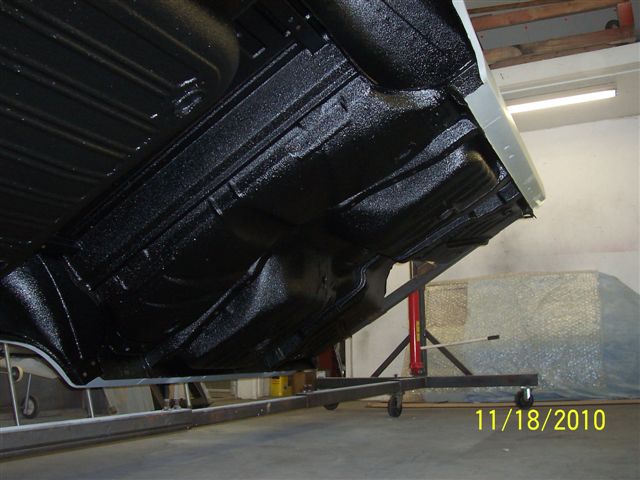
Got some more pics for you to look at.
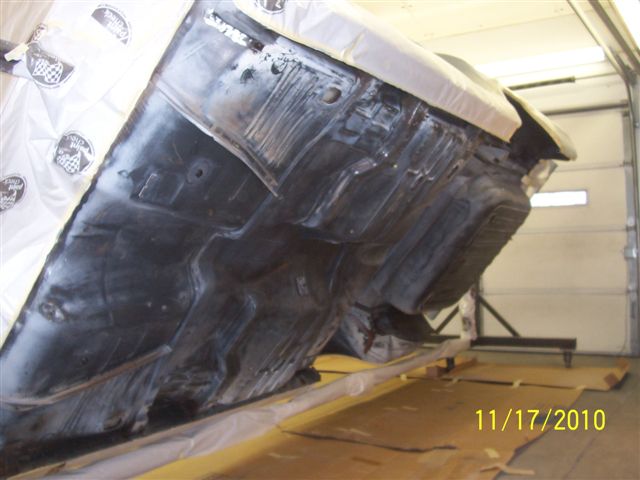
Bed liner came out nice. I sprayed it with just a little heavier texture than a truck bed to aid in sound deadening. I think that this was the messiest part of the whole job! If you brushed up against this stuff, I think you would become part of what you sprayed. Ha Ha!!!
You have approx 20 min. to apply after catalyzing the mixture or it will set up and ruin your spray gun. You have to clean (flush well) after applying each quart of mixture. Try doing this 7 times before completing the process. The clean up after the last application has to be done quickly and very thoroughly or else your spray gun is lost. The guys who do this for a living earn their money!!! Thank god for Tyvek throw away paint suits!!
That’s all I got for now. Hope you have a great day!
Ole man in MO
P.S. The pics of Gold Diggers ride are Awesome!!! Love the color.
Really enjoyed the backdrop scenery (Mt Fuji) in his pictures. Looks like his buddies have some pretty nice rides also.
Thanks to all following this thread,
Rick

——————————————————-
December 4th, 2010:
Ladies and Gentlemen of NICO,
At this time I would like to let you all know that the Cruise Ship “S.S. Going Broke” is. At this time we are going to have to let the grand old lady sit in dry dock for a little while, as the board of directors (me) saves some more coin of the realm to pay for my follies. I over spent on the garage and house projects, then the rains came and I found I needed a roof on the back of the house. And of course the flood in the back yard twice and the new drain pipe did not help at all. So a little time to build the funds back up as I can, and then I will put Rick back in the saddle again. Please rest assured that Rick will stay busy as his talents are in demand by many people. If you are close to the Macon, MO area and would like to meet Rick or have him do some work for you, let me know and I will put you in touch with him. And NO he is not the reason I am out of coin, as I said things at home came up and LIFE just happens to all of us. So just grab you attitude and put your shoes on and get going, because life is not going to wait on us!
I hope each and every one of you fine “NICOites” the best holidays you can have with family and friends and “May God Bless” as Mr. Red Skelton was so fond of saying.
All my best to you,
Mark “G.O.B.” Hartman
——————————————————-
January 8th, 2011:
Now that the holidays are over, and Rick has been able to take care of a few other projects, it’s time to get back to business.
As promised the S.S. Going Broke has come out of dry dock and Rockin Rick has picked up where he left off on the old girl. And, as usual, Rick has included a little e-mail to let me know how things are going. He’s left you all a message as well.
Mark,
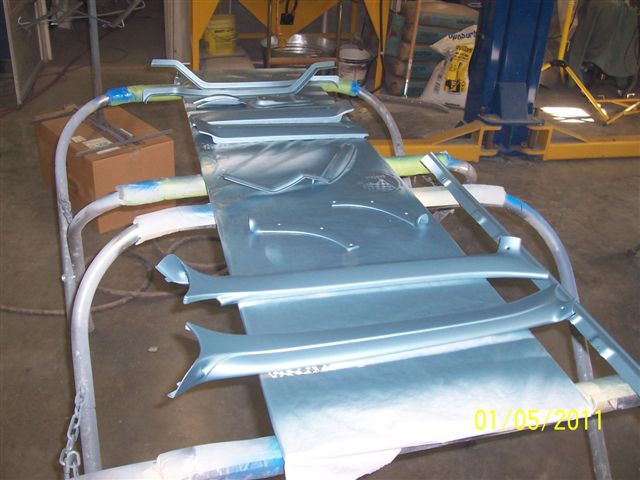
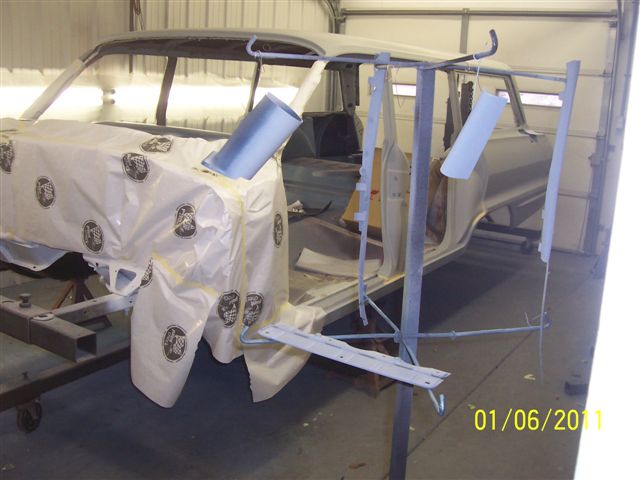
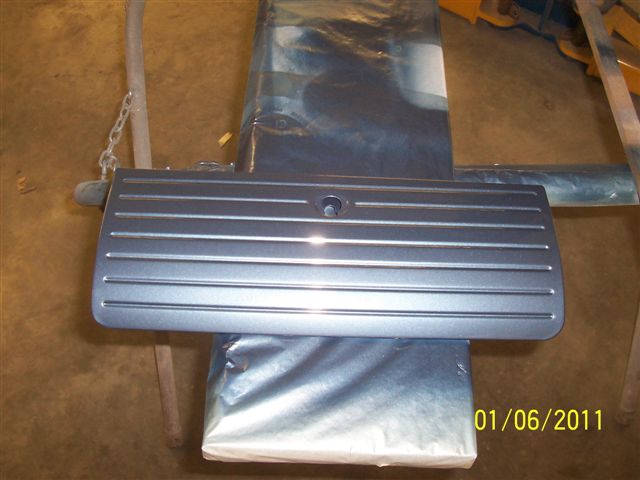
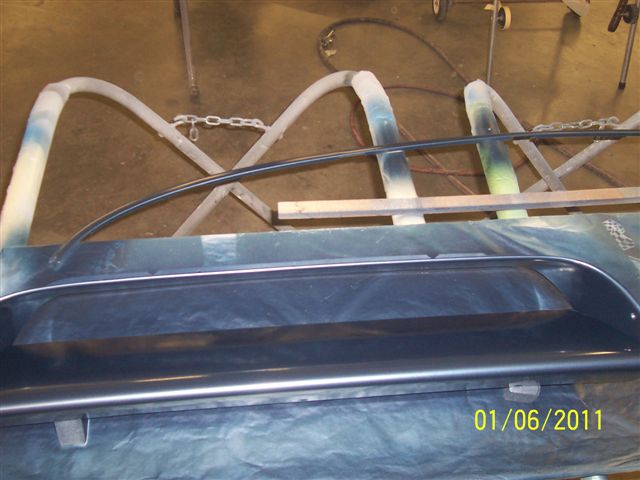
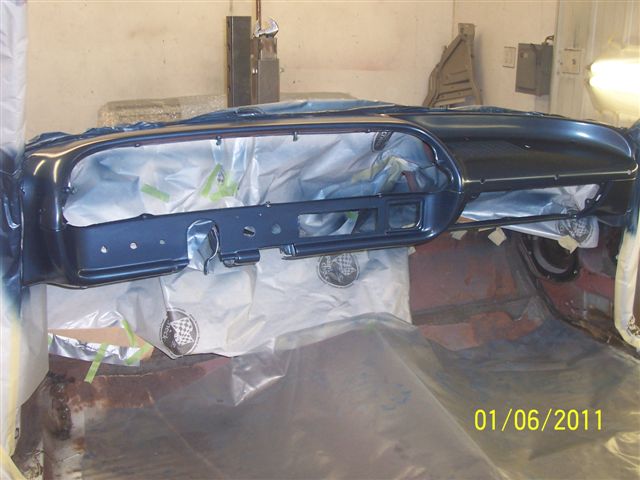
Here are some progress pics for you.
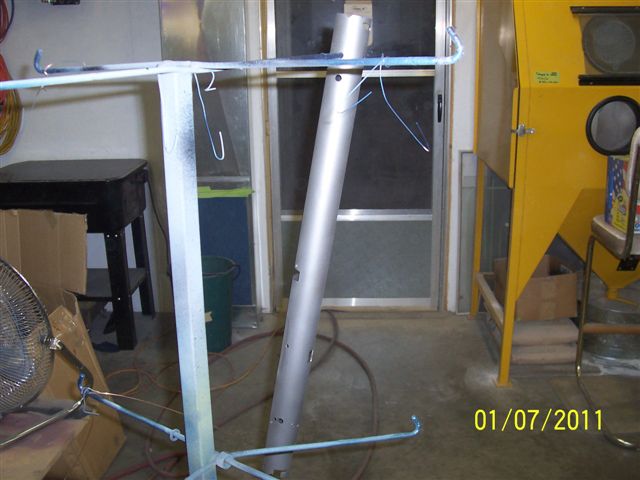
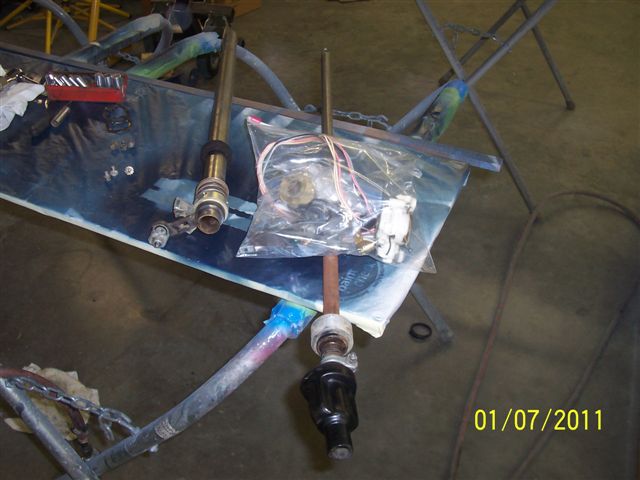
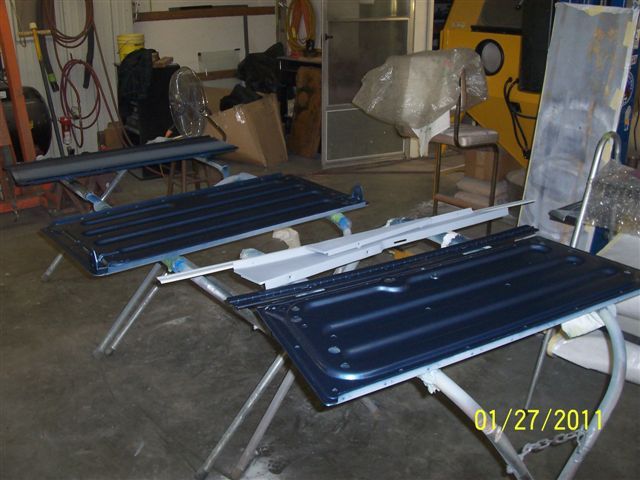
As you can see, the interior pieces both light blue and dark blue are now done. All I have left to paint are the steering column and seat brackets, which I will do today. They are black.
Hope the cruise control that goes in the steering column comes in soon since I had to completely disassemble it to paint. I also have the steering wheel to refinish and will do that soon, too!
To everyone on NICO who is following the thread: I hope you had a great holiday!!!
Rick


——————————————————-
January 10th, 2011:
Look out!! More updates for ya.
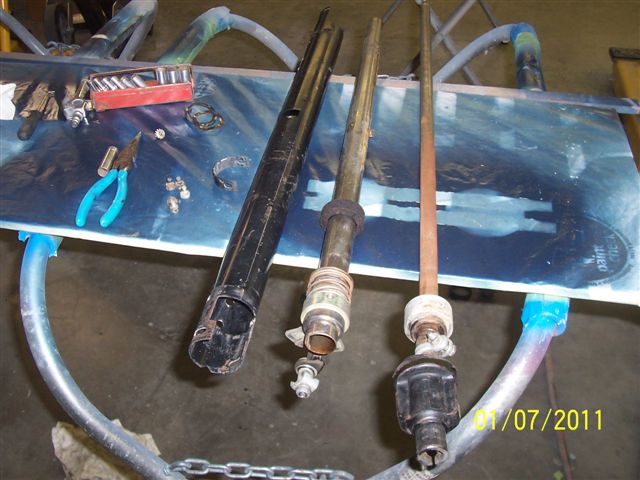
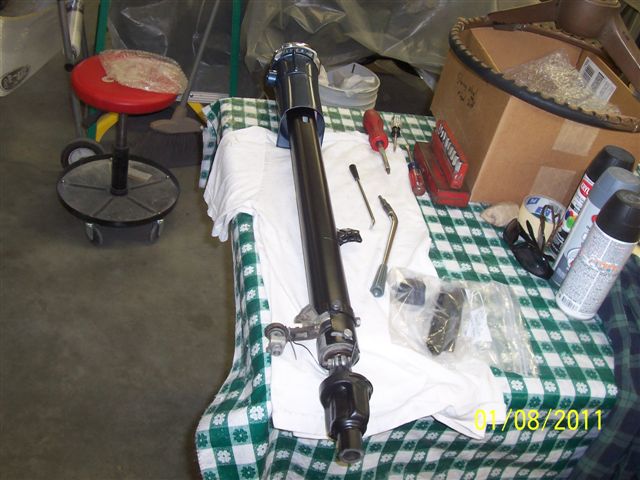
Mark,
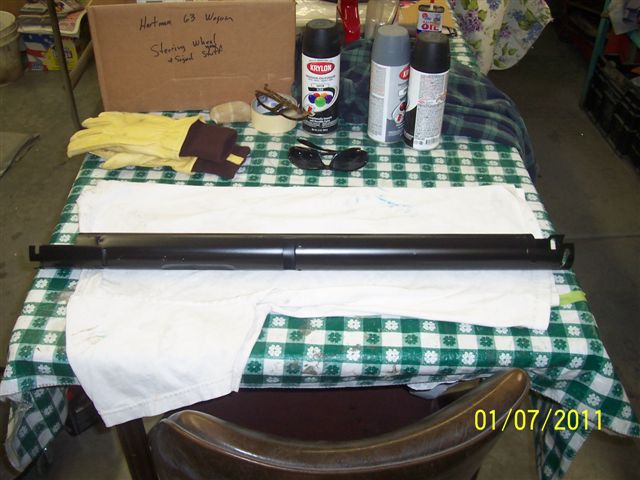
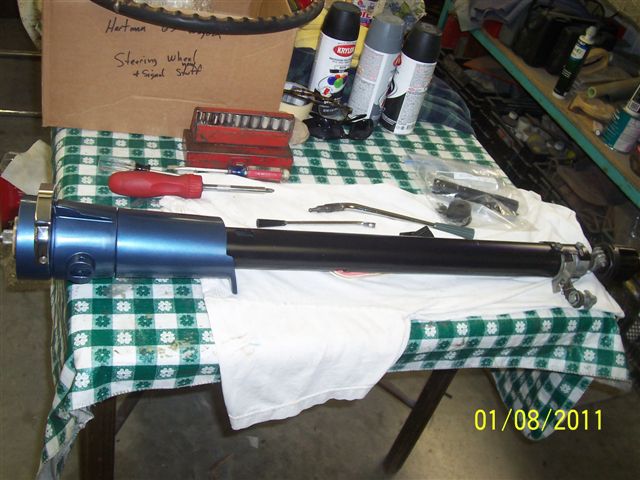
Here are the pics of your finished steering column. I was really happy with the results, hope you are too.
I think going with the new steering wheel is a good idea. Looking at repair factor and paint work, you can save money here and have new material…important since it will be exposed to the sun frequently.
Hope you have a great day,
Rockin Rick
Here is a picture of the rear seat brackets:

——————————————————-
February 7th, 2011:
Hey, gang.
Sorry it’s been so long since the last update, but I had to deal with something unexpected in my family, which I won’t discuss, having to work extra due to all the snow and just being my usual grouchy old tired self.
Anyway, Rick was busy a couple weeks ago and sent me a couple updates with a few pictures.
As usual, you’ll get the e-mail from Rick and pictures to go along with the messages. ENJOY!!!
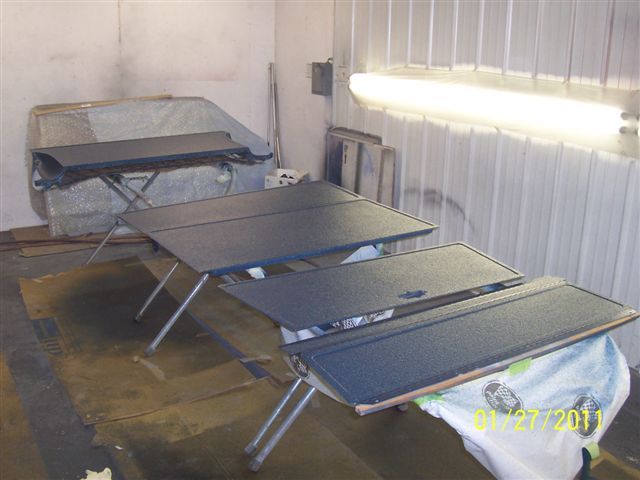
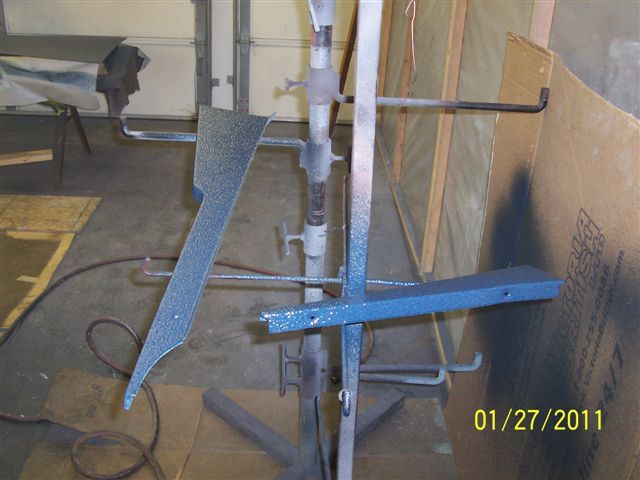
Mark;
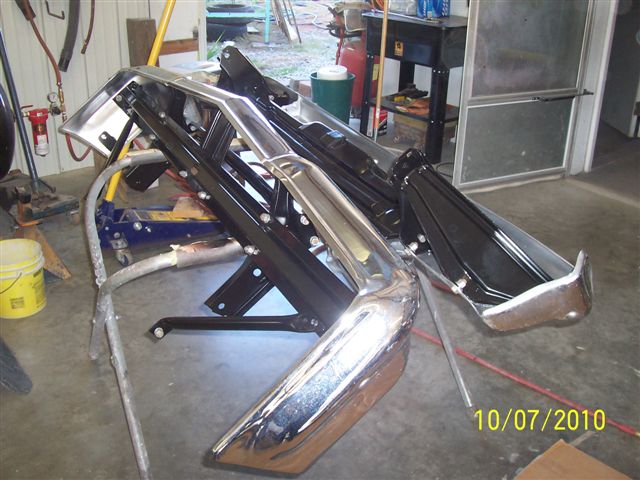
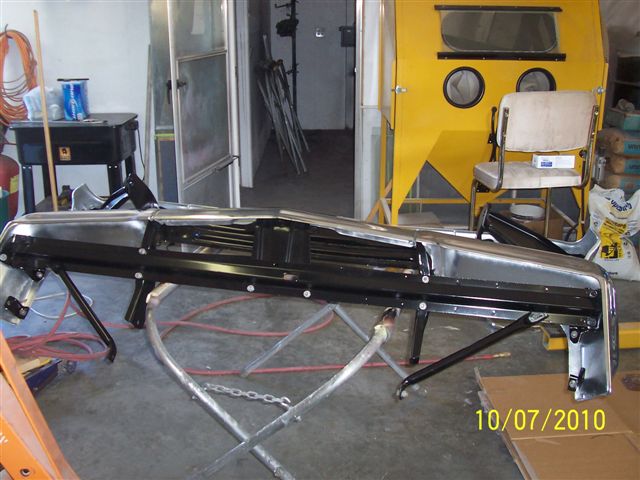
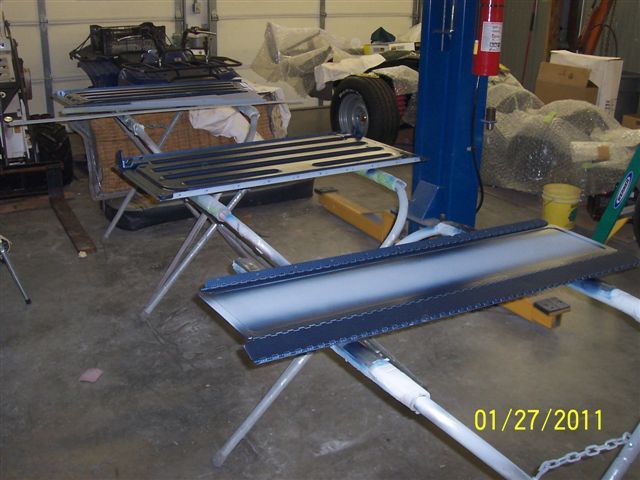
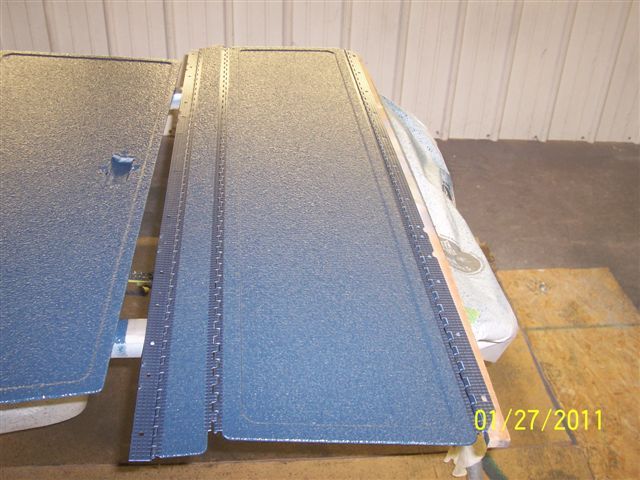
I will have to bed liner the 2 pieces. The picture explains it all. I will do the pieces when I spray the bed liner in back floor area.
Rockin Rick
NOTE: Rick is talking about the small angle pieces at the back of the car by the tailgate on the floor on each side.
And this mail came a short while later.
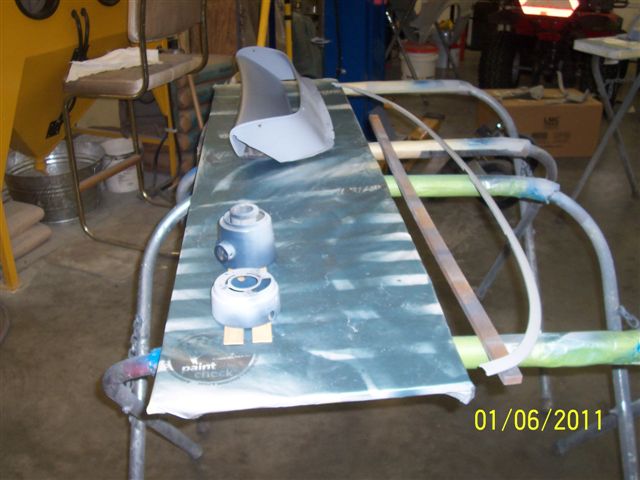
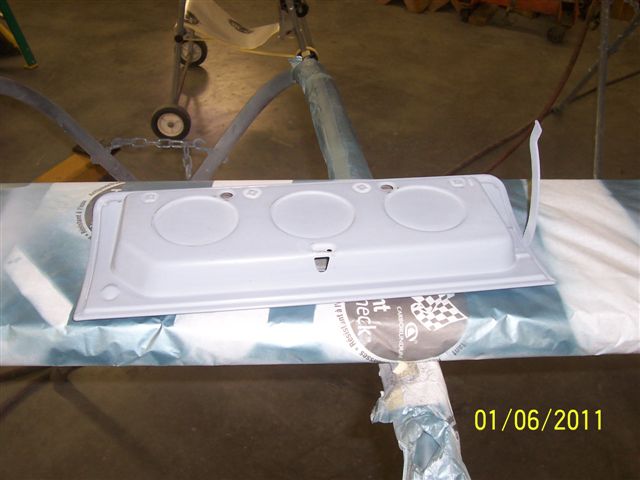
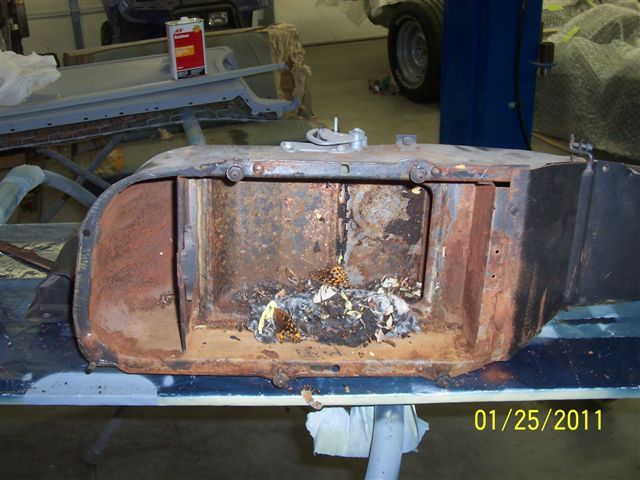
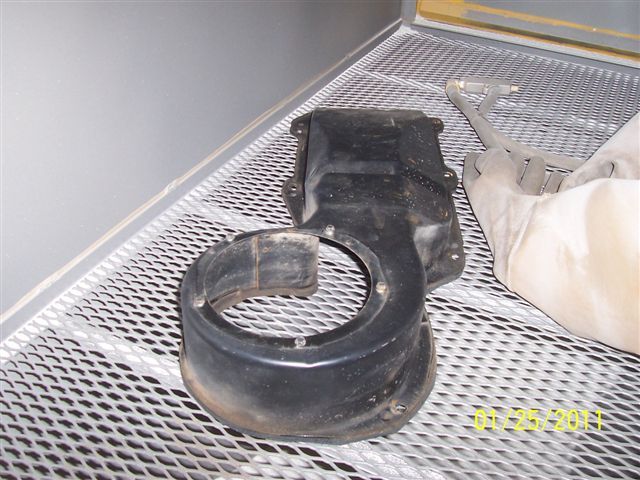
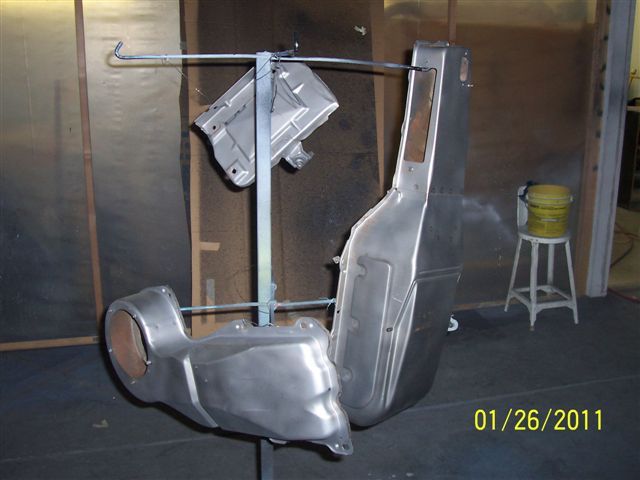
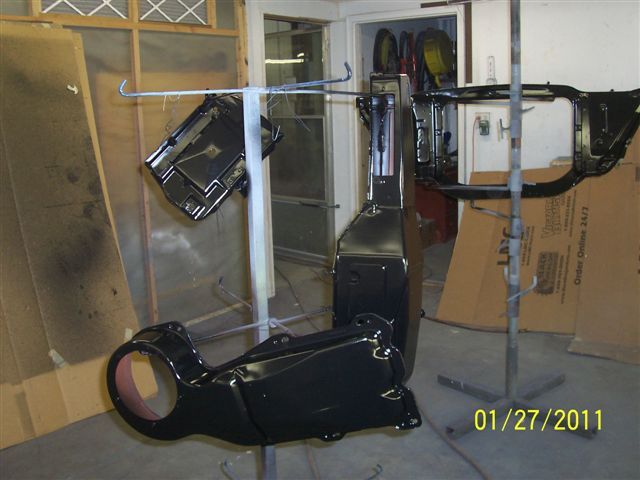
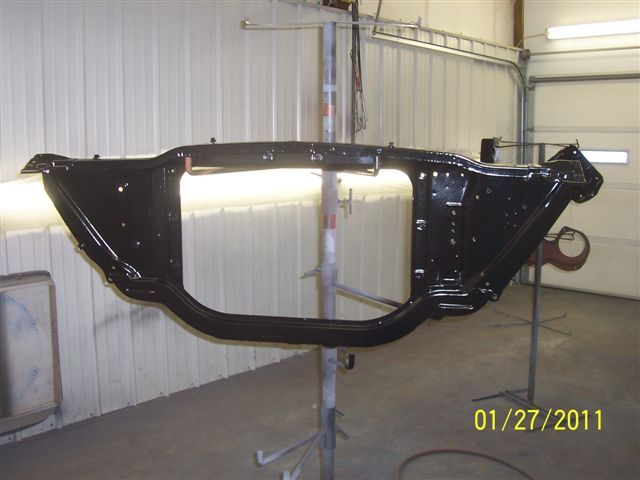
Mark:
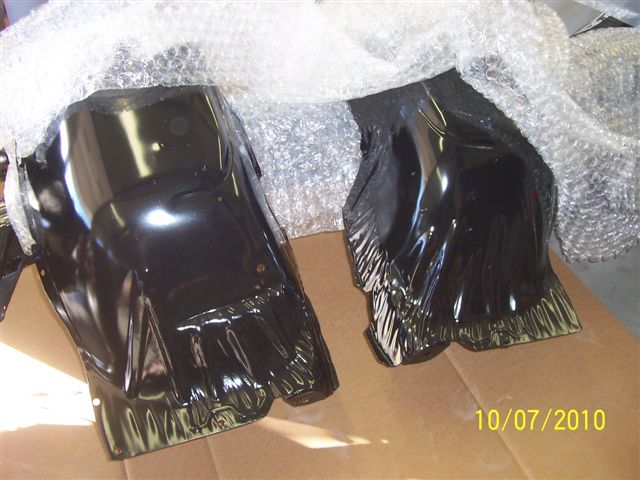
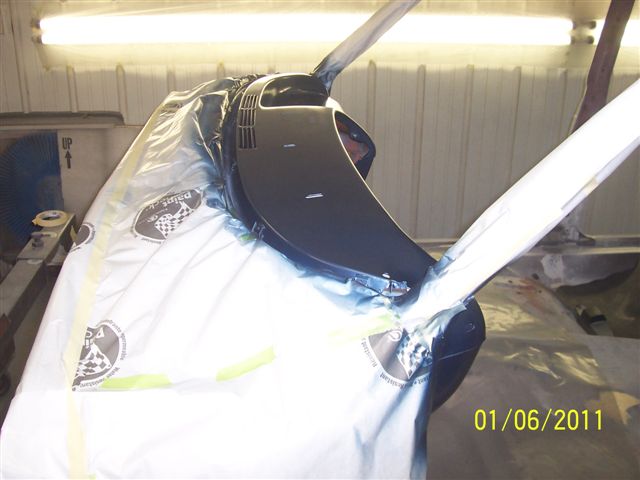
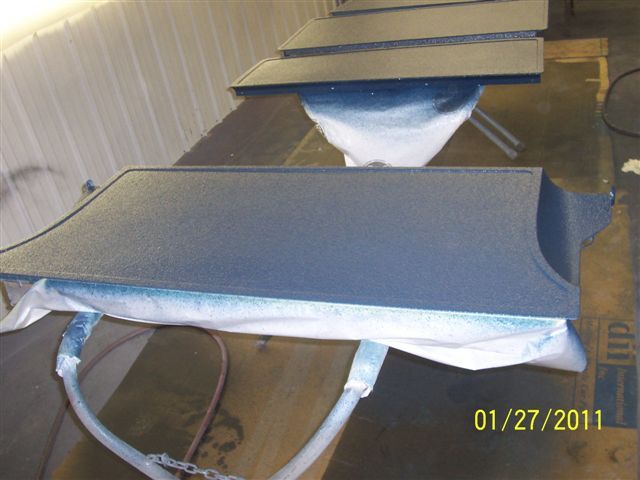
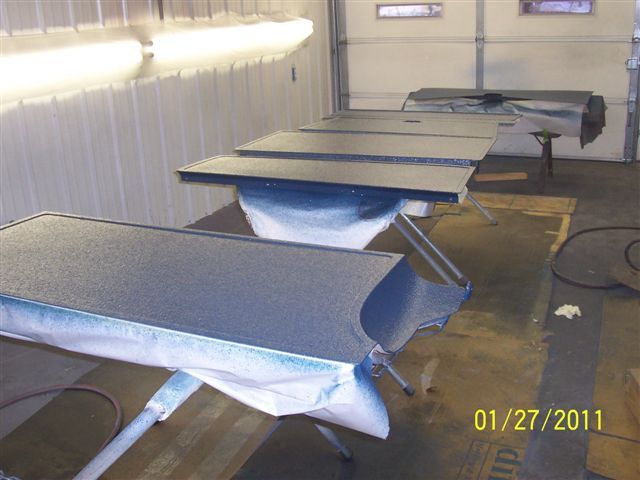
Here are some more update pics of the rear floor area and heater box components.
I’m keeping this short as it is getting late and I’m tired…
The floor actually looks better in person than in the pics. Must be something about the flash that seems to magnify the texture of the finish. I was really happy with the finish and color match. Interior should look great with the light blue, dark blue contrast.
Ole Man in MO
——————————————————-
I have a question about the steering on your wagon, are you using the stock LT-1 pump? Also, what steering box are you using? Car is coming along great by the way.